
用户
多因素认证
介绍
Filament 用户默认可以使用邮箱和密码登录。不过,你可以启用多因素认证(MFA),为用户提供额外的安全保障。
启用MFA后,用户在通过身份验证并访问应用之前必须执行额外的验证。
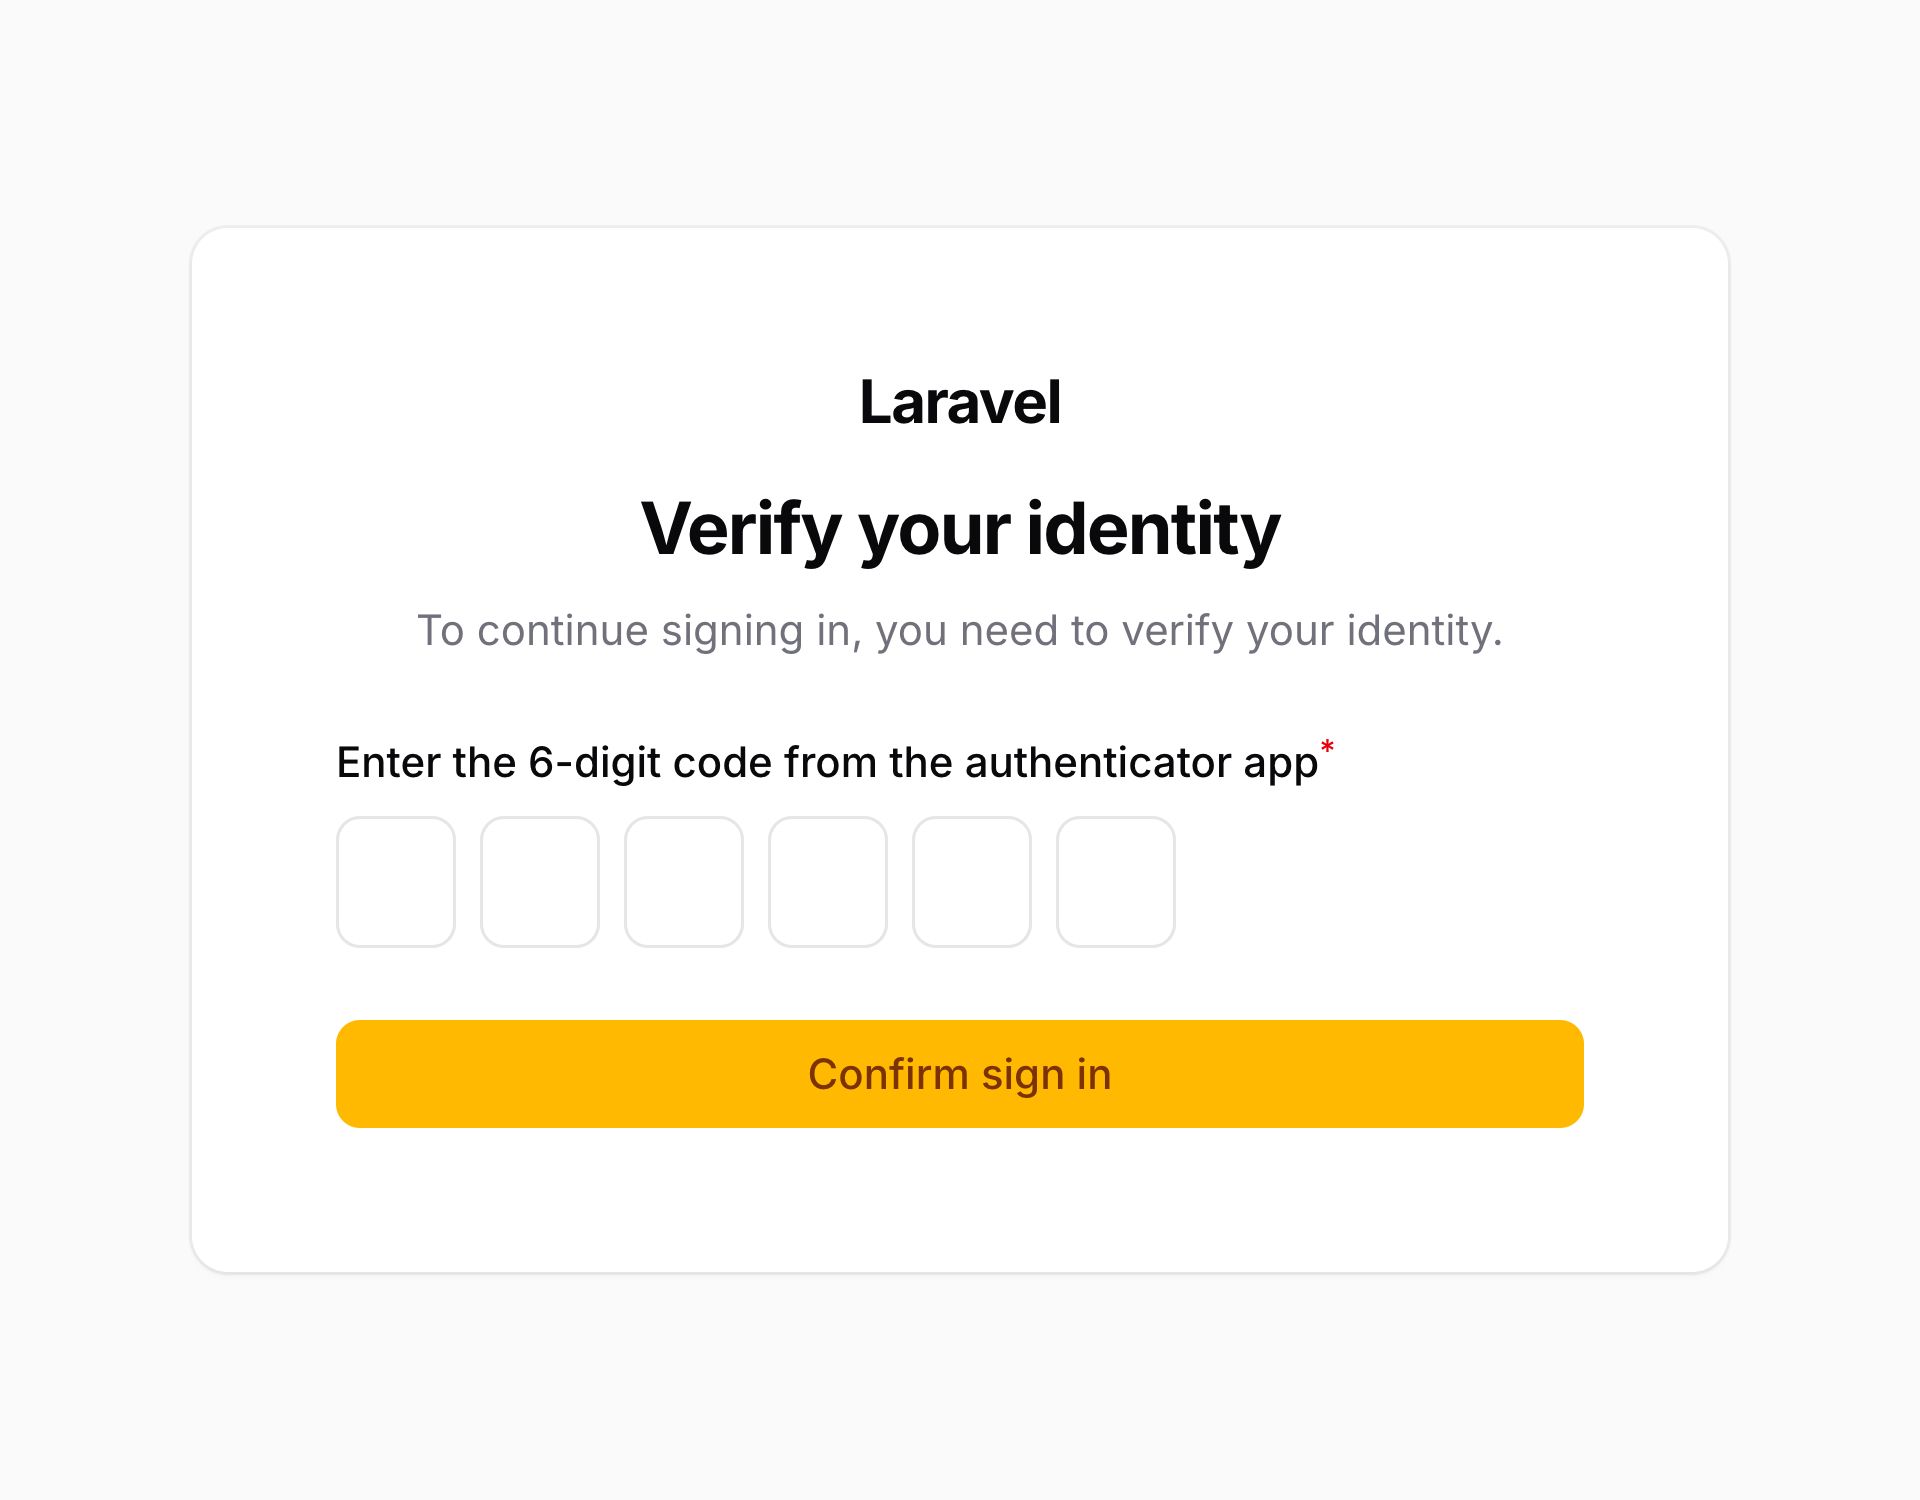
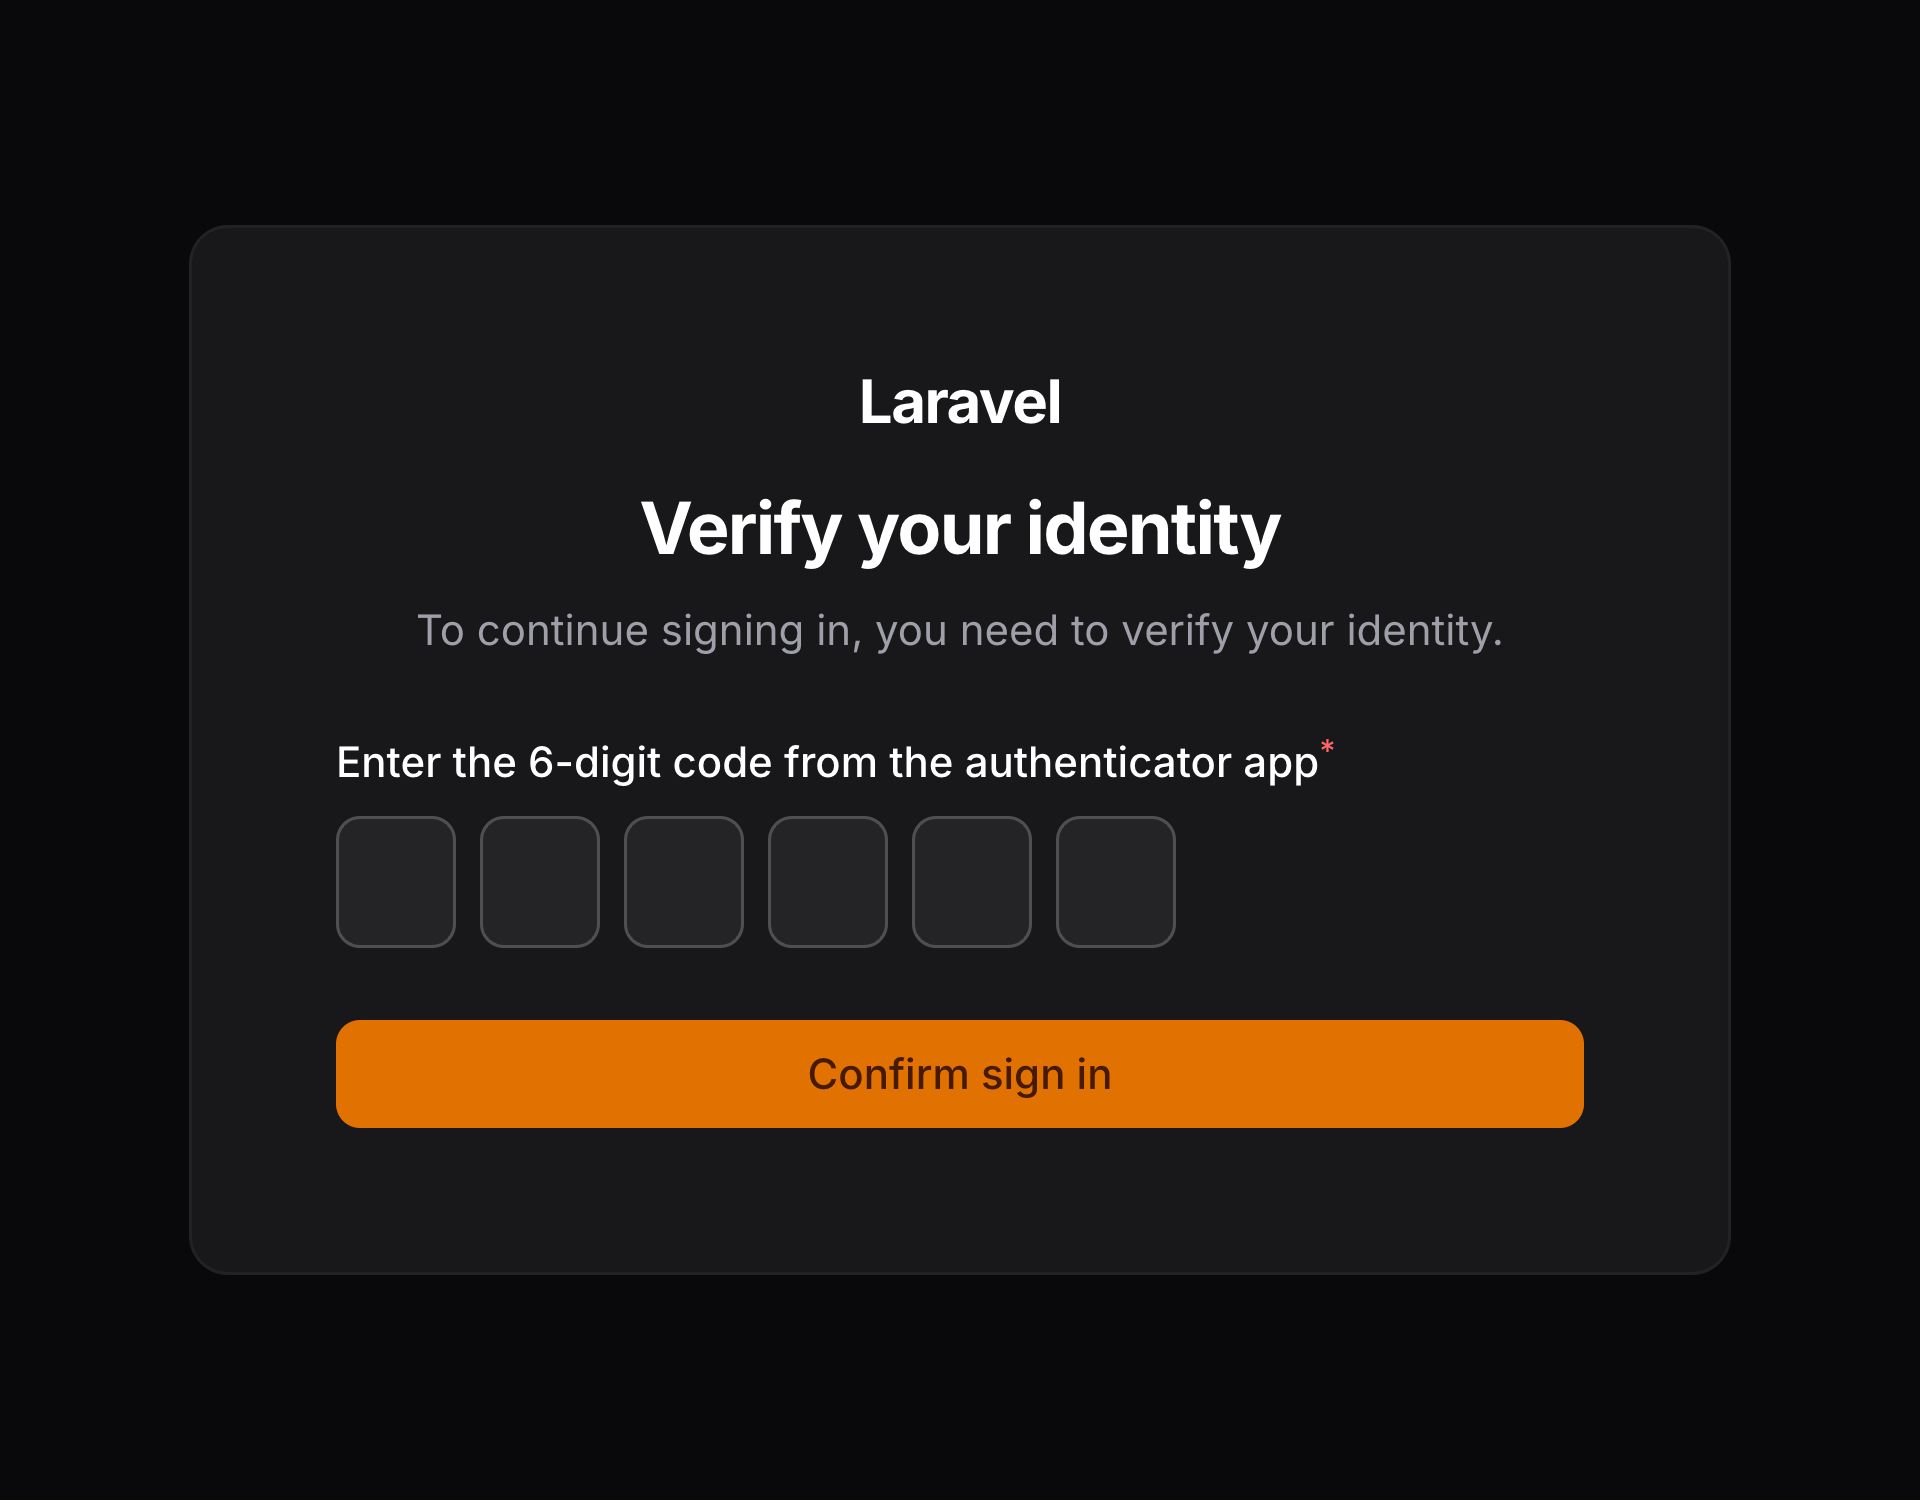
Filament 包括两种可以开箱即用的 MFA 方法:
- 应用身份认证使用与 Google 身份验证器兼容的应用(如 Google 身份验证器、Authy 或 Microsoft 身份验证器应用)生成用于验证用户的基于时间的一次性密码(TOTP)。
- 电子邮件身份认证向用户的电子邮件地址发送一个一次性代码,用户必须输入该代码以验证其身份。
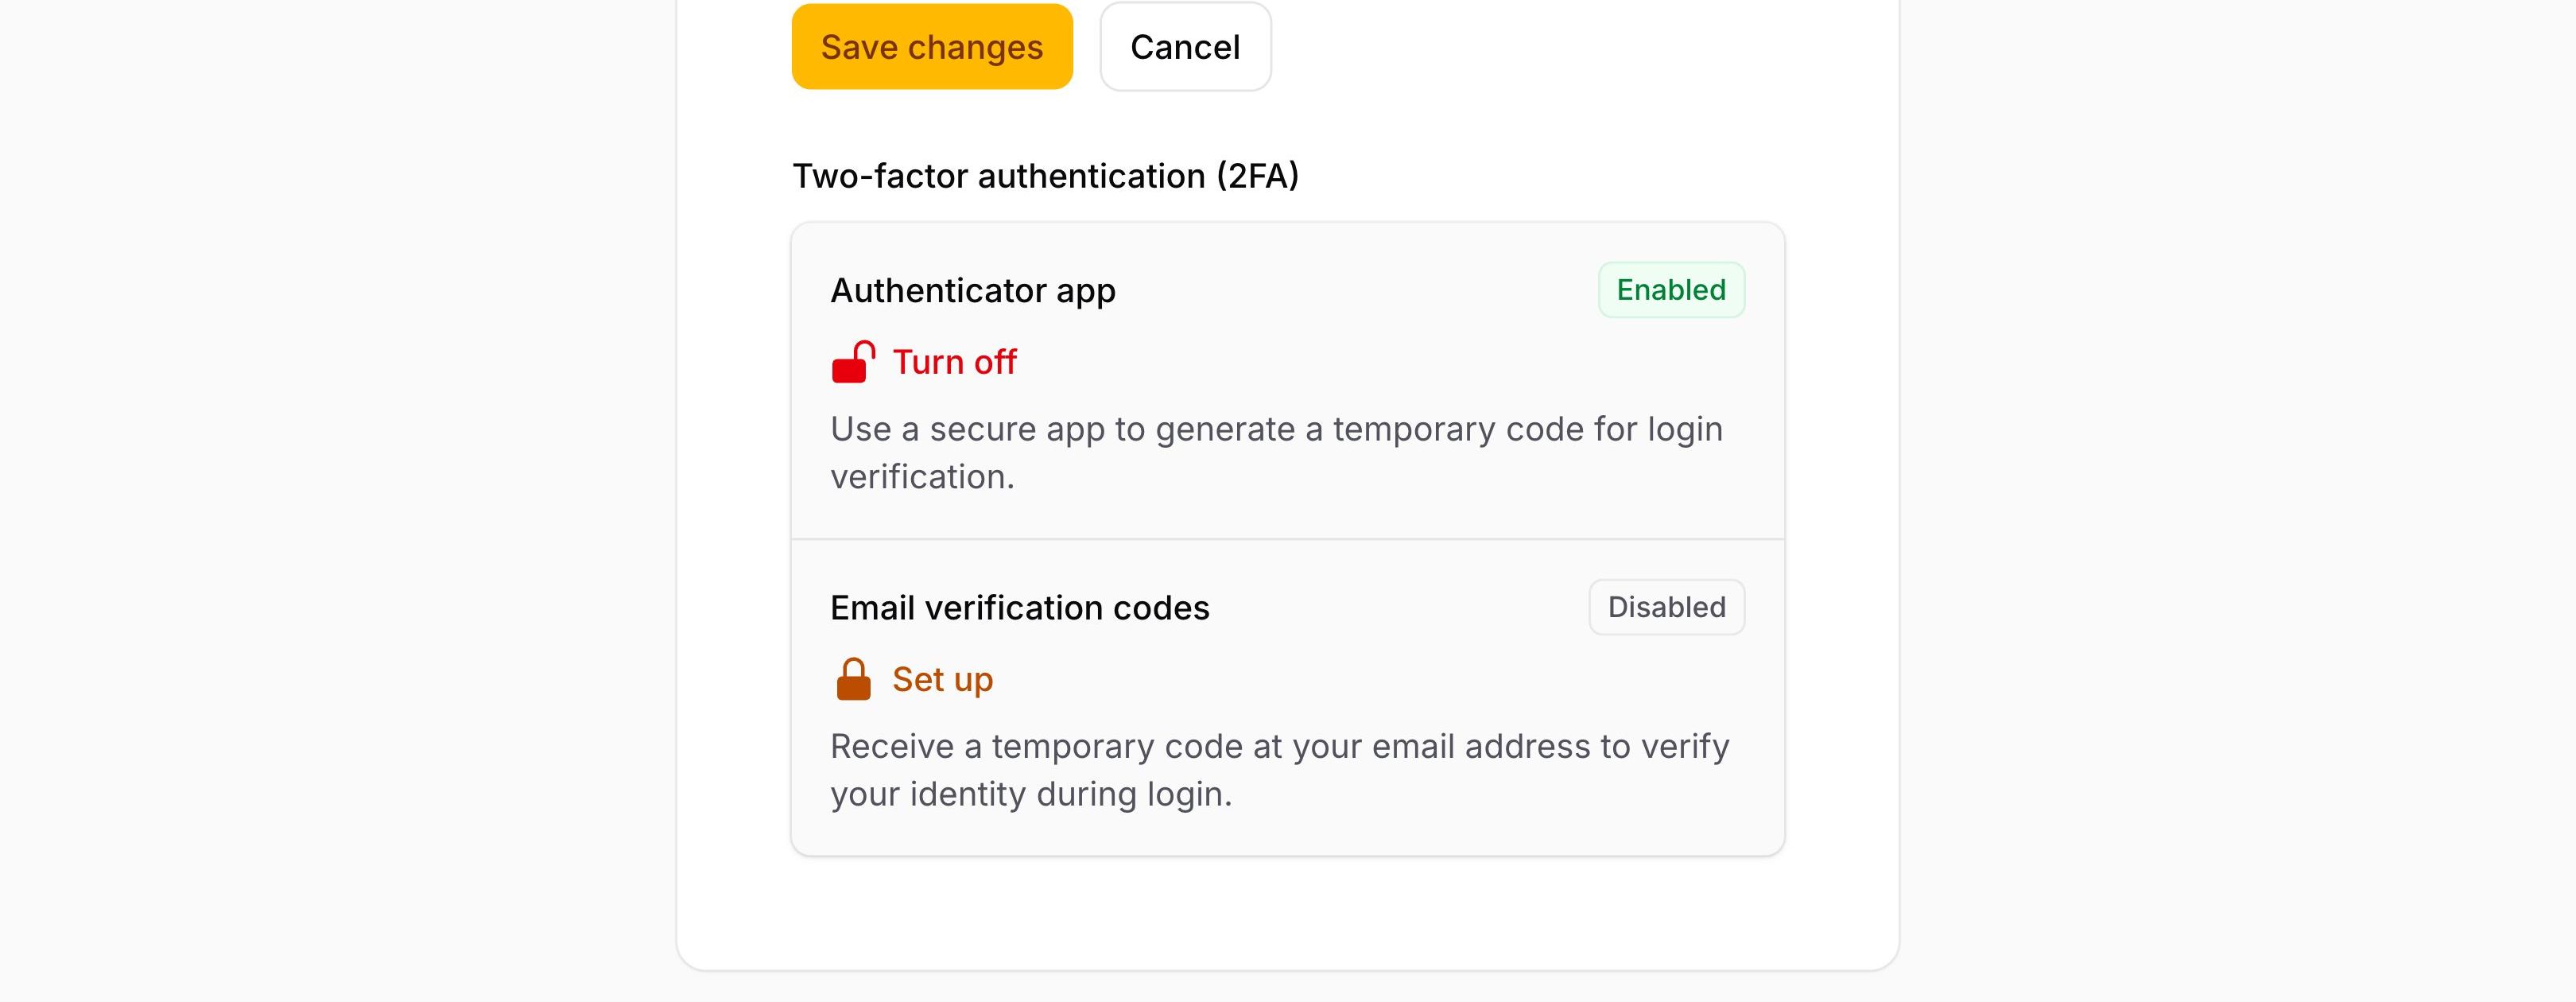
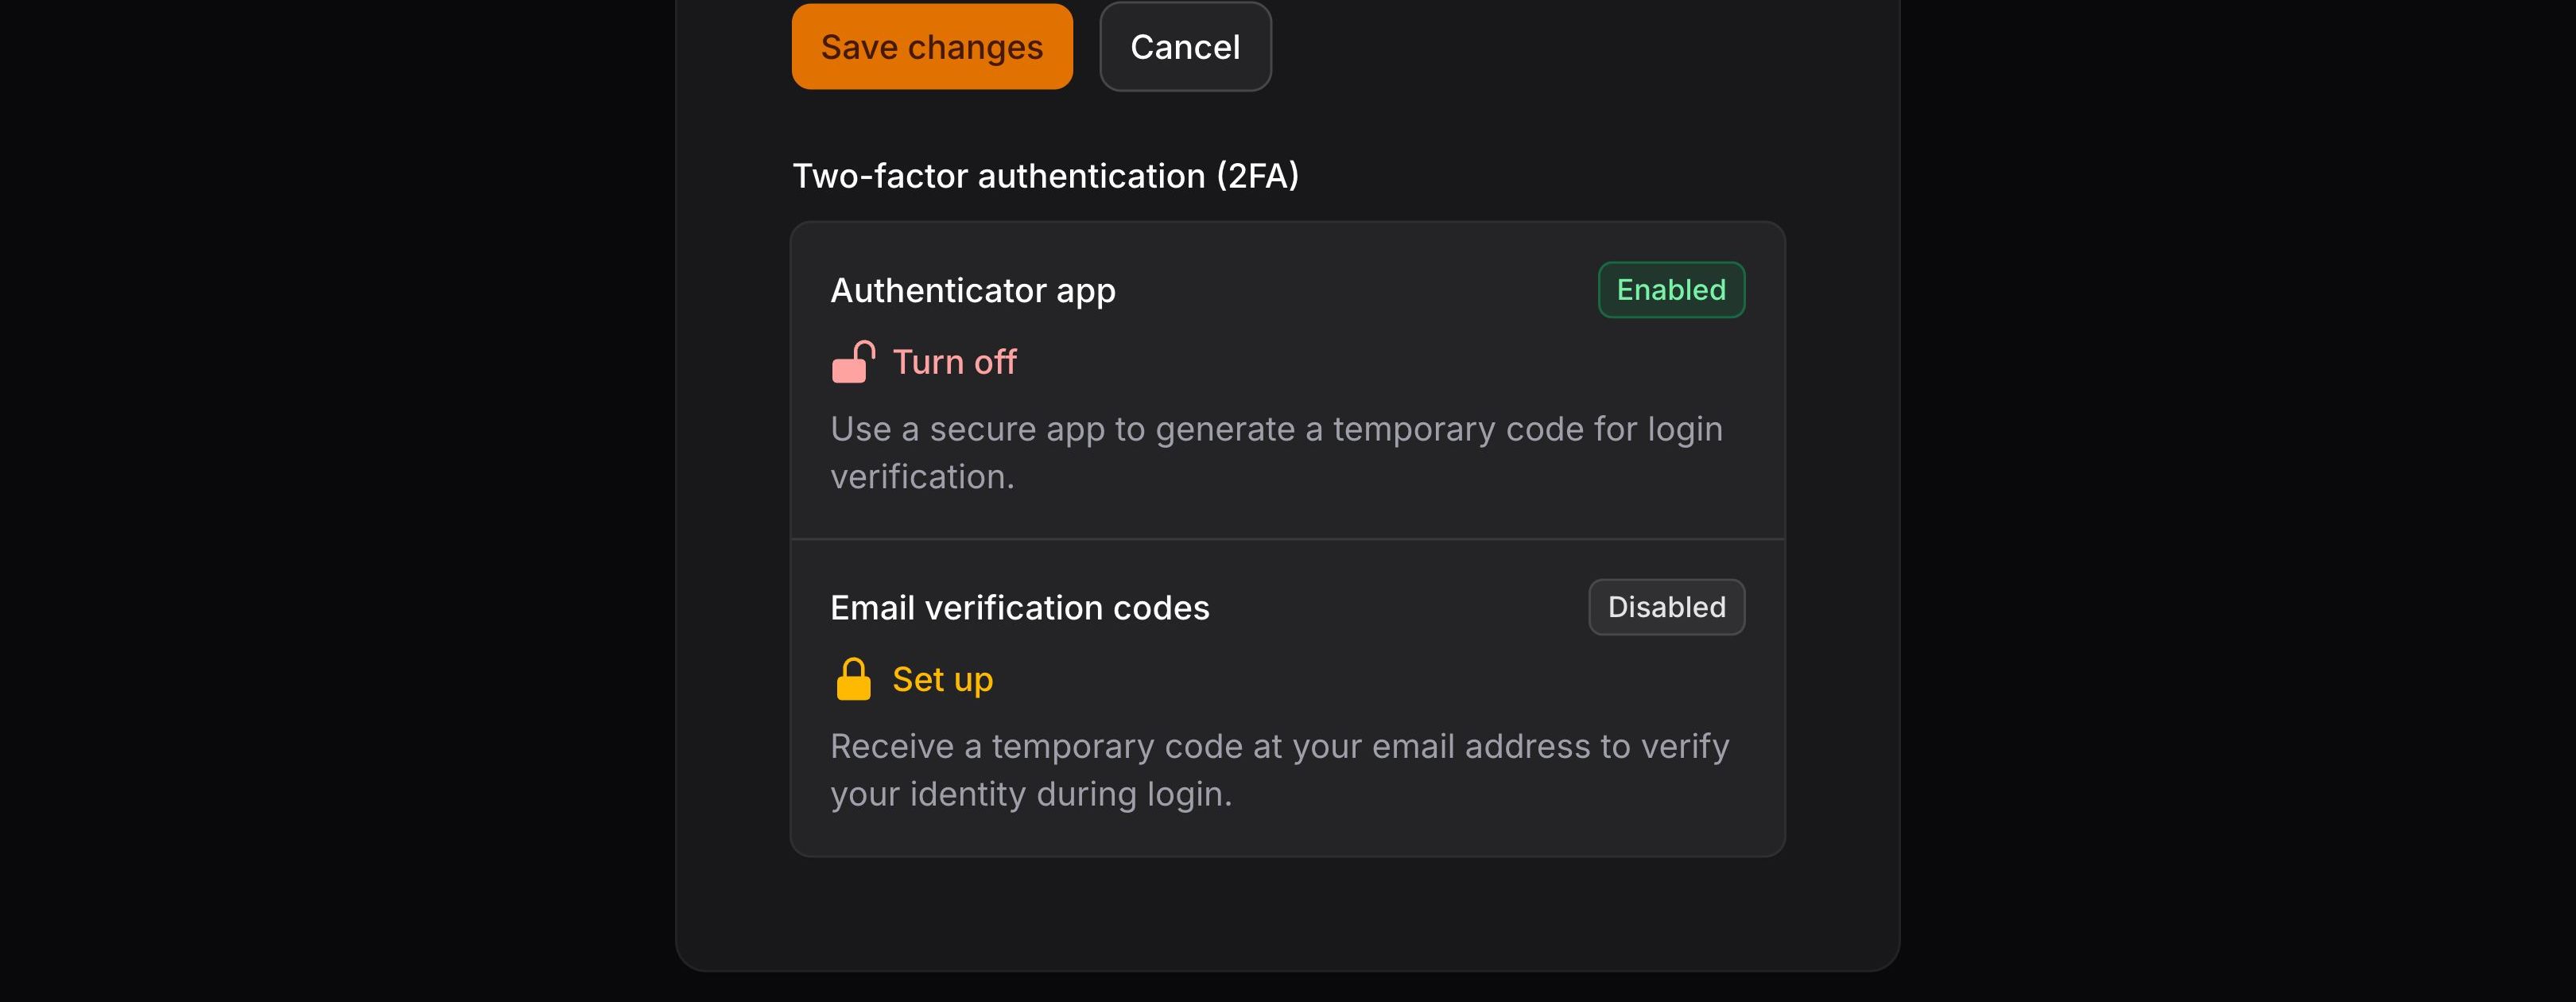
在 Filament 中,用户在他们的个人资料(profile)页面设置多因素身份验证。如果你使用 Filament 的个人资料页面功能,设置多因素身份验证将自动将对应的 UI 元素添加到个人资料页面:
use Filament\Panel;

public function panel(Panel $panel): Panel
{
    return $panel
        // ...
        ->profile();
}
应用身份认证
要在面板中启用应用身份验证,你必须首先向 users 表(或此面板中“可身份验证(authenticatable)” 的 Eloquent 模型的任何表)添加一个新字段。该字段需要存储用于生成和验证基于时间的一次性密码的密钥。它可以是迁移中的普通 text() 字段:
use Illuminate\Database\Schema\Blueprint;
use Illuminate\Support\Facades\Schema;

Schema::table('users', function (Blueprint $table) {
    $table->text('app_authentication_secret')->nullable();
});
在 User 模型中,你需要实现 HasAppAuthentication 接口并使用 InteractsWithAppAuthentication trait。它提供了与密钥及其他集成信息交互的必要方法:
use Filament\Auth\MultiFactor\App\Contracts\HasAppAuthentication;
use Filament\Auth\MultiFactor\App\Concerns\InteractsWithAppAuthentication;
use Filament\Models\Contracts\FilamentUser;
use Illuminate\Contracts\Auth\MustVerifyEmail;
use Illuminate\Foundation\Auth\User as Authenticatable;

class User extends Authenticatable implements FilamentUser, HasAppAuthentication, MustVerifyEmail
{
    use InteractsWithAppAuthentication;

    // ...
}
TIP
Filament provides a default implementation for speed and simplicity, but you could implement the required methods yourself and customize the column name or store the secret in a completely separate table.
最后,你应该在面板中激活应用身份认证功能。为此,请在配置中使用 multiFactorAuthentication() 方法,并传入一个 AppAuthentication 实例:
use Filament\Auth\MultiFactor\App\AppAuthentication;
use Filament\Panel;

public function panel(Panel $panel): Panel
{
    return $panel
        // ...
        ->multiFactorAuthentication([
            AppAuthentication::make(),
        ]);
}
NOTE
To prevent the same app authentication code from being accepted more than once, use a default cache store that supports atomic locks, such as the database or Redis cache driver. All application servers must use the same cache backend. With other cache configurations, concurrent requests may accept the same code more than once.
设置应用恢复码
如果用户丢失访问他们的双因素身份验证应用的权限,他们将无法登录到应用中。为了防止这种情况,你可以生成一组恢复码,用户可以在失去对双因素身份验证应用的访问权限时使用这些代码登录。
与 app_authentication_secret 字段类似, 你应该向 users表(或面板中使用 “authenticatable” Eloquent 模型的任何表)添加一个新字段。该字段用于存储恢复码。它可以是迁移中的普通 text() 字段:
use Illuminate\Database\Schema\Blueprint;
use Illuminate\Support\Facades\Schema;

Schema::table('users', function (Blueprint $table) {
    $table->text('app_authentication_recovery_codes')->nullable();
});
接下来,你需要在 User 模型中实现 HasAppAuthenticationRecovery 接口,并使用 InteractsWithAppAuthenticationRecovery trait。该 trait 提供了与恢复码进行交互的必要方法:
use Filament\Auth\MultiFactor\App\Contracts\HasAppAuthentication;
use Filament\Auth\MultiFactor\App\Concerns\InteractsWithAppAuthentication;
use Filament\Auth\MultiFactor\App\Contracts\HasAppAuthenticationRecovery;
use Filament\Auth\MultiFactor\App\Concerns\InteractsWithAppAuthenticationRecovery;
use Filament\Models\Contracts\FilamentUser;
use Illuminate\Contracts\Auth\MustVerifyEmail;
use Illuminate\Foundation\Auth\User as Authenticatable;

class User extends Authenticatable implements FilamentUser, HasAppAuthentication, HasAppAuthenticationRecovery, MustVerifyEmail
{
    use InteractsWithAppAuthentication;
    use InteractsWithAppAuthenticationRecovery;

    // ...
}
TIP
由于 Filament 在 User 模型上使用了接口,而不是假定存在 app_authentication_recovery_codes 字段,因此你可以使用任何你想要的字段名。如果你的恢复码保存在不同的表格中,你甚至可以使用完全不同的模型。
最后,你应该在面板中激活应用身份验证恢复代码功能。为此,请在配置中的 multiFactorAuthentication() 方法中将 recovery() 方法传递给 AppAuthentication 实例:
use Filament\Auth\MultiFactor\App\AppAuthentication;
use Filament\Panel;

public function panel(Panel $panel): Panel
{
    return $panel
        // ...
        ->multiFactorAuthentication([
            AppAuthentication::make()
                ->recoverable(),
        ]);
}
修改恢复码的生成数量
默认情况下,Filament 为每位用户生成 8 个恢复码。如果你想修改,可以在配置的 multiFactorAuthentication() 方法中,使用 AppAuthentication 实例调用 recoveryCodeCount() 方法:
use Filament\Auth\MultiFactor\App\AppAuthentication;
use Filament\Panel;

public function panel(Panel $panel): Panel
{
    return $panel
        // ...
        ->multiFactorAuthentication([
            AppAuthentication::make()
                ->recoverable()
                ->recoveryCodeCount(10),
        ]);
}
防止用户重新生成恢复码
默认情况下,用户可以访问它们的个人资料页来重新生成恢复码。如果你想要阻止重新生成,可以在配置的 multiFactorAuthentication() 方法中,使用 AppAuthentication 实例调用 regenerableRecoveryCodes(false) 方法:
use Filament\Auth\MultiFactor\App\AppAuthentication;
use Filament\Panel;

public function panel(Panel $panel): Panel
{
    return $panel
        // ...
        ->multiFactorAuthentication([
            AppAuthentication::make()
                ->recoverable()
                ->regenerableRecoveryCodes(false),
        ]);
}
修改应用码到期时间
应用码是使用基于时间的一次性密码(TOTP)算法发布的,这意味着它们在生成前后仅在短时间内有效。该时间是在时间“窗口”中定义的。默认情况下, Filament 使用 8 的过期窗口,即在生成时间的两侧创建 4 分钟的有效期(总共 8 分钟)。
要更改窗口,例如使其在生成后仅在 2 分钟内有效,你可以在 AppAuthentication 实例上使用 codeWindow()方法,将其设置为 4:
use Filament\Auth\MultiFactor\App\AppAuthentication;
use Filament\Panel;

public function panel(Panel $panel): Panel
{
    return $panel
        // ...
        ->multiFactorAuthentication([
            AppAuthentication::make()
                ->codeWindow(4),
        ]);
}
自定义应用认证的品牌名
每个应用认证集成都有一个展示在认证应用上的“品牌名”。默认情况下,它是应用名。如果你想修改品牌名,你可以在配置的 multiFactorAuthentication() 方法的 AppAuthentication 实例上调用 brandName() 方法:
use Filament\Auth\MultiFactor\App\AppAuthentication;
use Filament\Panel;

public function panel(Panel $panel): Panel
{
    return $panel
        // ...
        ->multiFactorAuthentication([
            AppAuthentication::make()
                ->brandName('Filament Demo'),
        ]);
}
电子邮件身份认证
邮箱认证将会发送一次性验证码到用户邮箱地址中,用户必须输入该验证码进行确认。
要在面板中启用邮箱认证,你必须先新增一个用以验证的列到 users 表(或者其他使用 authenticatable 的 Eloquent 模型的表)中。该列用以存储布尔值,说明邮箱认证是否激活。
use Illuminate\Database\Schema\Blueprint;
use Illuminate\Support\Facades\Schema;

Schema::table('users', function (Blueprint $table) {
    $table->boolean('has_email_authentication')->default(false);
});
然后,在 User 模型中实现 HasEmailAuthentication 接口并使用 InteractsWithEmailAuthentication trait。这提供给 Filament 必须的方法,用来与说明邮箱认证是否激活的字段进行交互。
use Filament\Auth\MultiFactor\Email\Contracts\HasEmailAuthentication;
use Filament\Auth\MultiFactor\Email\Concerns\InteractsWithEmailAuthentication;
use Filament\Models\Contracts\FilamentUser;
use Illuminate\Contracts\Auth\MustVerifyEmail;
use Illuminate\Foundation\Auth\User as Authenticatable;

class User extends Authenticatable implements FilamentUser, HasEmailAuthentication, MustVerifyEmail
{
    use InteractsWithEmailAuthentication;

    // ...
}
TIP
Filament provides a default implementation for speed and simplicity, but you could implement the required methods yourself and customize the column name or store the value in a completely separate table.
最后,你需要在面板中激活邮箱认证功能。为此,请在配置中使用 multiFactorAuthentication() 方法,并传入一个 EmailAuthentication 实例:
use Filament\Auth\MultiFactor\Email\EmailAuthentication;
use Filament\Panel;

public function panel(Panel $panel): Panel
{
    return $panel
        // ...
        ->multiFactorAuthentication([
            EmailAuthentication::make(),
        ]);
}
修改邮箱验证码到期时间
邮件验证码有 4 分钟的到期时间。
要修改到期时间,比如在生成后的 2 分钟内有效,你可以在 EmailAuthentication 实例的 codeExpiryMinutes() 方法中将其设置为 2:
use Filament\Auth\MultiFactor\Email\EmailAuthentication;
use Filament\Panel;

public function panel(Panel $panel): Panel
{
    return $panel
        // ...
        ->multiFactorAuthentication([
            EmailAuthentication::make()
                ->codeExpiryMinutes(2),
        ]);
}
要求多因素认证
默认情况下,用户没被要求设置多因素认证。你可以将 isRequired: true 作为参数传给配置的 multiFactorAuthentication() 方法来要求用户设置多因素认证:
use Filament\Auth\MultiFactor\App\AppAuthentication;
use Filament\Panel;

public function panel(Panel $panel): Panel
{
    return $panel
        // ...
        ->multiFactorAuthentication([
            AppAuthentication::make(),
        ], isRequired: true);
}
启用后,入宫用户还没有启用多因素认证,j将会在登录后被提示设置多因素认证。
关于多因素认证的安全提示
在 Filament 中,多因素认证处理发生在用户实际认证之前。这确保用户不能在未进行多因素认证就访问应用。你无需添加中间件到任何认证路由来确保用户完成多因素认证步骤。
不过,如果你的 Laravel 应用的其他部分也在认证用户,请记住:如果他们已经在其他地方进行过认证,不会再受多因素认证限制,除非多因素认证是必需的并且他们还未进行过设置。
Creating a custom multi-factor authentication provider
You can add another MFA method by creating an object that implements the MultiFactorAuthenticationProvider interface. The provider tells Filament how to identify the method, determine whether it is enabled for a user, manage it, and validate its login challenge.
The following sections use an SMS authentication provider as an example. The provider delegates code generation, storage, delivery, and verification to an SmsAuthenticationService in your app. This keeps the provider focused on integrating your authentication method with Filament:
<?php

namespace App\Filament\Auth\MultiFactor;

use App\Services\SmsAuthenticationService;
use Filament\Auth\MultiFactor\Contracts\MultiFactorAuthenticationProvider;

class SmsAuthentication implements MultiFactorAuthenticationProvider
{
    public function __construct(
        protected SmsAuthenticationService $service,
    ) {}

    public static function make(): static
    {
        return app(static::class);
    }

    // ...
}
The service should generate codes using a cryptographically secure random source, store only a hash of each code, scope codes to the user they were issued for, expire and consume codes, and rate-limit both delivery and verification attempts. It may deliver codes using any SMS notification channel supported by Laravel.
Identifying the provider
The getId() method must return a stable identifier that is unique among the panel’s MFA providers. Filament uses it to identify the provider and scope its form state. The getLoginFormLabel() method returns the option shown when a user has more than one MFA method enabled:
// ...

public function getId(): string
{
    return 'sms';
}

public function getLoginFormLabel(): string
{
    return 'SMS';
}

// ...
Checking whether the provider is enabled
The isEnabled() method determines whether a user should be challenged by the provider. For example, you could store a has_sms_authentication boolean and a phone_number on the User model:
use App\Models\User;
use Illuminate\Contracts\Auth\Authenticatable;

// ...

public function isEnabled(Authenticatable $user): bool
{
    if (! ($user instanceof User)) {
        return false;
    }

    return filled($user->phone_number) && ((bool) $user->has_sms_authentication);
}

// ...
The user passed to isEnabled() is not authenticated yet when Filament is preparing a login challenge, so you should always use the method’s $user argument instead of the currently authenticated user.
Rendering the management schema
The getManagementSchemaComponents() method returns the schema components and actions used to manage the provider. Filament renders them on the user’s profile page and, when MFA is required, on the required MFA setup page:
use App\Filament\Auth\MultiFactor\Actions\DisableSmsAuthenticationAction;
use App\Filament\Auth\MultiFactor\Actions\SetUpSmsAuthenticationAction;
use Filament\Schemas\Components\Actions;

// ...

public function getManagementSchemaComponents(): array
{
    return [
        Actions::make([
            SetUpSmsAuthenticationAction::make($this->service),
            DisableSmsAuthenticationAction::make($this->service),
        ]),
    ];
}

// ...
In this example, the setup and disable actions should send an SMS code, display a OneTimeCodeInput, verify the code using the service, and then persist the new enabled state. Keeping these workflows in separate action classes prevents the provider from becoming difficult to read. If your integration manages enrollment elsewhere, the management schema could instead contain an action that links to that page.
Rendering the challenge form
The getChallengeFormComponents() method returns the fields shown after the user’s password has been verified. Filament completes authentication only when the components pass validation, so the SMS code field uses the service to reject an invalid challenge:
use Closure;
use Filament\Forms\Components\OneTimeCodeInput;
use Illuminate\Contracts\Auth\Authenticatable;
use SensitiveParameter;

// ...

public function getChallengeFormComponents(Authenticatable $user): array
{
    return [
        OneTimeCodeInput::make('code')
            ->label('SMS code')
            ->required()
            ->rule(fn (): Closure => function (string $attribute, #[SensitiveParameter] mixed $value, Closure $fail) use ($user): void {
                if (is_string($value) && $this->service->verifyCode($user, $value)) {
                    return;
                }

                $fail('The SMS code is invalid or has expired.');
            }),
    ];
}

// ...
The verification operation should consume a valid code so that it cannot be used successfully again.
Running logic before the challenge
SMS providers need to send a code before displaying the challenge. To run logic at that point, also implement the HasBeforeChallengeHook interface and add the beforeChallenge() method:
use Filament\Auth\MultiFactor\Contracts\HasBeforeChallengeHook;
use Illuminate\Contracts\Auth\Authenticatable;

class SmsAuthentication implements HasBeforeChallengeHook, MultiFactorAuthenticationProvider
{
    // ...

    public function beforeChallenge(Authenticatable $user): void
    {
        $this->service->sendCode($user);
    }

    // ...
}
The beforeChallenge() method may be called more than once if the user switches between enabled providers. The service should rate-limit code delivery and avoid invalidating an existing code when another code cannot be sent yet.
NOTE
Store phone numbers in a consistent format such as E.164, and disable SMS authentication whenever a user’s phone number changes so that they must verify the new number. You should also provide a secure account recovery process for users who lose access to their phone. SMS authentication is vulnerable to risks such as SIM swapping, so consider offering app authentication or security keys as stronger alternatives.
Registering the provider
Finally, register the provider with the panel’s multiFactorAuthentication() method:
use App\Filament\Auth\MultiFactor\SmsAuthentication;
use Filament\Panel;

public function panel(Panel $panel): Panel
{
    return $panel
        // ...
        ->multiFactorAuthentication([
            SmsAuthentication::make(),
        ]);
}
Challenging a user outside of the login page
The multi-factor challenge that the login page presents is also available on its own, so that you can ask a signed-in user to verify a configured factor before they perform a sensitive action.
The MultiFactorChallenge class builds the challenge for a user. Its schema components carry the validation rules that verify the code that the user enters.
NOTE
The examples below assume that $user is the signed-in user and is an instance of Authenticatable. Your Livewire component must also be set up to use schemas and use the RestrictsFileUploadsToSchemaComponents trait described in the security documentation.
Checking whether a user can be challenged
You should use hasEnabledProviders() to check that the user has at least one enabled provider before presenting a challenge:
use Filament\Auth\MultiFactor\MultiFactorChallenge;

$multiFactorChallenge = MultiFactorChallenge::make();

abort_unless($multiFactorChallenge->hasEnabledProviders($user), 403);
Always repeat this check immediately before validating the challenge. When no provider is enabled, getSchemaComponents() returns an empty schema, and validating an empty schema succeeds. Your application must treat that state as a failed challenge.
You can use getEnabledProviders() to retrieve all enabled provider instances, or getFirstEnabledProvider() to retrieve the first one. getFirstEnabledProvider() returns null when none are enabled.
Building the challenge schema
Use getSchemaComponents() to get the provider picker and challenge fields for every enabled provider:
use Filament\Auth\MultiFactor\MultiFactorChallenge;

$schema
    ->components(MultiFactorChallenge::make()->getSchemaComponents($user))
    ->statePath('multiFactorData');
When more than one provider is enabled, the generated provider picker controls which provider’s fields are visible. If you need to place the picker and fields separately, use getProviderPickerSchemaComponent() and getChallengeSchemaComponents() instead. Both components must belong to the same root schema so that the picker can find the selected provider’s fields.
Render and submit the schema like any other Livewire schema.
Running logic before the challenge
Some providers need to do work before their challenge is presented, such as emailing the user a code. Use beforeChallenge() before filling and presenting the schema:
$multiFactorChallenge->beforeChallenge($user);

$this->multiFactorChallengeForm->fill();
This runs the hook for the first enabled provider. When the generated provider picker is used, it runs the appropriate hook whenever the user switches provider.
Rate limiting challenge attempts
Challenges should be rate limited so that a user’s second factor cannot be brute forced. Check isRateLimited() before each validation attempt, then call hitRateLimiter() immediately before validation:
abort_if($multiFactorChallenge->isRateLimited($user), 429);

$multiFactorChallenge->hitRateLimiter($user);
The rate limiter is shared with the login page’s challenge and is scoped to the authentication guard and user. You can use getMaxRateLimiterAttempts() to retrieve the maximum number of attempts, and getRateLimiterAvailableInSeconds() to determine how long remains before another attempt may be made.
Validating the challenge
Call getState() on the schema to validate the selected provider’s fields. Immediately before doing so, check that the user still has an enabled provider and record a rate-limited attempt:
abort_unless($multiFactorChallenge->hasEnabledProviders($user), 403);
abort_if($multiFactorChallenge->isRateLimited($user), 429);

$multiFactorChallenge->hitRateLimiter($user);

$this->multiFactorChallengeForm->getState();
NOTE
Verifying a challenge does not authenticate anyone or authorize the protected operation. It only proves that the signed-in user holds a factor currently registered against their account. After validation succeeds, reload any security-sensitive state and reauthorize the protected operation immediately before performing it.
Security notes about multi-factor authentication
In Filament, the multi-factor authentication process occurs before the user is actually authenticated into the app. This allows you to be sure that no users can authenticate and access the app without passing the multi-factor authentication step. You do not need to remember to add middleware to any of your authenticated routes to ensure that users completed the multi-factor authentication step.
However, if you have other parts of your Laravel app that authenticate users, please bear in mind that they will not be challenged for multi-factor authentication if they are already authenticated elsewhere and then visit the panel, unless multi-factor authentication is required and they have not set it up yet.
Concurrent recovery code submissions
When a user signs in with a recovery code, Filament’s verifyRecoveryCode() method wraps the read-validate-write sequence in a per-user Cache::lock and a database transaction with a lockForUpdate() row lock on the user’s row. The cache lock serializes concurrent submissions across PHP workers regardless of the underlying database driver, so two parallel sign-in requests cannot both consume the same code or resurrect a just-consumed code from a stale snapshot — even when the storage is a non-SQL store, a different database connection, or a driver without SELECT ... FOR UPDATE support (such as SQLite).
NOTE
The cache lock relies on a shared lock store. Filament’s default file cache store, as well as redis, memcached, database, and dynamodb, all provide a shared lock across PHP-FPM workers on the same machine (or across machines, for the network-backed stores). The array store is per-process and does not serialize across workers — it is intended for testing only.
If you override getAppAuthenticationRecoveryCodes() / saveAppAuthenticationRecoveryCodes(), the cache lock still wraps the full read-validate-write sequence, so your override is protected. Your override is only responsible for making the storage write itself atomic — for example, a single Eloquent update() or an equivalent atomic primitive on your chosen store.
Still need help? Join our Discord community or open a GitHub discussion