
表单
富文本编辑器
简介
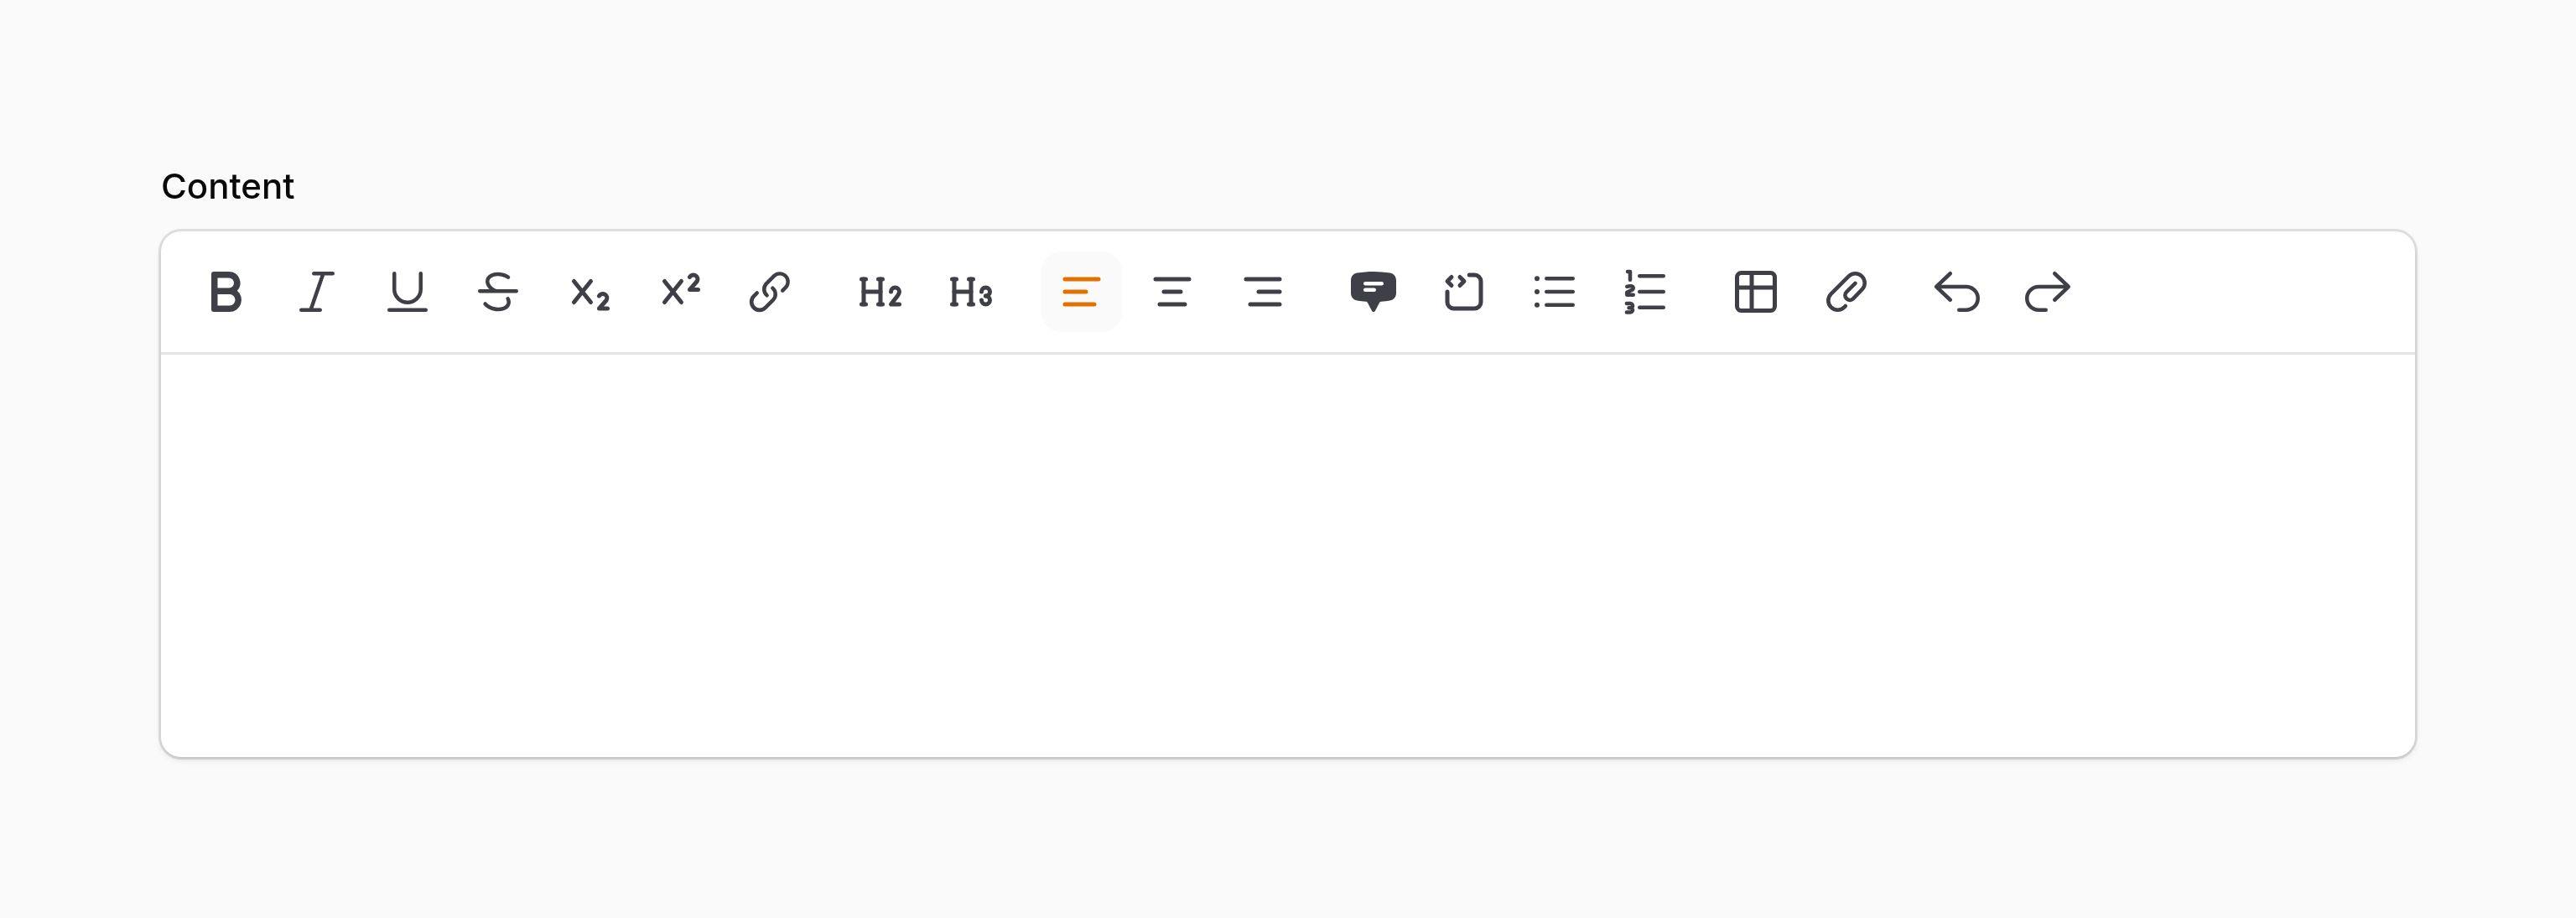
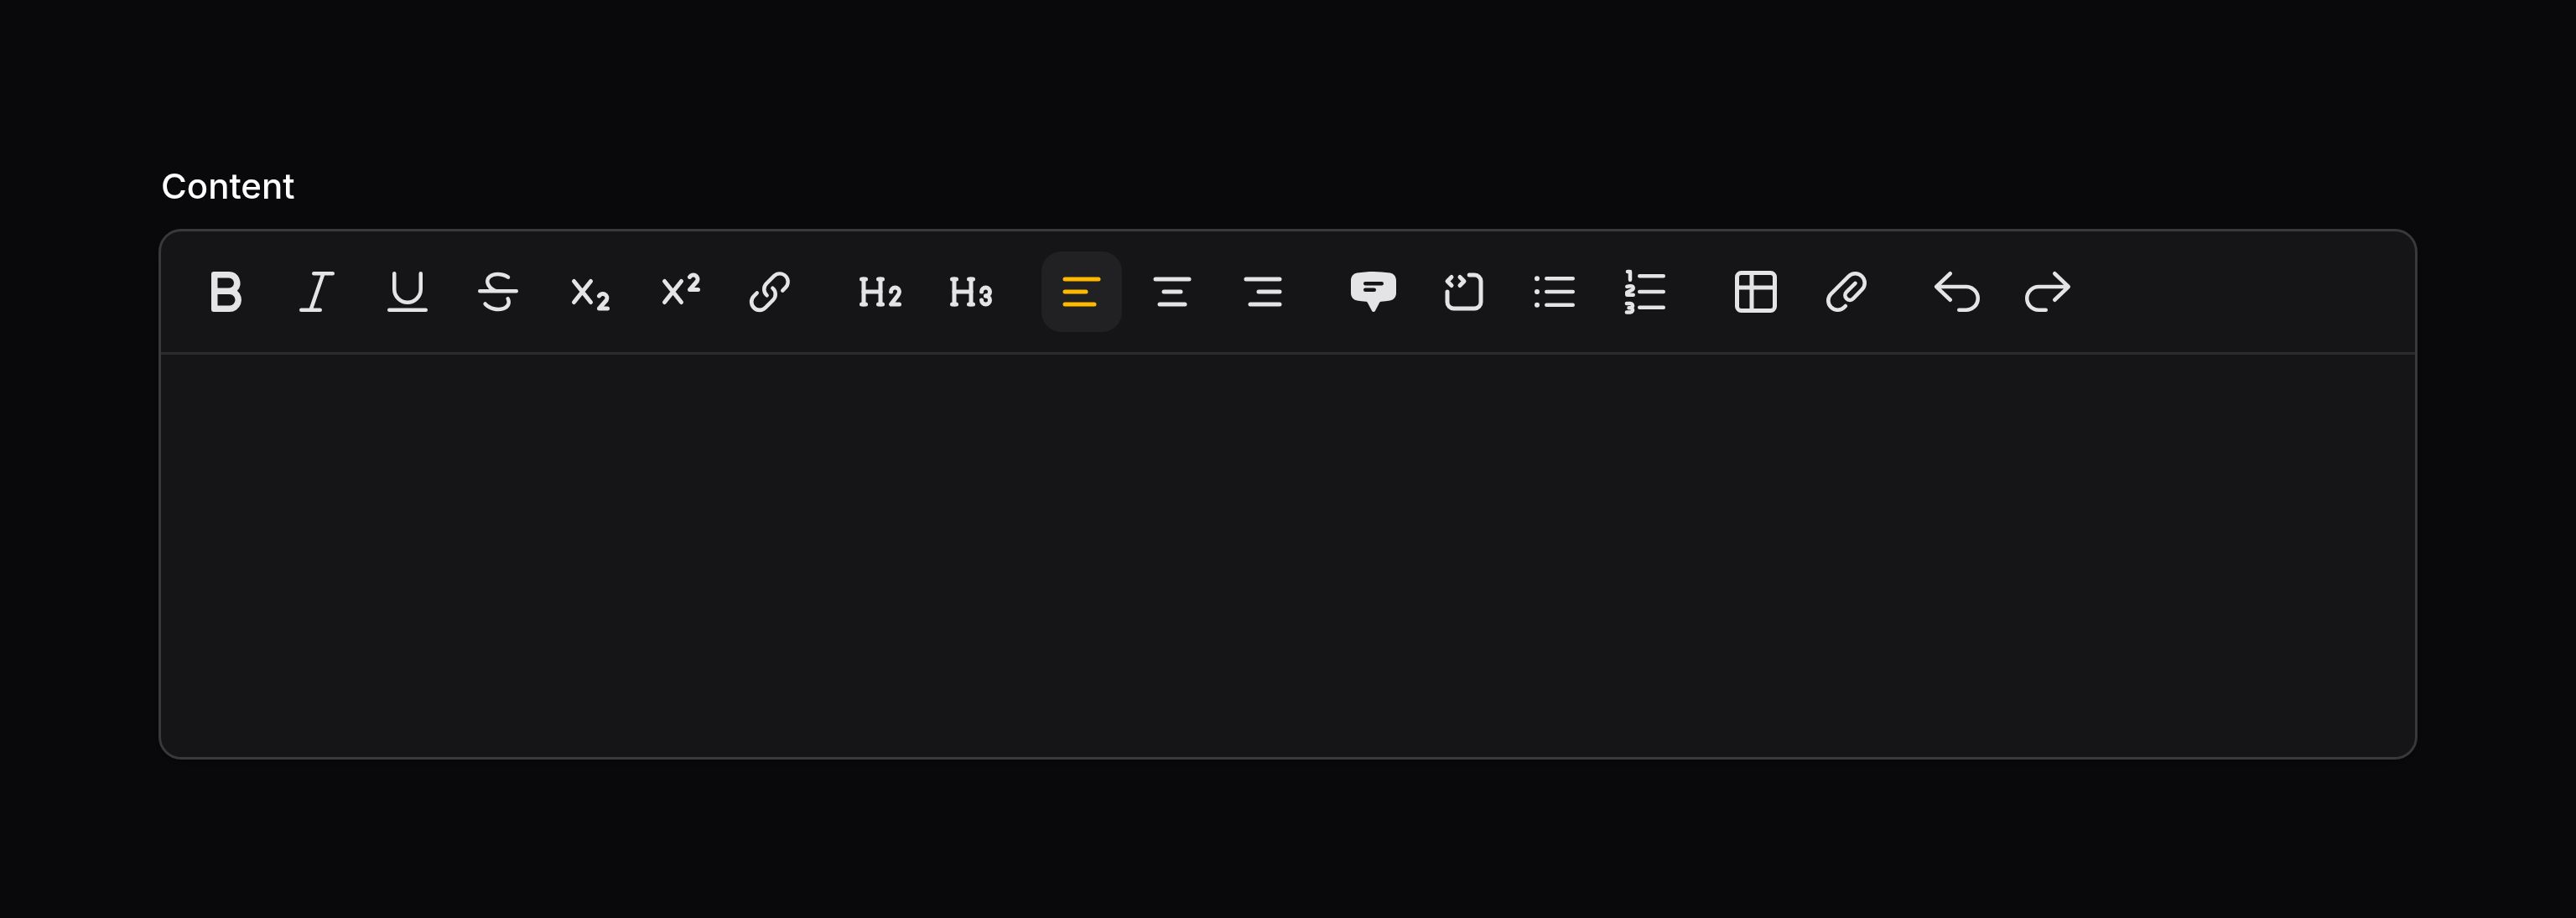
富文本编辑器允许你编辑和预览 HTML 内容,以及上传图片。它使用 TipTap 作为底层编辑器。
use Filament\Forms\Components\RichEditor;

RichEditor::make('content')
配置 Livewire 最大嵌套深度
富文本编辑器将其 TipTap 文档作为嵌套数据与 Livewire 同步。Livewire 默认将嵌套属性路径限制为 10 层,对于列表和表格等结构,这可能不够用。如果遇到 Livewire\Exceptions\MaxNestingDepthExceededException 异常,且你的应用中尚无 config/livewire.php 文件,请发布 Livewire 的配置文件:
php artisan livewire:publish --config
该命令会覆盖现有的 config/livewire.php 文件,因此如果你已经发布了该配置文件,请跳过此步骤。
接下来,调大 config/livewire.php 中现有的 max_nesting_depth 设置。例如,将深度设置为 32 可以容纳深度嵌套的富文本内容:
'payload' => [
    // ...
    'max_nesting_depth' => 32,
],
仅修改现有 payload 数组中的 max_nesting_depth 值,以保留 Livewire 其他特定于版本的 payload 设置。
将内容存储为 JSON
默认情况下,富文本编辑器将内容存储成 HTML,如果你想将其存储为 JSON 格式,你可以使用 json() 方法:
use Filament\Forms\Components\RichEditor;

RichEditor::make('content')
    ->json()
该 JSON 是以 TipTap 的格式存储,它是内容的结构化表示。
如果你使用 Eloquent 来保存 JSON 内容,你应该确保将 array cast 添加到模型属性中:
use Illuminate\Database\Eloquent\Model;

class Post extends Model
{
    /**
     * @return array<string, string>
     */
    protected function casts(): array
    {
        return [
            'content' => 'array',
        ];
    }

    // ...
}
自定义工具栏按钮
使用 toolbarButtons() 方法,你可以设置编辑器的工具栏按钮。此例中的选项为默认值:
use Filament\Forms\Components\RichEditor;

RichEditor::make('content')
    ->toolbarButtons([
        ['bold', 'italic', 'underline', 'strike', 'subscript', 'superscript', 'link'],
        ['h2', 'h3'],
        ['alignStart', 'alignCenter', 'alignEnd'],
        ['blockquote', 'codeBlock', 'bulletList', 'orderedList'],
        ['table', 'attachFiles'], // The `customBlocks` and `mergeTags` tools are also added here if those features are used.
        ['undo', 'redo'],
    ])
主数组中的每个嵌套数组都表示工具栏中的一组按钮。
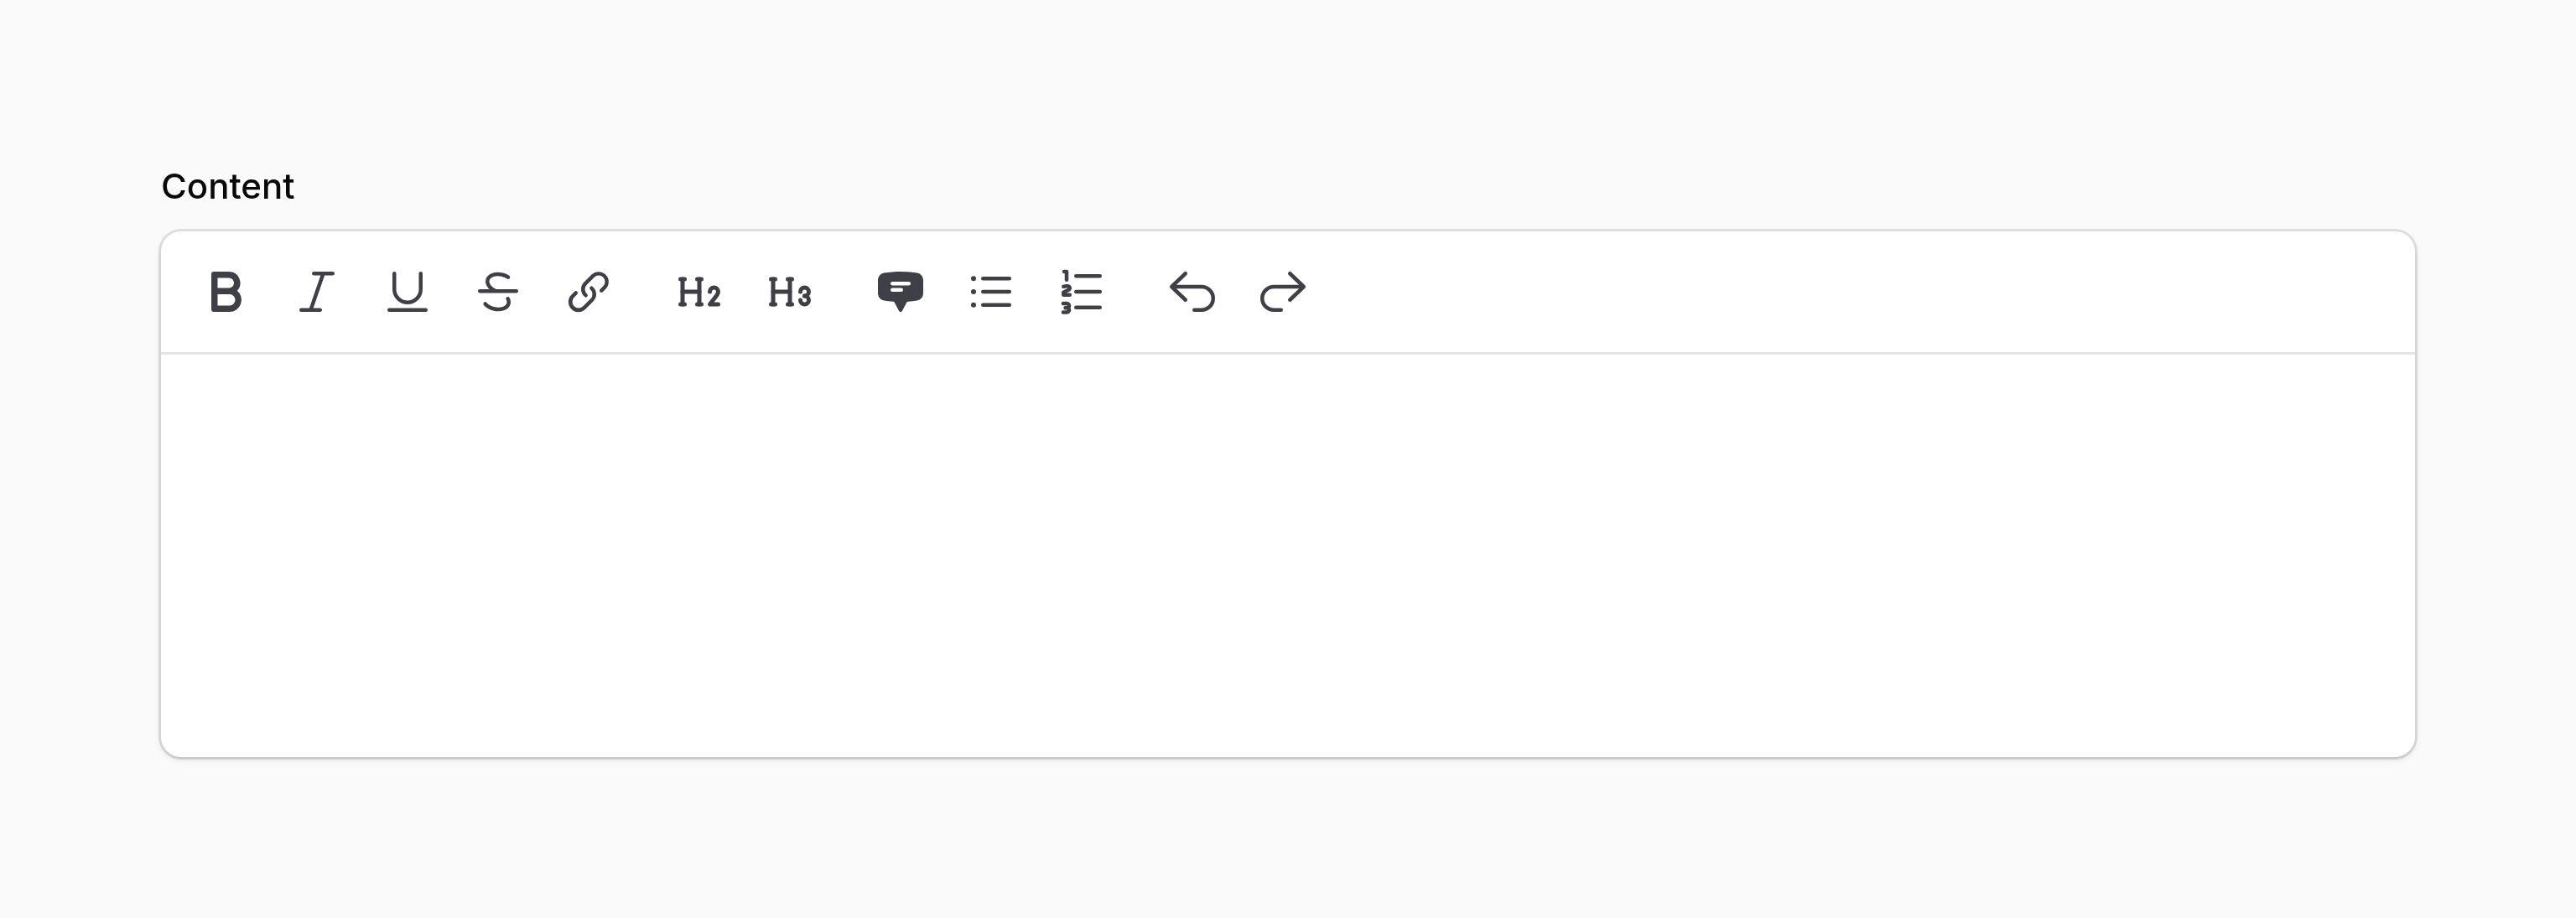
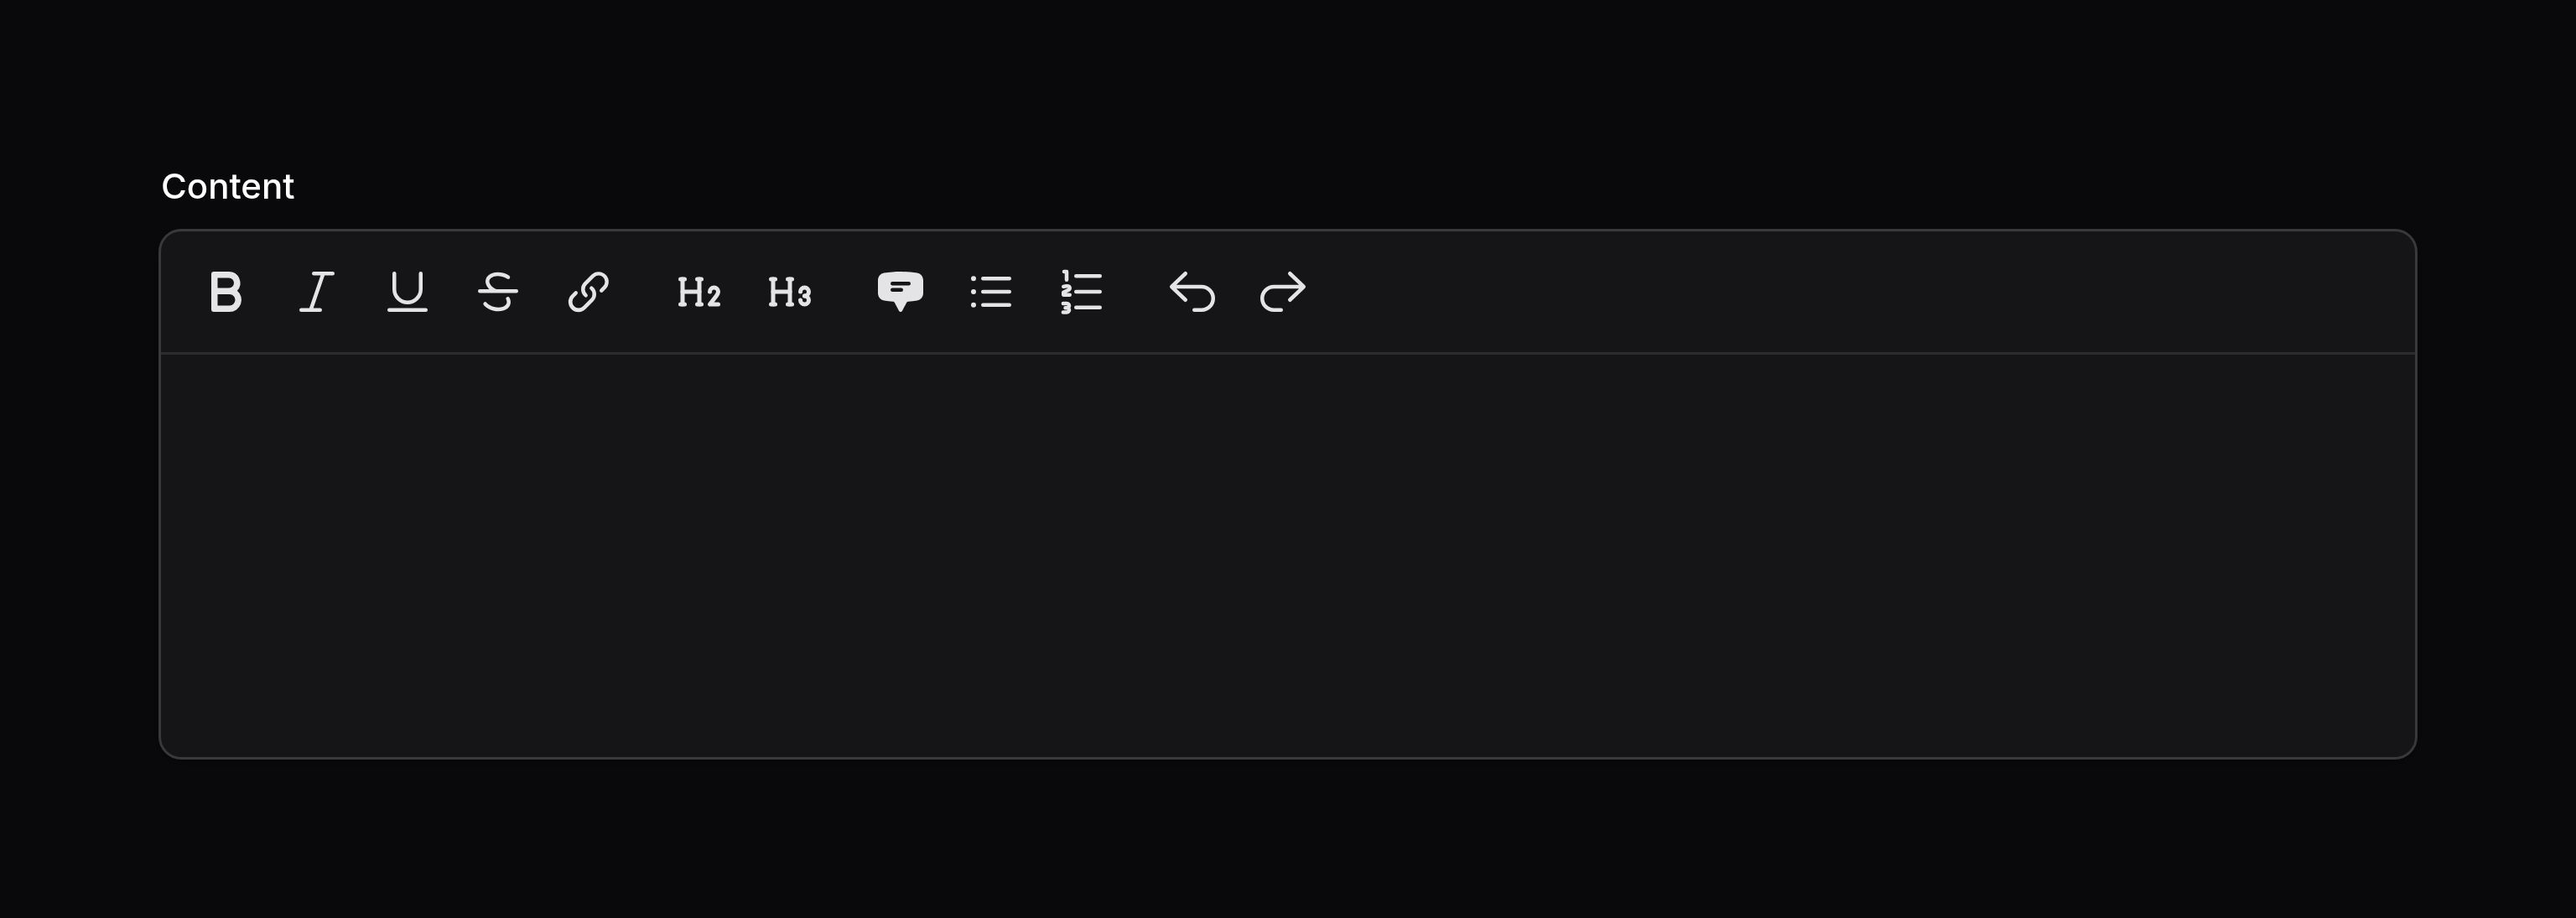
Toolbar 中可以引入的其他组件:
h1- 将 “h1” 标签应用到文本中。h4- 将 “h4” 标签应用到文本中。h5- 将 “h5” 标签应用到文本中。h6- 将 “h6” 标签应用到文本中。alignJustify- 对齐文本。clearFormatting- Clears all formatting from the selected text.details- Inserts a<details>tag, which allows users to create collapsible sections in their content.grid- Inserts a grid layout into the editor, allowing users to create responsive columns of content.gridDelete- Deletes the current grid layout.highlight- 使用<mark>标签高亮显示选中的文本。horizontalRule- Inserts a horizontal rule.lead- 在文本中使用lead类,通常用于文章的第一章。paragraph- Sets the current block to a paragraph, removing any heading formatting.small- 将<small>标签应用到文本中,通常用于小字体打印或免责声明。code- Format the selected text as inline code.textColor- Changes the text color of the selected text.table- Creates a table in the editor with a default layout of 3 columns and 2 rows, with the first row configured as a header row.tableAddColumnBefore- Adds a new column before the current column.tableAddColumnAfter- Adds a new column after the current column.tableDeleteColumn- Deletes the current column.tableAddRowBefore- Adds a new row above the current row.tableAddRowAfter- Adds a new row below the current row.tableDeleteRow- Deletes the current row.tableMergeCells- Merges the selected cells into one cell.tableSplitCell- Splits the selected cell into multiple cells.tableToggleHeaderRow- Toggles the header row of the table.tableToggleHeaderCell- Toggles the header cell of the table.tableDelete- Deletes the table.
除了允许静态值之外,toolbarButtons() 方法也接收函数来计算它的值。你可以将各种 utility 作为参数注入到该函数中。
了解更多 utility 注入详情。 | Utility | 类型 | 参数 | 描述 |
|---|---|---|---|
| Field | Filament\Forms\Components\Field | $component | The current field component instance. |
| Get function | Filament\Schemas\Components\Utilities\Get | $get | A function for retrieving values from the current form data. Validation is not run. |
| Livewire | Livewire\Component | $livewire | The Livewire component instance. |
| Eloquent model FQN | ?string<Illuminate\Database\Eloquent\Model> | $model | The Eloquent model FQN for the current schema. |
| Operation | string | $operation | The current operation being performed by the schema. Usually create, edit, or view. |
| Raw state | mixed | $rawState | The current value of the field, before state casts were applied. Validation is not run. |
| Eloquent record | ?Illuminate\Database\Eloquent\Model | $record | The Eloquent record for the current schema. |
| State | mixed | $state | The current value of the field. Validation is not run. |
自定义浮动工具栏
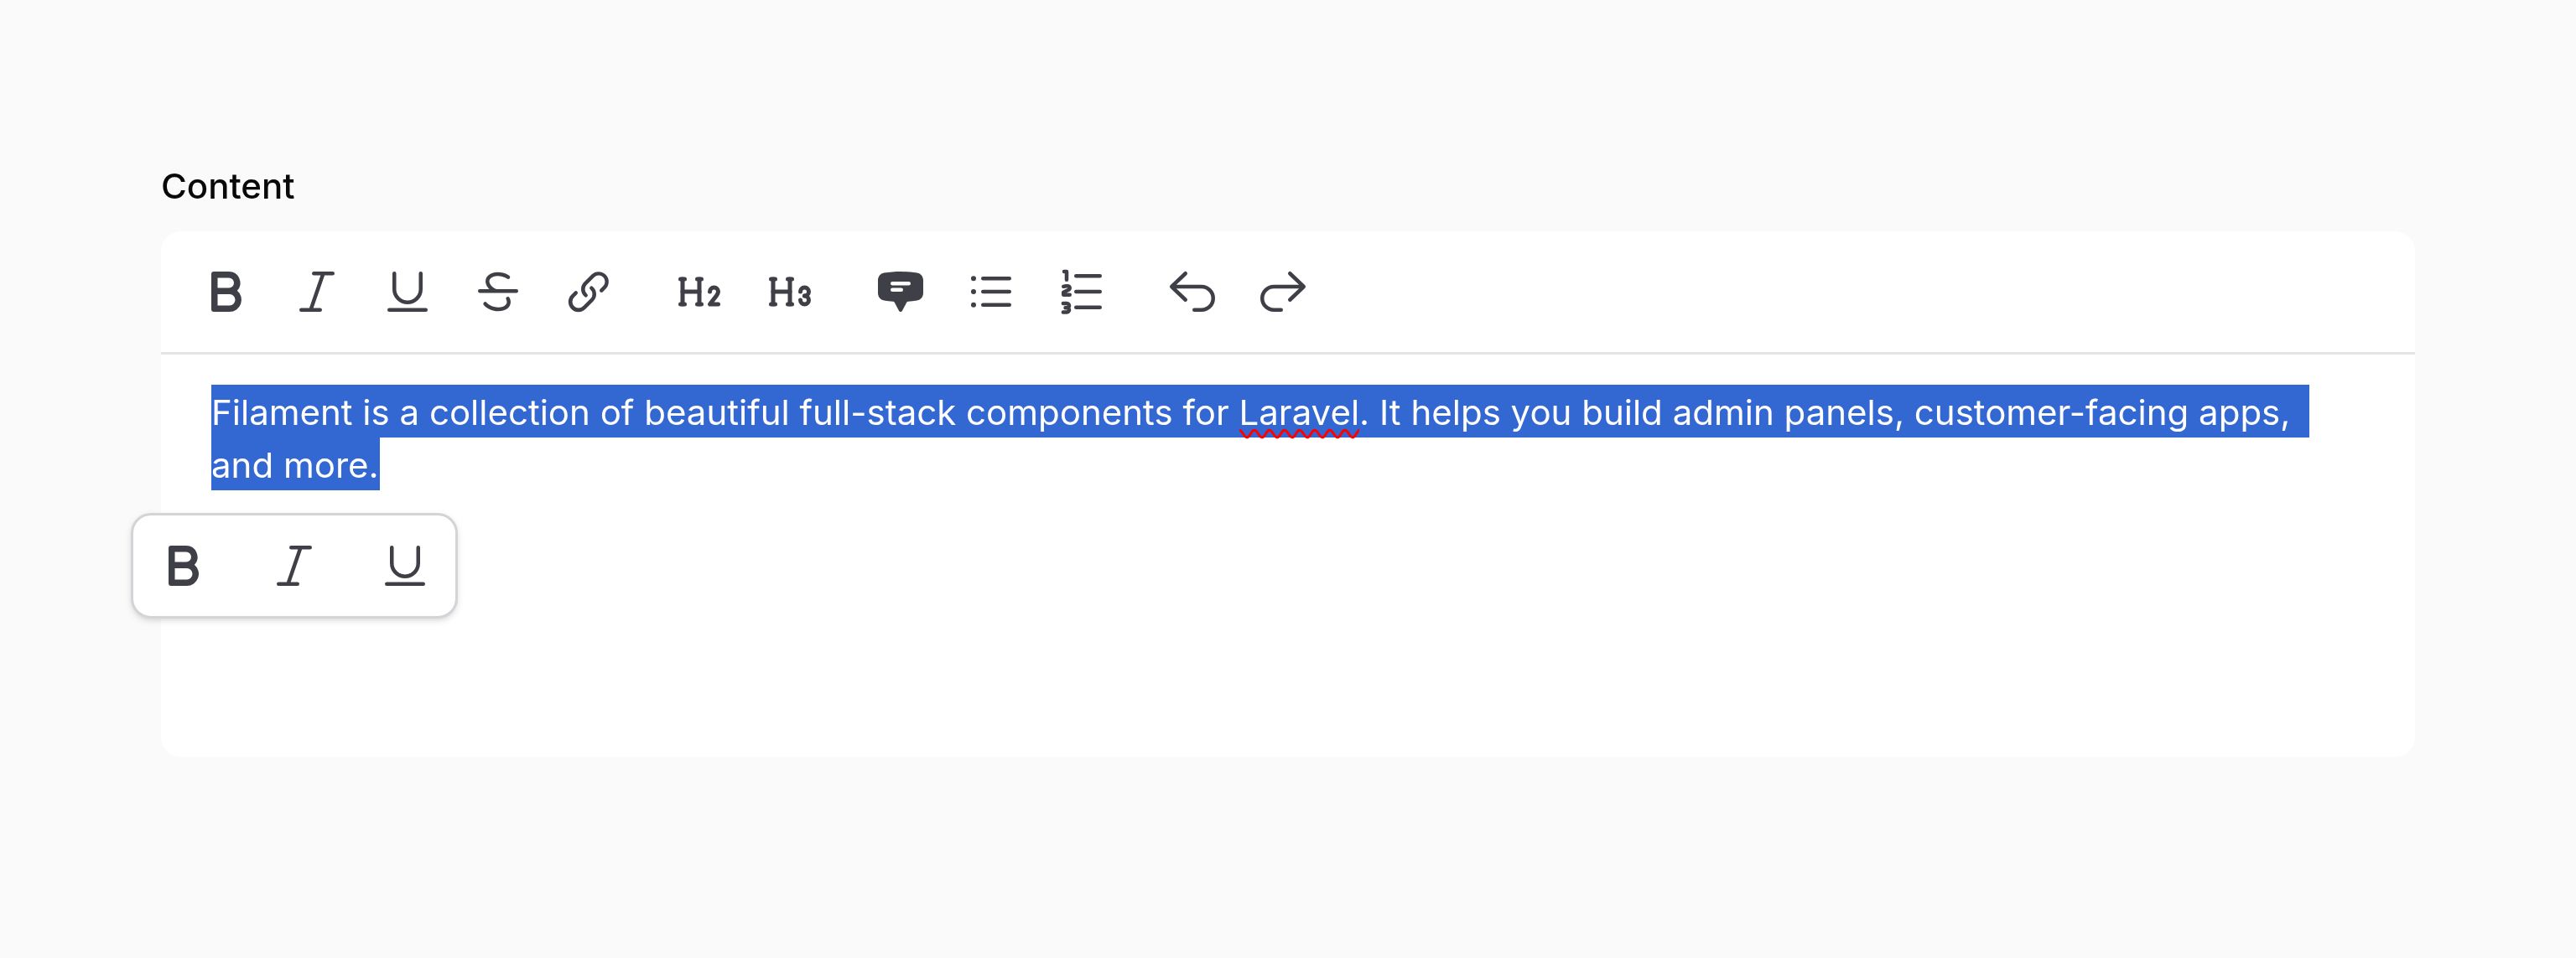
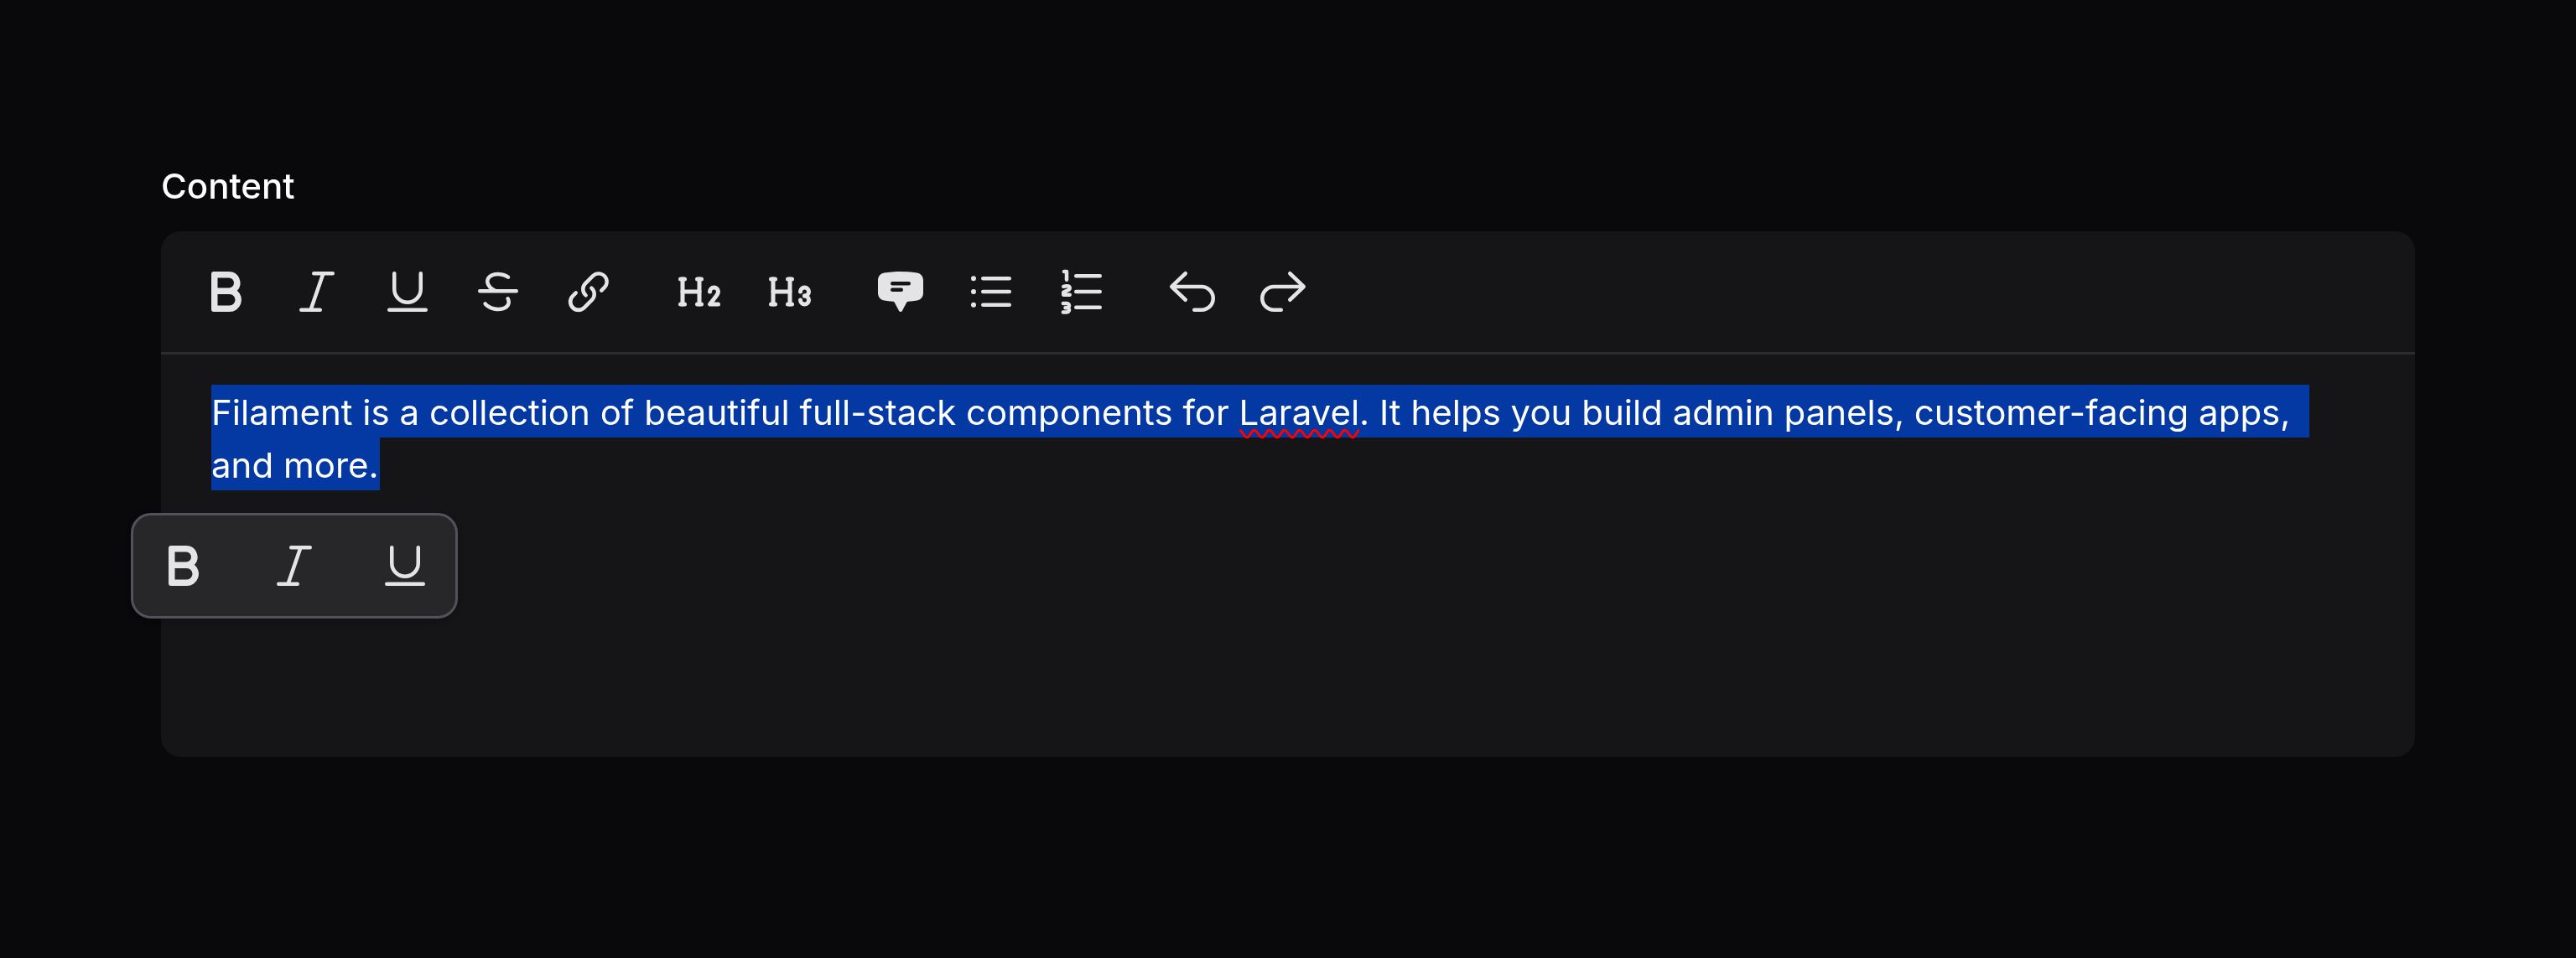
如果工具栏内容过于拥挤,可以使用浮动工具栏——即仅当光标位于特定类型的节点内时,在光标下方显示的工具栏。这样既能保持主工具栏整洁,又能确保在需要时可以使用其他工具。
你可以使用 floatingToolbars() 方法,自定义光标置于特定节点内时显示的浮动工具栏。
在下方的示例中,当光标位于段落节点内时,会显示一个包含加粗、斜体等按钮的浮动工具栏;当光标位于标题节点内时,显示与标题相关的按钮;而当光标位于表格内时,则显示针对表格的控制选项。
use Filament\Forms\Components\RichEditor;

RichEditor::make('content')
    ->floatingToolbars([
        'paragraph' => [
            'bold', 'italic', 'underline', 'strike', 'subscript', 'superscript',
        ],
        'heading' => [
            'h1', 'h2', 'h3',
        ],
        'table' => [
            'tableAddColumnBefore', 'tableAddColumnAfter', 'tableDeleteColumn',
            'tableAddRowBefore', 'tableAddRowAfter', 'tableDeleteRow',
            'tableMergeCells', 'tableSplitCell',
            'tableToggleHeaderRow', 'tableToggleHeaderCell',
            'tableDelete',
        ],
    ])
将工具栏按钮组合为下拉菜单
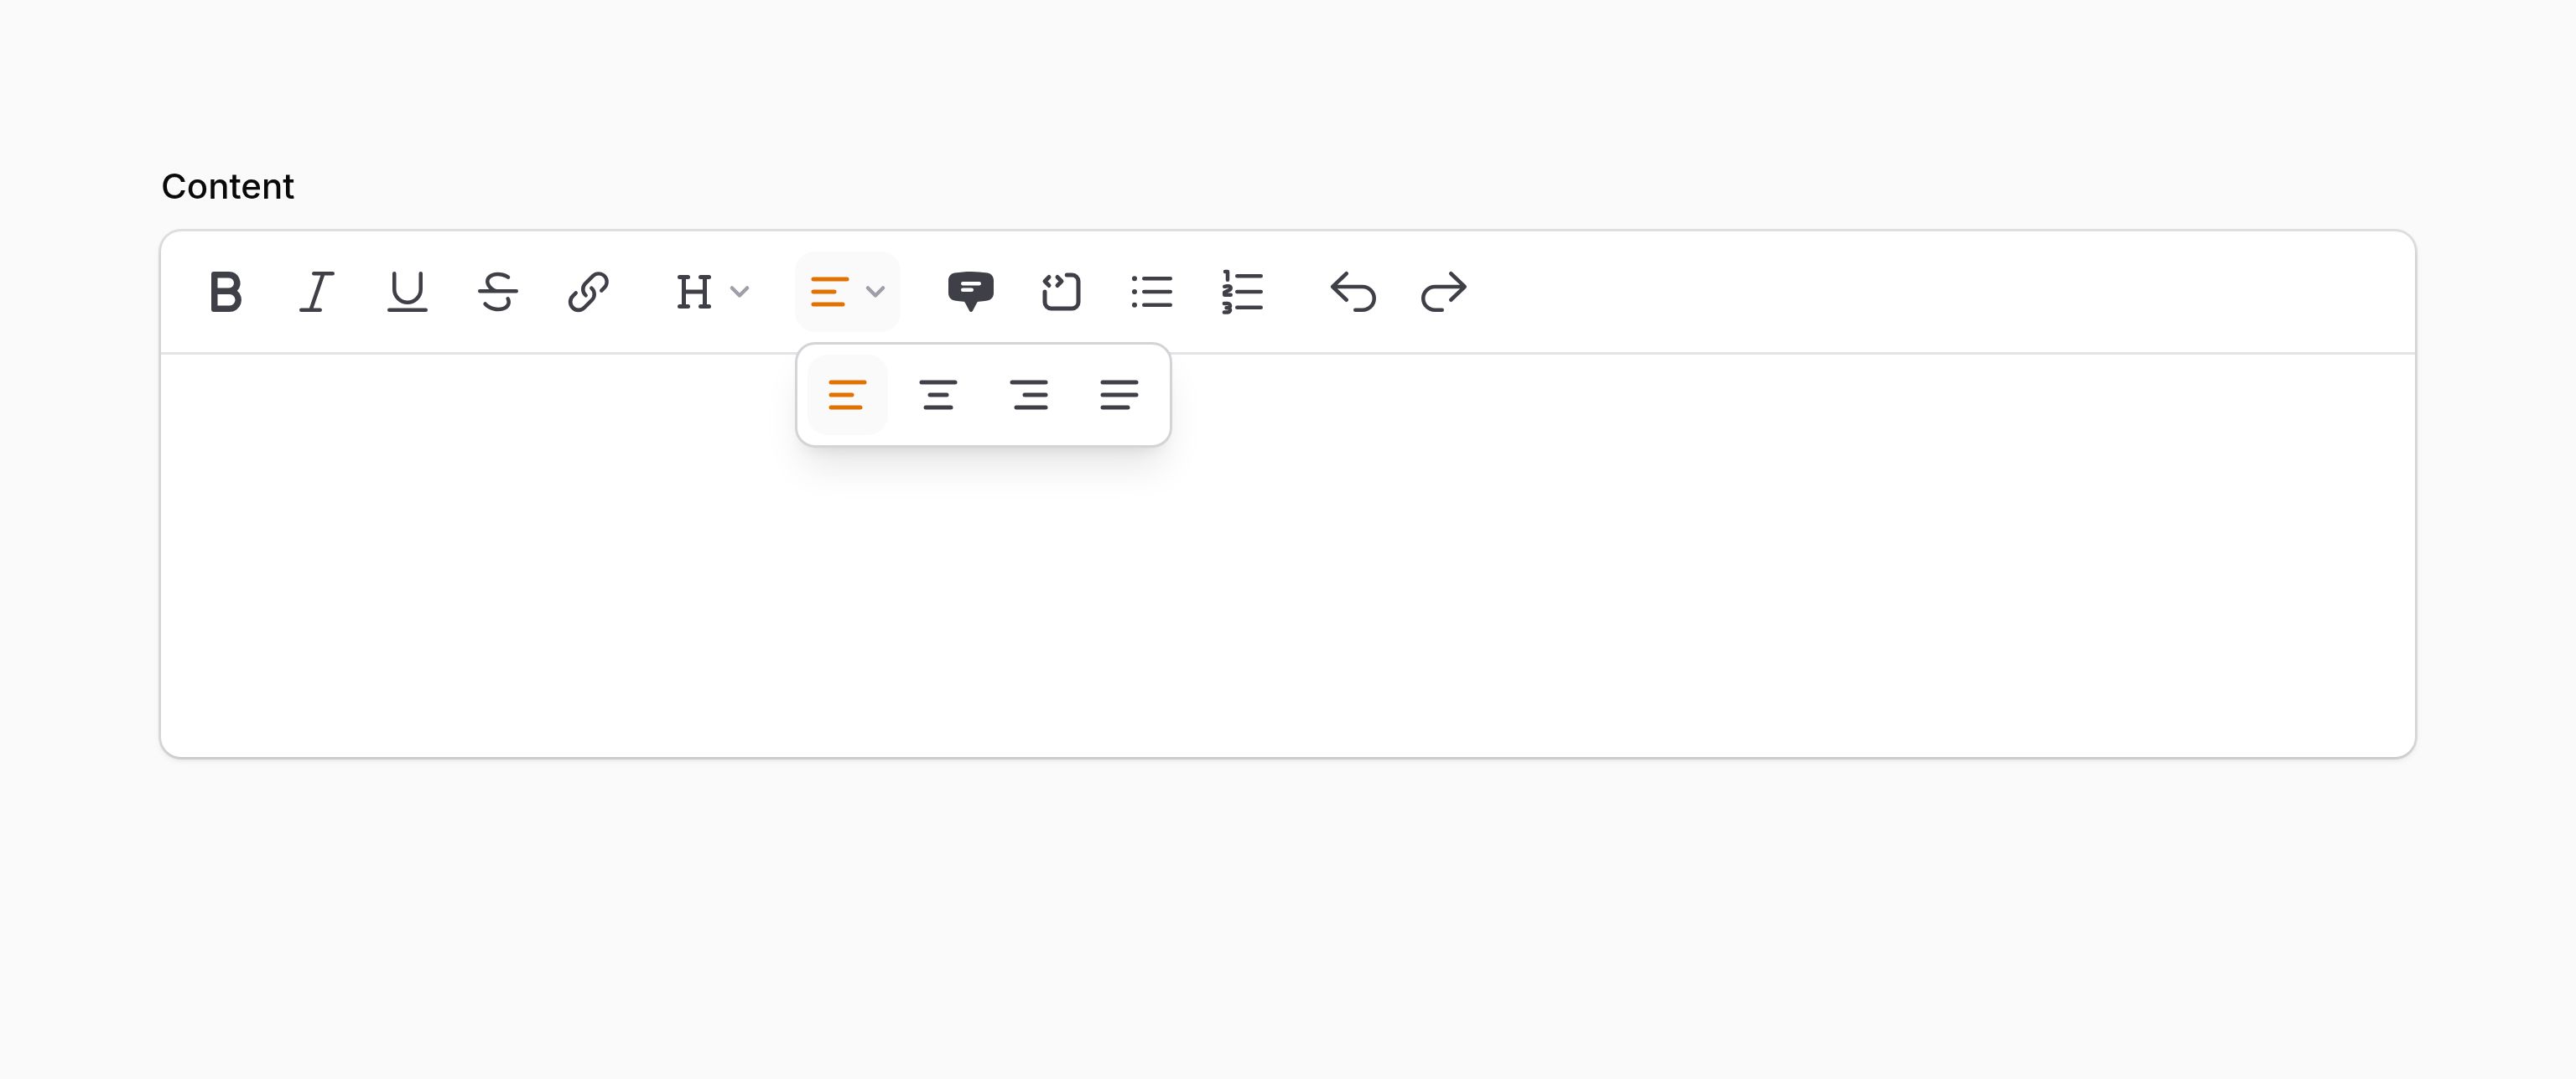
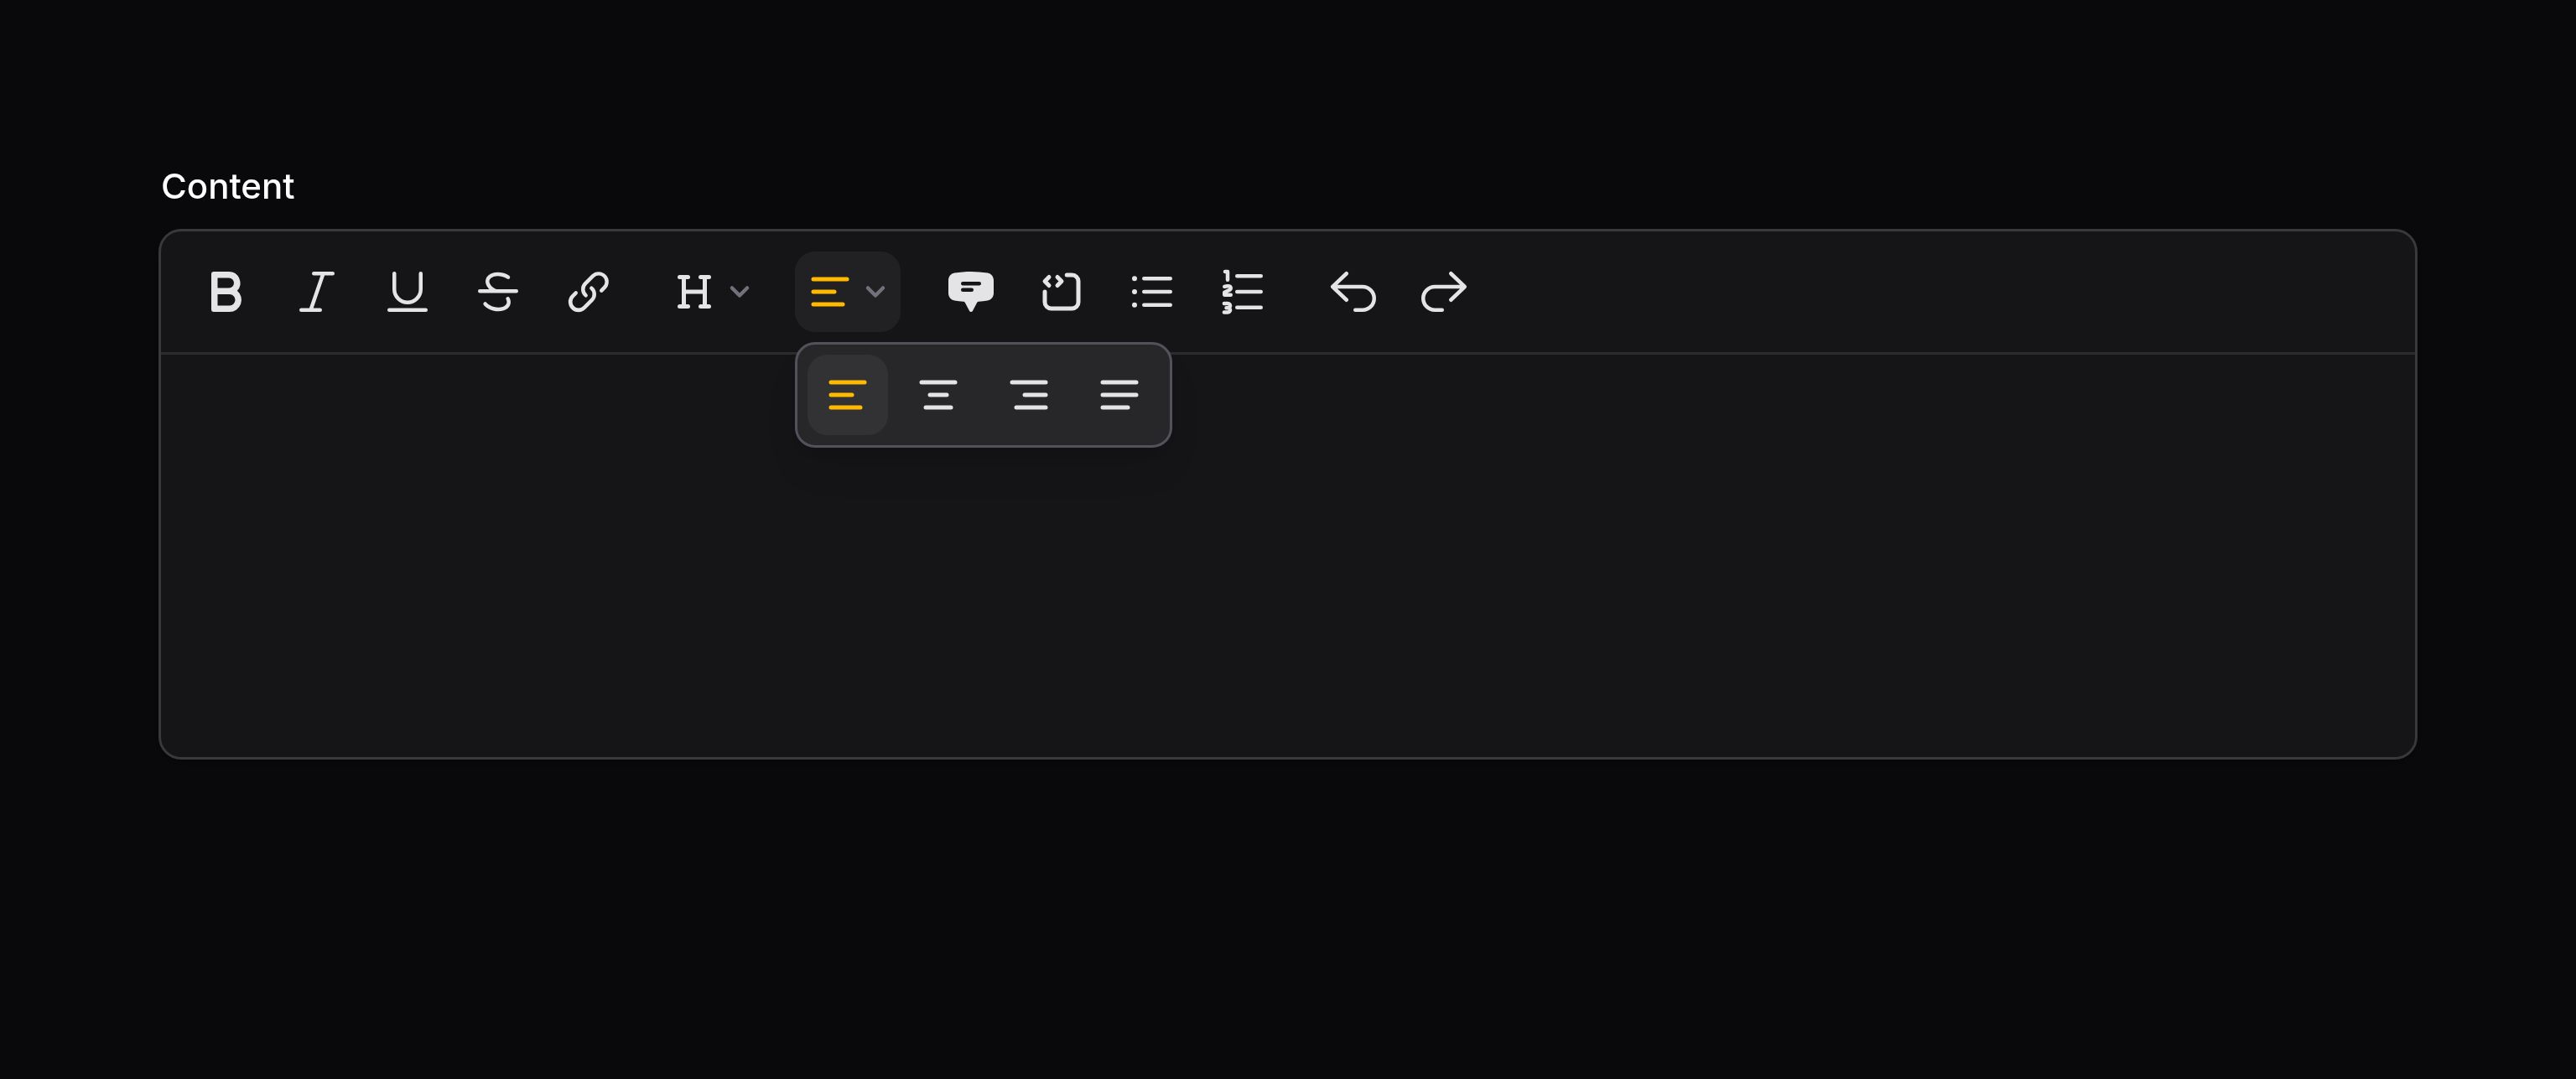
你可以使用 ToolbarButtonGroup 将相关的工具栏按钮组合成一个下拉菜单。第一个参数是用于下拉菜单工具提示(tooltip)和无障碍的标签,第二个参数是包含在下拉菜单中的按钮名称数组:
use Filament\Forms\Components\RichEditor;
use Filament\Forms\Components\RichEditor\ToolbarButtonGroup;

RichEditor::make('content')
    ->toolbarButtons([
        ['bold', 'italic', 'underline', 'strike'],
        [ToolbarButtonGroup::make('Paragraph', ['paragraph', 'h1', 'h2', 'h3'])],
        [ToolbarButtonGroup::make('Alignment', ['alignStart', 'alignCenter', 'alignEnd', 'alignJustify'])],
        ['blockquote', 'codeBlock', 'bulletList', 'orderedList'],
        ['undo', 'redo'],
    ])
默认情况下,第一个按钮的图标被用作下拉触发器,并会根据当前激活的按钮动态更新。点击该触发器即可显示分组的按钮。
你可以使用 icon() 方法为下拉触发器设置固定图标。一旦设置了自定义图标,触发器图标将保持固定,不会随激活按钮的变化而改变:
use Filament\Forms\Components\RichEditor;
use Filament\Forms\Components\RichEditor\ToolbarButtonGroup;

RichEditor::make('content')
    ->toolbarButtons([
        ['bold', 'italic', 'underline', 'strike'],
        [ToolbarButtonGroup::make('Heading', ['h1', 'h2', 'h3'])->icon('fi-o-heading')],
        [ToolbarButtonGroup::make('Alignment', ['alignStart', 'alignCenter', 'alignEnd', 'alignJustify'])],
        ['blockquote', 'codeBlock', 'bulletList', 'orderedList'],
        ['undo', 'redo'],
    ])
使用文本化的工具栏下拉按钮
默认情况下,工具栏下拉按钮仅显示图标。如果你希望在下拉选项中同时显示图标和文本标签,可以在 ToolbarButtonGroup 上使用 textualButtons() 方法:
use Filament\Forms\Components\RichEditor;
use Filament\Forms\Components\RichEditor\ToolbarButtonGroup;

RichEditor::make('content')
    ->toolbarButtons([
        ['bold', 'italic', 'underline', 'strike', 'link'],
        [ToolbarButtonGroup::make('Paragraph', ['paragraph', 'h1', 'h2', 'h3'])->textualButtons()],
        [ToolbarButtonGroup::make('Alignment', ['alignStart', 'alignCenter', 'alignEnd', 'alignJustify'])],
        ['blockquote', 'codeBlock', 'bulletList', 'orderedList'],
        ['undo', 'redo'],
    ])
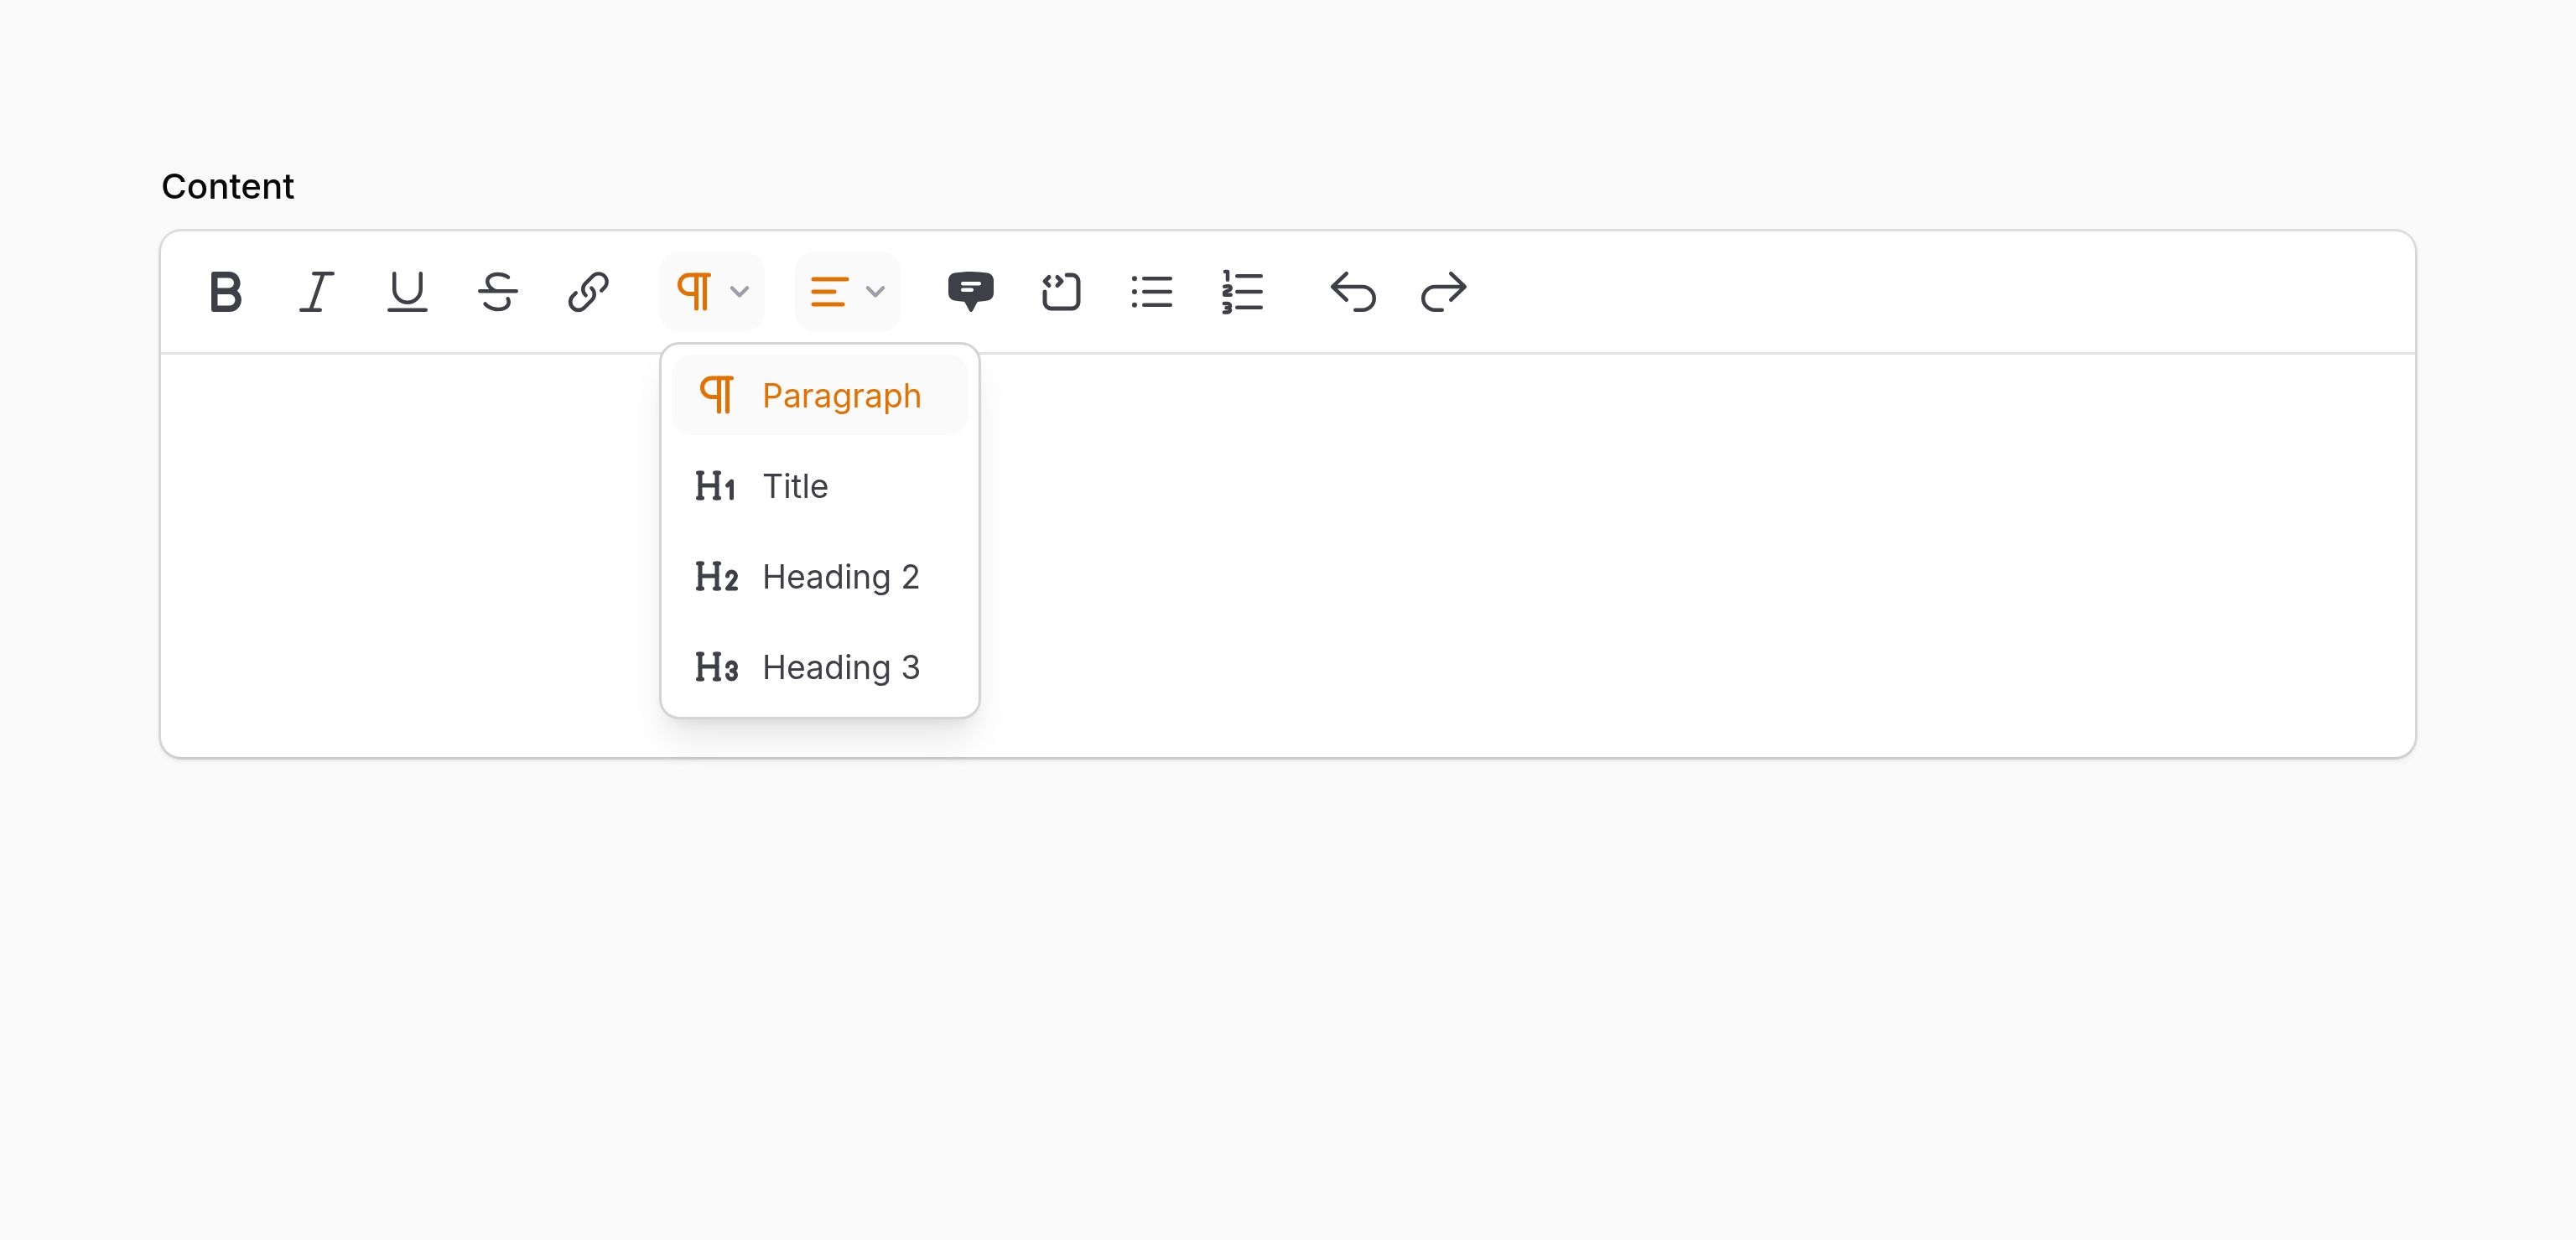
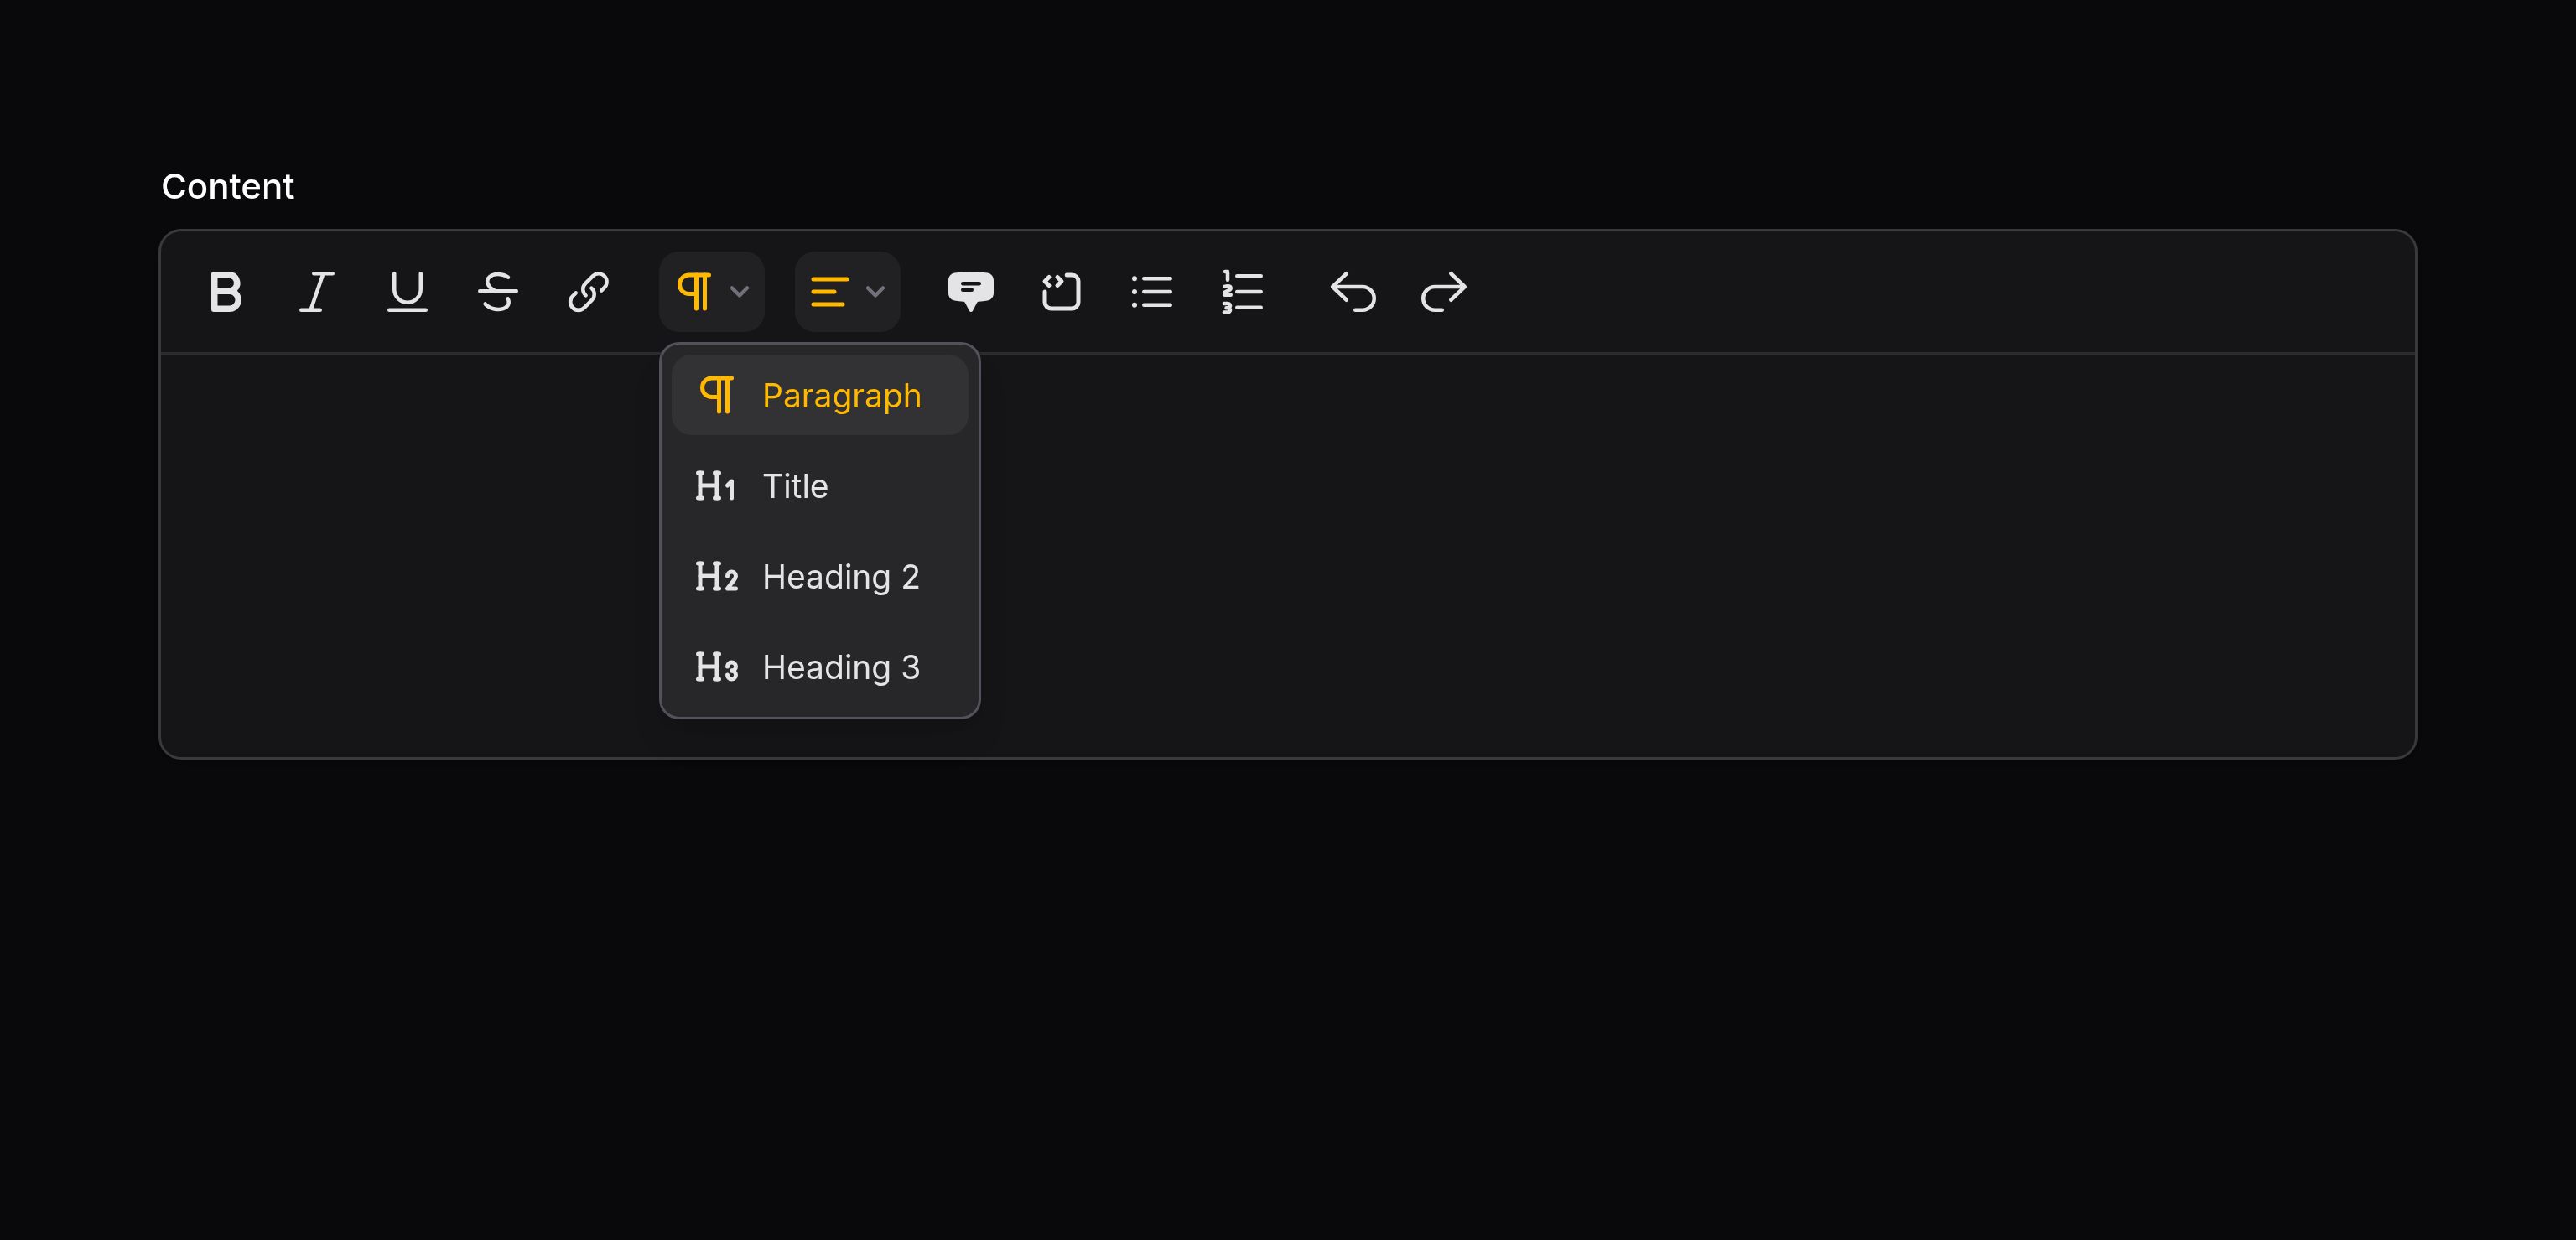
本例中,Paragraph 下拉菜单的选项同时显示图标和文本标签(e.g., “Paragraph”, “Heading 1”),而 Alignment 下拉菜单则仍然仅显示图标。
设置高度
你可以通过定义 minHeight() 和 maxHeight() 方法来控制编辑器的高度,这些方法接受任何 CSS 长度值:
use Filament\Forms\Components\RichEditor;

RichEditor::make('content')
    ->minHeight('12rem')
    ->maxHeight('24rem')
编辑器默认的最小高度为 10rem。当内容高度超过 maxHeight() 设定的值时,编辑器将停止自动增高并变为可滚动状态。这两个方法既可以单独使用,也可以组合使用:minHeight() 用于设定初始高度(同时允许编辑器继续增高),而 maxHeight() 则用于限制编辑器的最大高度。向 minHeight() 传入 null 可恢复编辑器默认的 3rem 最小高度,向 maxHeight() 传入 null 则可取消最大高度限制。即使在编辑器处于禁用状态时,这些限制依然有效。
As well as allowing static values, the minHeight() and maxHeight() methods also accept functions to dynamically calculate them. You can inject various utilities into the functions as parameters.
了解更多 utility 注入详情。 | Utility | 类型 | 参数 | 描述 |
|---|---|---|---|
| Field | Filament\Forms\Components\Field | $component | The current field component instance. |
| Get function | Filament\Schemas\Components\Utilities\Get | $get | A function for retrieving values from the current form data. Validation is not run. |
| Livewire | Livewire\Component | $livewire | The Livewire component instance. |
| Eloquent model FQN | ?string<Illuminate\Database\Eloquent\Model> | $model | The Eloquent model FQN for the current schema. |
| Operation | string | $operation | The current operation being performed by the schema. Usually create, edit, or view. |
| Raw state | mixed | $rawState | The current value of the field, before state casts were applied. Validation is not run. |
| Eloquent record | ?Illuminate\Database\Eloquent\Model | $record | The Eloquent record for the current schema. |
| State | mixed | $state | The current value of the field. Validation is not run. |
自定义文本颜色
富文本编辑器包含一个用于设置行内文本样式的颜色工具。默认情况下,它使用 Tailwind CSS 调色板。在浅色模式下,文本使用 600 阶色值;在深色模式下,则使用 400 阶色值。
你可以使用 textColors() 方法自定义颜色选择器中可用的颜色:
use Filament\Forms\Components\RichEditor;

RichEditor::make('content')
    ->textColors([
        '#ef4444' => 'Red',
        '#10b981' => 'Green',
        '#0ea5e9' => 'Sky',
    ])
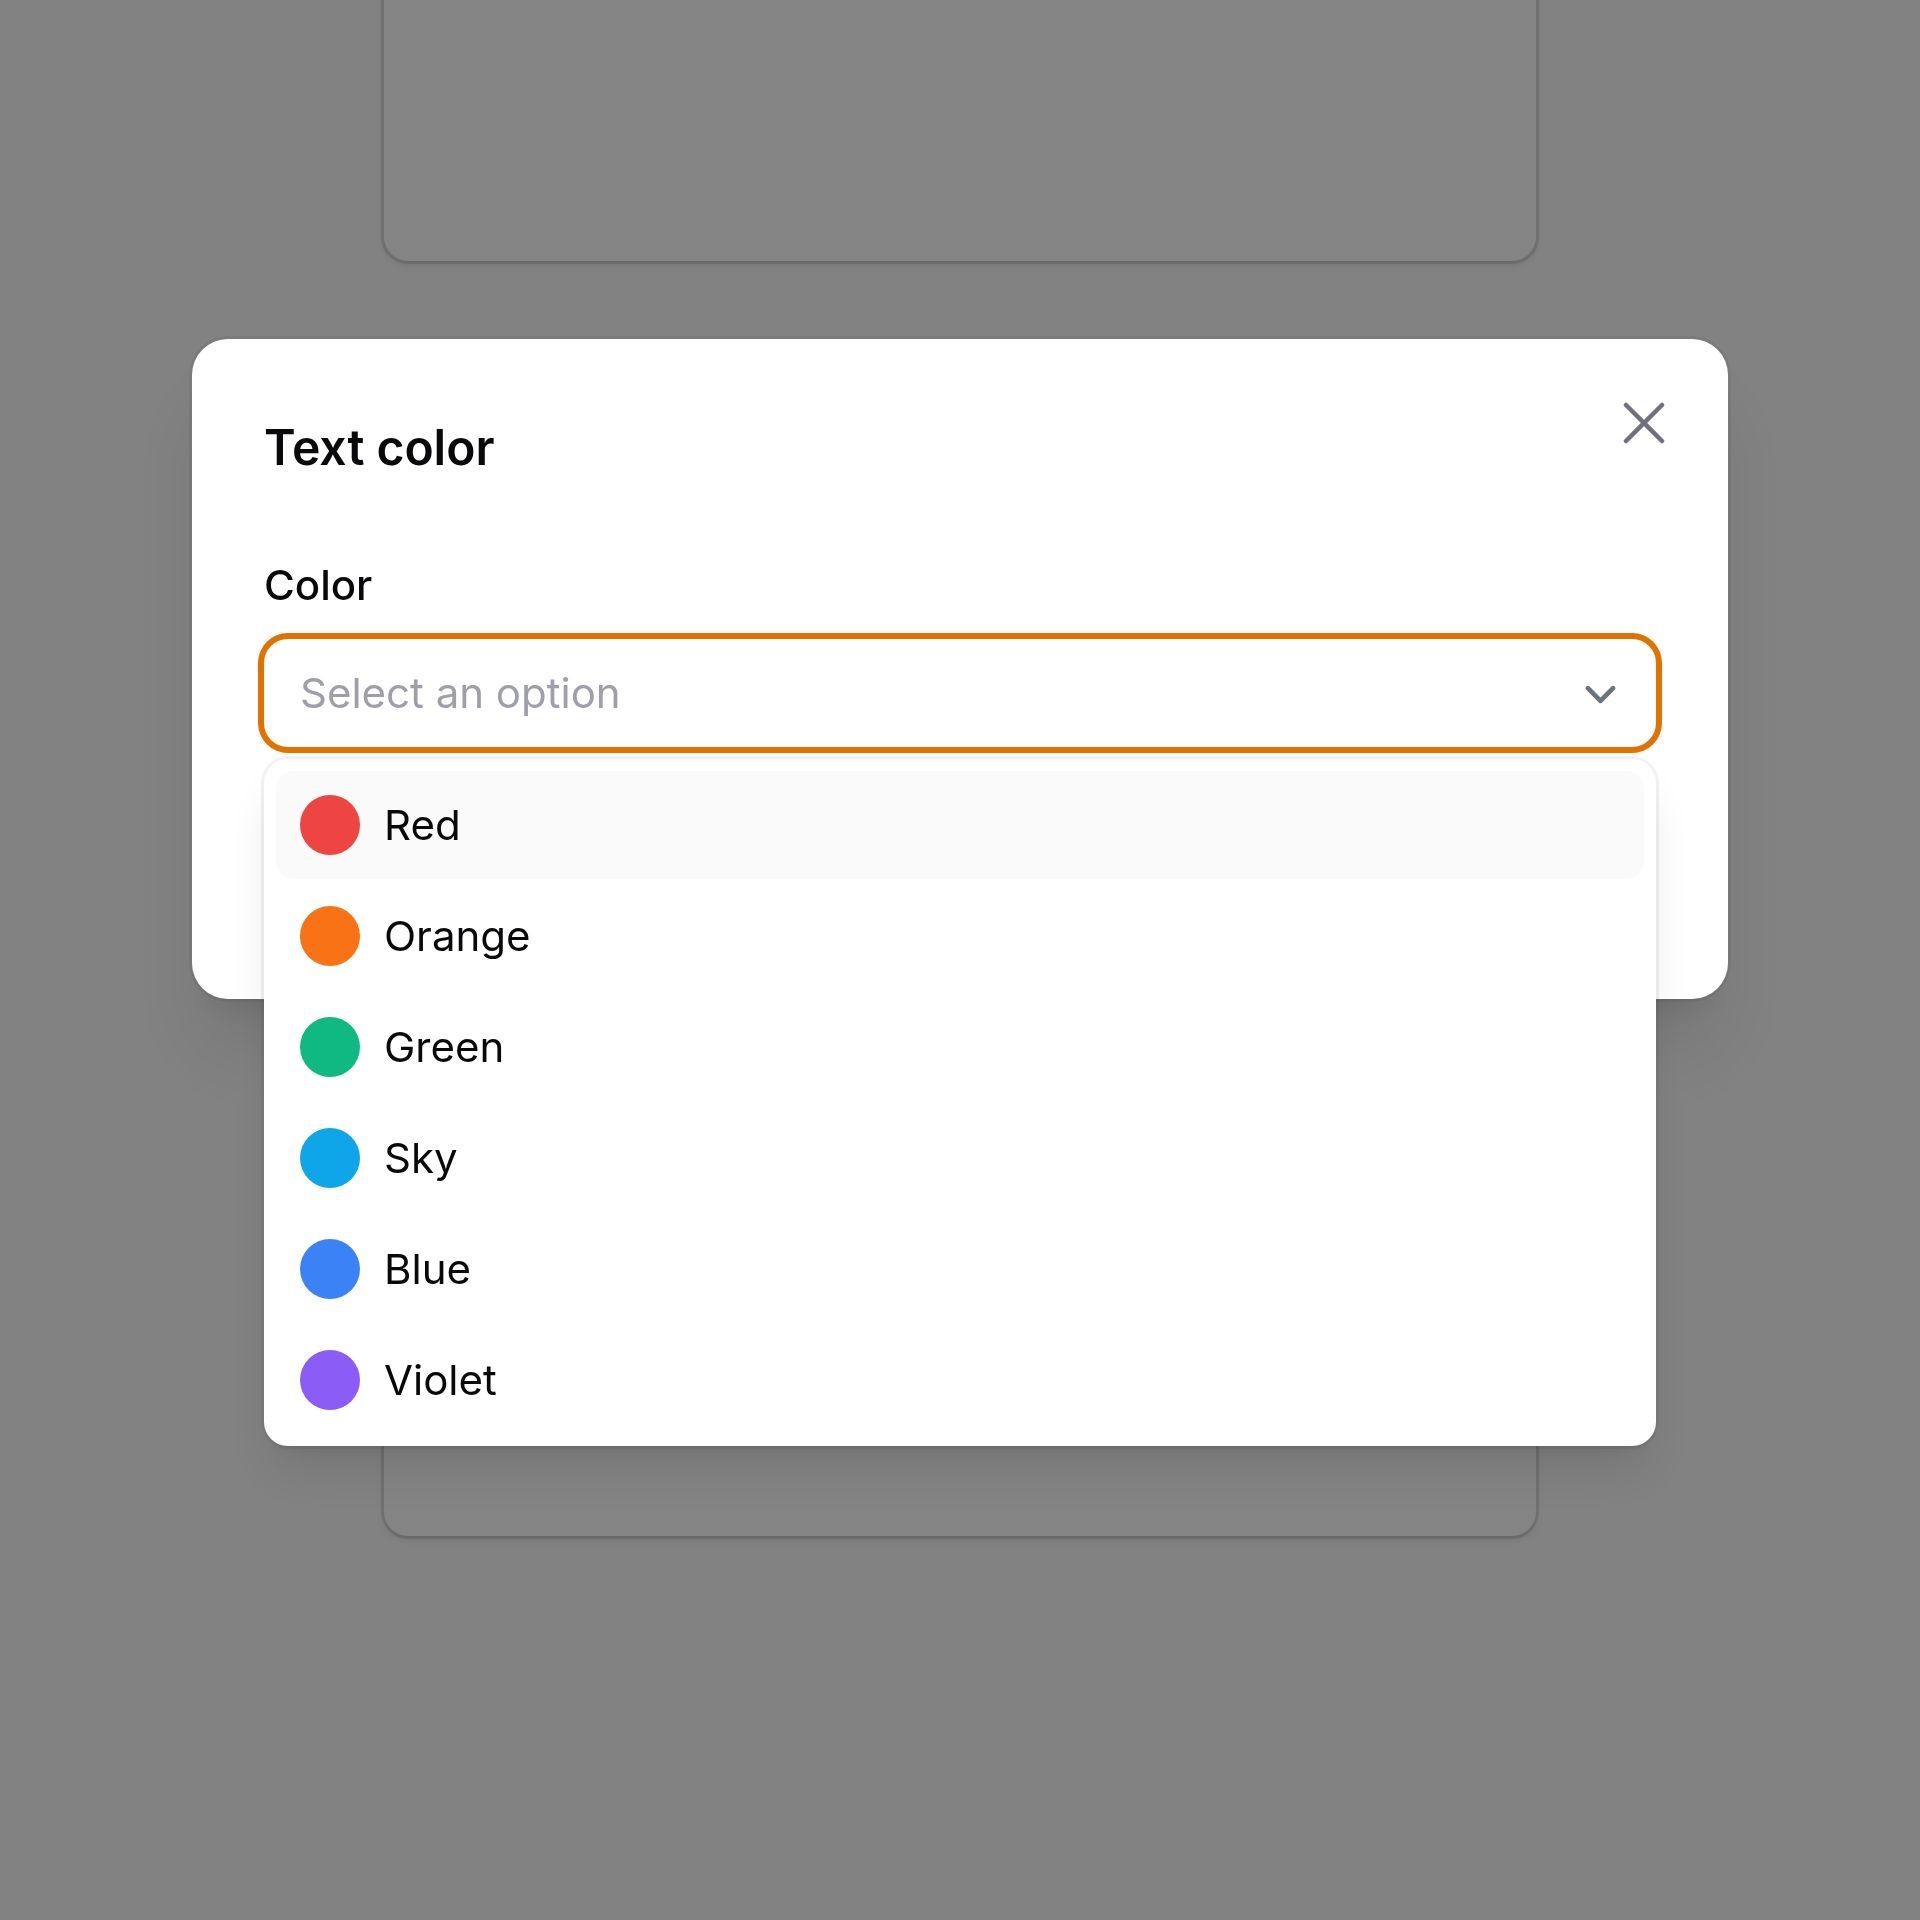
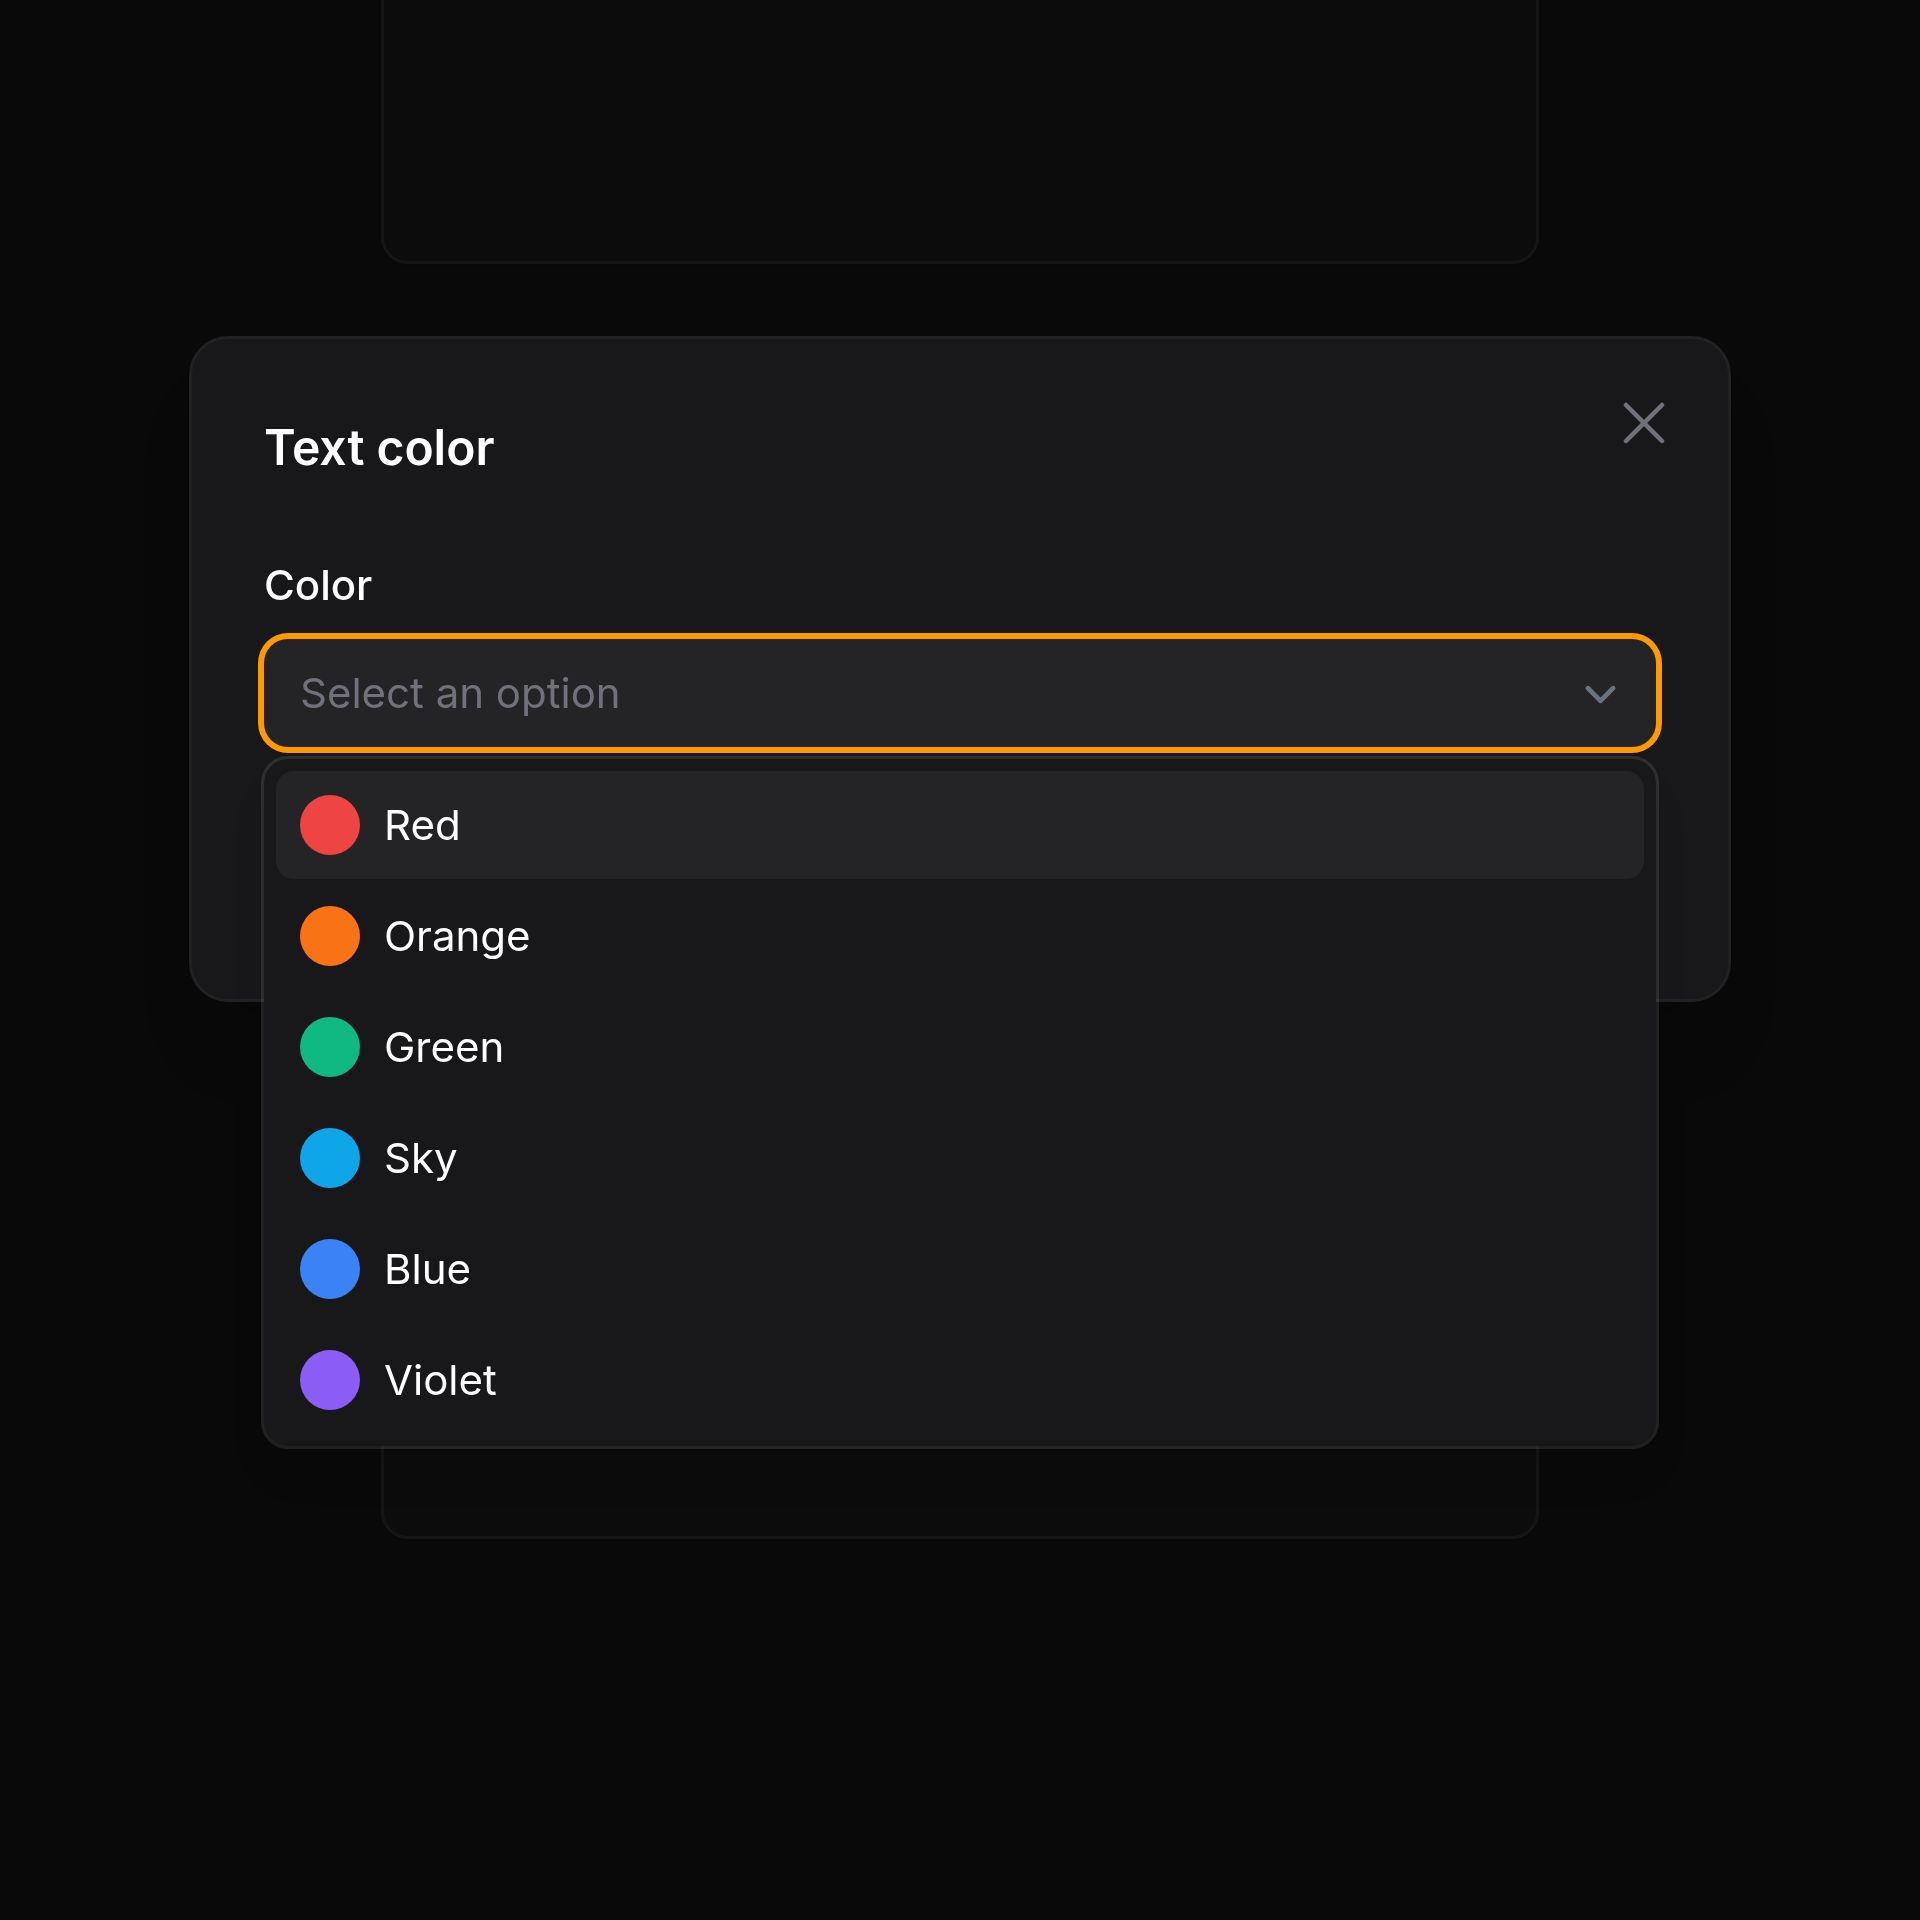
如果你希望为浅色模式和深色模式定义不同的颜色,可以使用 TextColor 对象来定义颜色:
use Filament\Forms\Components\RichEditor;
use Filament\Forms\Components\RichEditor\TextColor;

RichEditor::make('content')
    ->textColors([
        'brand' => TextColor::make('Brand', '#0ea5e9'),
        'warning' => TextColor::make('Warning', '#f59e0b', darkColor: '#fbbf24'),
    ])
如果你希望在现有的 Tailwind 調色板中添加新颜色,可以将你的颜色合并到 TextColor::getDefaults() 数组中:
use Filament\Forms\Components\RichEditor;
use Filament\Forms\Components\RichEditor\TextColor;

RichEditor::make('content')
    ->textColors([
        'brand' => TextColor::make('Brand', '#0ea5e9'),
        'warning' => TextColor::make('Warning', '#f59e0b', darkColor: '#fbbf24'),
        ...TextColor::getDefaults(),
    ])
使用 TextColor 对象时,数组的键(key)会作为 <span> 标签上的 data-color 属性进行存储,从而允许你在 CSS 中引用该颜色。若将颜色直接作为数组的值(value),则实际的颜色值(例如 HEX 字符串)会被存储为 data-color 属性。
你还可以将 textColors() 传递给内容渲染器和富文本内容属性,以确保服务端渲染与编辑器配置保持一致。
此外,你还可以使用 customTextColors() 方法,允许用户选择预定义列表之外的自定义颜色:
use Filament\Forms\Components\RichEditor;

RichEditor::make('content')
    ->textColors([
        // ...
    ])
    ->customTextColors()
您无需在富文本内容渲染器上使用 customTextColors(),因为它会自动渲染内容中使用的任何自定义颜色。
渲染富文本内容
如果你将内容存储为 JSON而非 HTML,或者你的内容需要处理以注入私有图片 URL等,你将需要使用 Filament 中 RichContentRenderer 工具来输出 HTML:
use Filament\Forms\Components\RichEditor\RichContentRenderer;

RichContentRenderer::make($record->content)->toHtml()
toHtml() 方法返回一个字符串。如果你想要在 Blade 视图中输出 HTML 而不进行转义,你可以输出 RichContentRender 而不调用 toHtml()
{{ \Filament\Forms\Components\RichEditor\RichContentRenderer::make($record->content) }}
如果你已经配置了编辑器的文件附件行为以修改上传文件的磁盘或可见性,则还必须将这些设置传递给渲染器,以确保生成正确的 URL:
use Filament\Forms\Components\RichEditor\RichContentRenderer;

RichContentRenderer::make($record->content)
    ->fileAttachmentsDisk('s3')
    ->fileAttachmentsVisibility('private')
    ->toHtml()
如果你在富文本编辑器中使用了自定义 Block,你可以将自定义 Block 数组传入到渲染器,以确保其正确渲染:
use Filament\Forms\Components\RichEditor\RichContentRenderer;

RichContentRenderer::make($record->content)
    ->customBlocks([
        HeroBlock::class => [
            'categoryUrl' => $record->category->getUrl(),
        ],
        CallToActionBlock::class,
    ])
    ->toHtml()
如果你要使用合并标签,你可以传入值数组来替换要合并标签:
use Filament\Forms\Components\RichEditor\RichContentRenderer;

RichContentRenderer::make($record->content)
    ->mergeTags([
        'name' => $record->user->name,
        'today' => now()->toFormattedDateString(),
    ])
    ->toHtml()
如果你使用了自定义文本颜色,可以向渲染器传入一个颜色数组,以确保颜色能被正确渲染:
use Filament\Forms\Components\RichEditor\RichContentRenderer;
use Filament\Forms\Components\RichEditor\TextColor;

RichContentRenderer::make($record->content)
    ->textColors([
        'brand' => TextColor::make('Brand', '#0ea5e9', darkColor: '#38bdf8'),
    ])
    ->toHtml();
设置渲染内容的样式
富文本编辑器生成的 HTML 会结合 HTML 元素、CSS 类名和行内样式来渲染内容,具体取决于编辑器中使用的功能。如果你在 Filament 表格列或信息列表条目中使用 prose() 来渲染内容,Filament 会自动应用必要的样式。如果你是在自定义的 Blade 视图中输出内容,则可能需要添加一些额外的样式,以确保内容渲染正确。
设置内容样式的一种方法是使用 Tailwind CSS Typography 插件。该插件为常见的 HTML 元素(如标题、段落、列表和表格)提供了一套预定义的样式。你可以通过在容器元素上应用 prose 类名来使用这些样式:
<div class="prose dark:prose-invert">
    {!! \Filament\Forms\Components\RichEditor\RichContentRenderer::make($record->content) !!}
</div>
不过,诸如网格布局和文本颜色等特性,需要 Tailwind CSS Typography 插件未包含的额外样式。Filament 提供了自带的 fi-prose CSS 类来应用这些额外样式;任何加载了 Filament 的 vendor/filament/support/resources/css/index.css 文件的应用均可使用该类。虽然其样式与 prose 类有所不同,但与 Filament 的设计系统更为契合:
<div class="fi-prose">
    {!! \Filament\Forms\Components\RichEditor\RichContentRenderer::make($record->content) !!}
</div>
安全
默认情况下,该编辑器输出原始 HTML,并将其发送到后端。攻击者能够拦截组件的值,并将不同的原始 HTML 字符串发送到后端。因此,从富文本编辑器输出 HTML 时,对其进行净化非常重要;否则,你的网站可能会暴露于跨站点脚本(XSS)漏洞。
当 Filament 在 TextColumn 和 TextEntry 等组件中从数据库输出原始 HTML 时,它会对其进行净化,以删除任何危险的 JavaScript。但是,如果你在自己的 Blade 视图中输出来自富文本编辑器的 HTML,这是你的责任。一种选择是使用 Filament 的 sanctizeHtml() 助手函数来执行此操作,这与我们在上述组件中用于净化 HTML 的工具相同:
{!! str($record->content)->sanitizeHtml() !!}
如果你将内容存储为 JSON而非 HTML,或者你的内容需要处理以注入私有图像 URL或类似行为,你可以使用内容渲染器以输出 HTML。这将为你自动净化 HTML,因此你无需为此担心。
NOTE
Filament 内置的 HTML 净化器允许使用行内 style 属性,以支持字体颜色、文本高亮和图像尺寸调整等富文本格式功能。这意味着诸如 background: url(...) 或 position: fixed 之类的 CSS 属性不会在 HTML 清洗过程中被移除。如果你的内容来自不可信用户,建议考虑限制默认配置。有关如何自定义清洗器的详细信息,请参阅安全文档。
上传图片到编辑器
默认情况下,上传的图片被公开保存到你的存储磁盘中,以便保存到数据库中的富文本内容可以在任何地方轻松地输出到。你可以使用配置方法,自定义图片的上传方式:
use Filament\Forms\Components\RichEditor;

RichEditor::make('content')
    ->fileAttachmentsDisk('s3')
    ->fileAttachmentsDirectory('attachments')
    ->fileAttachmentsVisibility('private')
除了允许静态值之外,fileAttachmentsDisk()、fileAttachmentsDirectory(), 和 fileAttachmentsVisibility() 方法也接受函数来动态计算它们的值。你可以将各种 utility 作为参数注入到函数中。
了解更多 utility 注入详情。 | Utility | 类型 | 参数 | 描述 |
|---|---|---|---|
| Field | Filament\Forms\Components\Field | $component | The current field component instance. |
| Get function | Filament\Schemas\Components\Utilities\Get | $get | A function for retrieving values from the current form data. Validation is not run. |
| Livewire | Livewire\Component | $livewire | The Livewire component instance. |
| Eloquent model FQN | ?string<Illuminate\Database\Eloquent\Model> | $model | The Eloquent model FQN for the current schema. |
| Operation | string | $operation | The current operation being performed by the schema. Usually create, edit, or view. |
| Raw state | mixed | $rawState | The current value of the field, before state casts were applied. Validation is not run. |
| Eloquent record | ?Illuminate\Database\Eloquent\Model | $record | The Eloquent record for the current schema. |
| State | mixed | $state | The current value of the field. Validation is not run. |
TIP
Filament 也支持使用 spatie/laravel-medialibrary 来存储富文本文件附件。请查阅插件文档了解更多信息。
在编辑器中使用私有图像
在编辑器中使用私有图像会增加处理流程的复杂性,因为私有图像无法通过永久 URL 直接访问。每次加载编辑器或渲染其内容时,都需要为每个镜像生成临时 URL,这些 URL 永远不会存储在数据库中。Filament 为图像标签添加了 data-id 属性,该属性包含图像在存储磁盘中的标识符,以便可以根据需要生成临时 URL。
使用私有图像渲染内容时,请确保使用 Filament 中的 RichContentRenderer 工具输出 HTML:
use Filament\Forms\Components\RichEditor\RichContentRenderer;

RichContentRenderer::make($record->content)
    ->fileAttachmentsDisk('s3')
    ->fileAttachmentsVisibility('private')
    ->toHtml()
保护文件附件 ID
图像节点上的 data-id 属性是配置存储磁盘上某个文件的标识符。当内容进行渲染时,Filament 会为其生成一个 URL——如果可见性设置为 private(私有),则生成签名的临时 URL。与其他任何 Livewire 表单字段值一样,该内容及其 data-id 属性均由客户端控制:攻击者可以拦截请求,将 data-id 修改为同一磁盘上的其他任意标识符。如果该磁盘同时也存储了属于其他用户或记录的文件,攻击者便可能导致渲染后的内容引用(并获取签名 URL)他人的文件。
Filament 默认允许这种行为,因为某些合法功能依赖于它——例如,从现有库中插入图像的操作,或“从其他记录复制”的按钮。如果你的编辑器功能不依赖此类流程,可以在该字段上调用 preventFileAttachmentPathTampering() 以启用内置检查:
use Filament\Forms\Components\RichEditor;

RichEditor::make('content')
    ->preventFileAttachmentPathTampering()
Filament 会解析记录的原始内容(针对与字段名匹配的属性,通过 $record->getOriginal() 获取),并仅允许使用已存在的 data-id 值。任何其他 data-id 都会导致字段验证失败,从而确保记录不会保存被篡改过的值;而新上传的图片则始终会被允许通过。
默认的文件附件提供者不会执行针对单条记录的范围限制——只要 data-id 对应于配置存储磁盘上的某个文件,它就会被接受,除非你启用了 preventFileAttachmentPathTampering()(或者在磁盘/目录级别隔离了上传内容)。如果你改用 spatie/laravel-medialibrary 插件作为文件附件提供者,则该保护机制已内置其中:它会通过 $media->has($file) 针对记录自身的媒体集合来校验每个 data-id,因此属于其他记录媒体的 data-id 会被自动拒绝。
NOTE
preventFileAttachmentPathTampering() needs a record on the form. Without one — for example, on a create page — every existing data-id fails validation unless the allowFilePathUsing callback approves it. New uploads are unaffected.
To apply this check to every RichEditor in your application without repeating it on each field, call configureUsing() in a service provider’s boot() method:
use Filament\Forms\Components\RichEditor;

RichEditor::configureUsing(function (RichEditor $component): void {
    $component->preventFileAttachmentPathTampering();
});
Individual fields can still opt out by calling preventFileAttachmentPathTampering(false).
Allowing additional data-id values with a callback
If your application legitimately references an identifier that is not on the record — for example, a “copy from another record” action — pass the allowFilePathUsing argument to approve it. Approved identifiers bypass the validation error:
use Filament\Forms\Components\RichEditor;

RichEditor::make('content')
    ->preventFileAttachmentPathTampering(
        allowFilePathUsing: fn (string $file): bool => str_starts_with($file, 'templates/'),
    )
You can inject various utilities into the function passed to allowFilePathUsing as parameters.
了解更多 utility 注入详情。 | Utility | 类型 | 参数 | 描述 |
|---|---|---|---|
| Field | Filament\Forms\Components\Field | $component | The current field component instance. |
| File | string | $file | The submitted `data-id` value being authorized. |
| Get function | Filament\Schemas\Components\Utilities\Get | $get | A function for retrieving values from the current form data. Validation is not run. |
| Livewire | Livewire\Component | $livewire | The Livewire component instance. |
| Eloquent model FQN | ?string<Illuminate\Database\Eloquent\Model> | $model | The Eloquent model FQN for the current schema. |
| Operation | string | $operation | The current operation being performed by the schema. Usually create, edit, or view. |
| Raw state | mixed | $rawState | The current value of the field, before state casts were applied. Validation is not run. |
| Eloquent record | ?Illuminate\Database\Eloquent\Model | $record | The Eloquent record for the current schema. |
| State | mixed | $state | The current value of the field. Validation is not run. |
The validation error message can be customized via validationMessages() using the tampered key:
use Filament\Forms\Components\RichEditor;

RichEditor::make('content')
    ->preventFileAttachmentPathTampering()
    ->validationMessages([
        'tampered' => 'The content references an image that is not permitted.',
    ])
验证上传图片
You may use the fileAttachmentsAcceptedFileTypes() method to control a list of accepted mime types for uploaded images. By default, image/png, image/jpeg, image/gif, and image/webp are accepted:
use Filament\Forms\Components\RichEditor;

RichEditor::make('content')
    ->fileAttachmentsAcceptedFileTypes(['image/png', 'image/jpeg'])
You may use the fileAttachmentsMaxSize() method to control the maximum file size for uploaded images. The size is specified in kilobytes. By default, the maximum size is 12288 KB (12 MB):
use Filament\Forms\Components\RichEditor;

RichEditor::make('content')
    ->fileAttachmentsMaxSize(5120) // 5 MB
允许用户调整图片大小
默认情况下,编辑器中的图片无法由用户调整大小。你可以使用 resizableImages() 方法启用图片大小调整功能:
use Filament\Forms\Components\RichEditor;

RichEditor::make('content')
    ->resizableImages()
启用此功能后,用户可以通过点击图片并拖动调整大小的控制柄来改变图片尺寸。在调整大小时,图片始终保持纵横比不变。
As well as allowing a static value, the resizableImages() method also accepts a function to dynamically calculate it. You can inject various utilities into the function as parameters.
了解更多 utility 注入详情。 | Utility | 类型 | 参数 | 描述 |
|---|---|---|---|
| Field | Filament\Forms\Components\Field | $component | The current field component instance. |
| Get function | Filament\Schemas\Components\Utilities\Get | $get | A function for retrieving values from the current form data. Validation is not run. |
| Livewire | Livewire\Component | $livewire | The Livewire component instance. |
| Eloquent model FQN | ?string<Illuminate\Database\Eloquent\Model> | $model | The Eloquent model FQN for the current schema. |
| Operation | string | $operation | The current operation being performed by the schema. Usually create, edit, or view. |
| Raw state | mixed | $rawState | The current value of the field, before state casts were applied. Validation is not run. |
| Eloquent record | ?Illuminate\Database\Eloquent\Model | $record | The Eloquent record for the current schema. |
| State | mixed | $state | The current value of the field. Validation is not run. |
使用自定义 Block
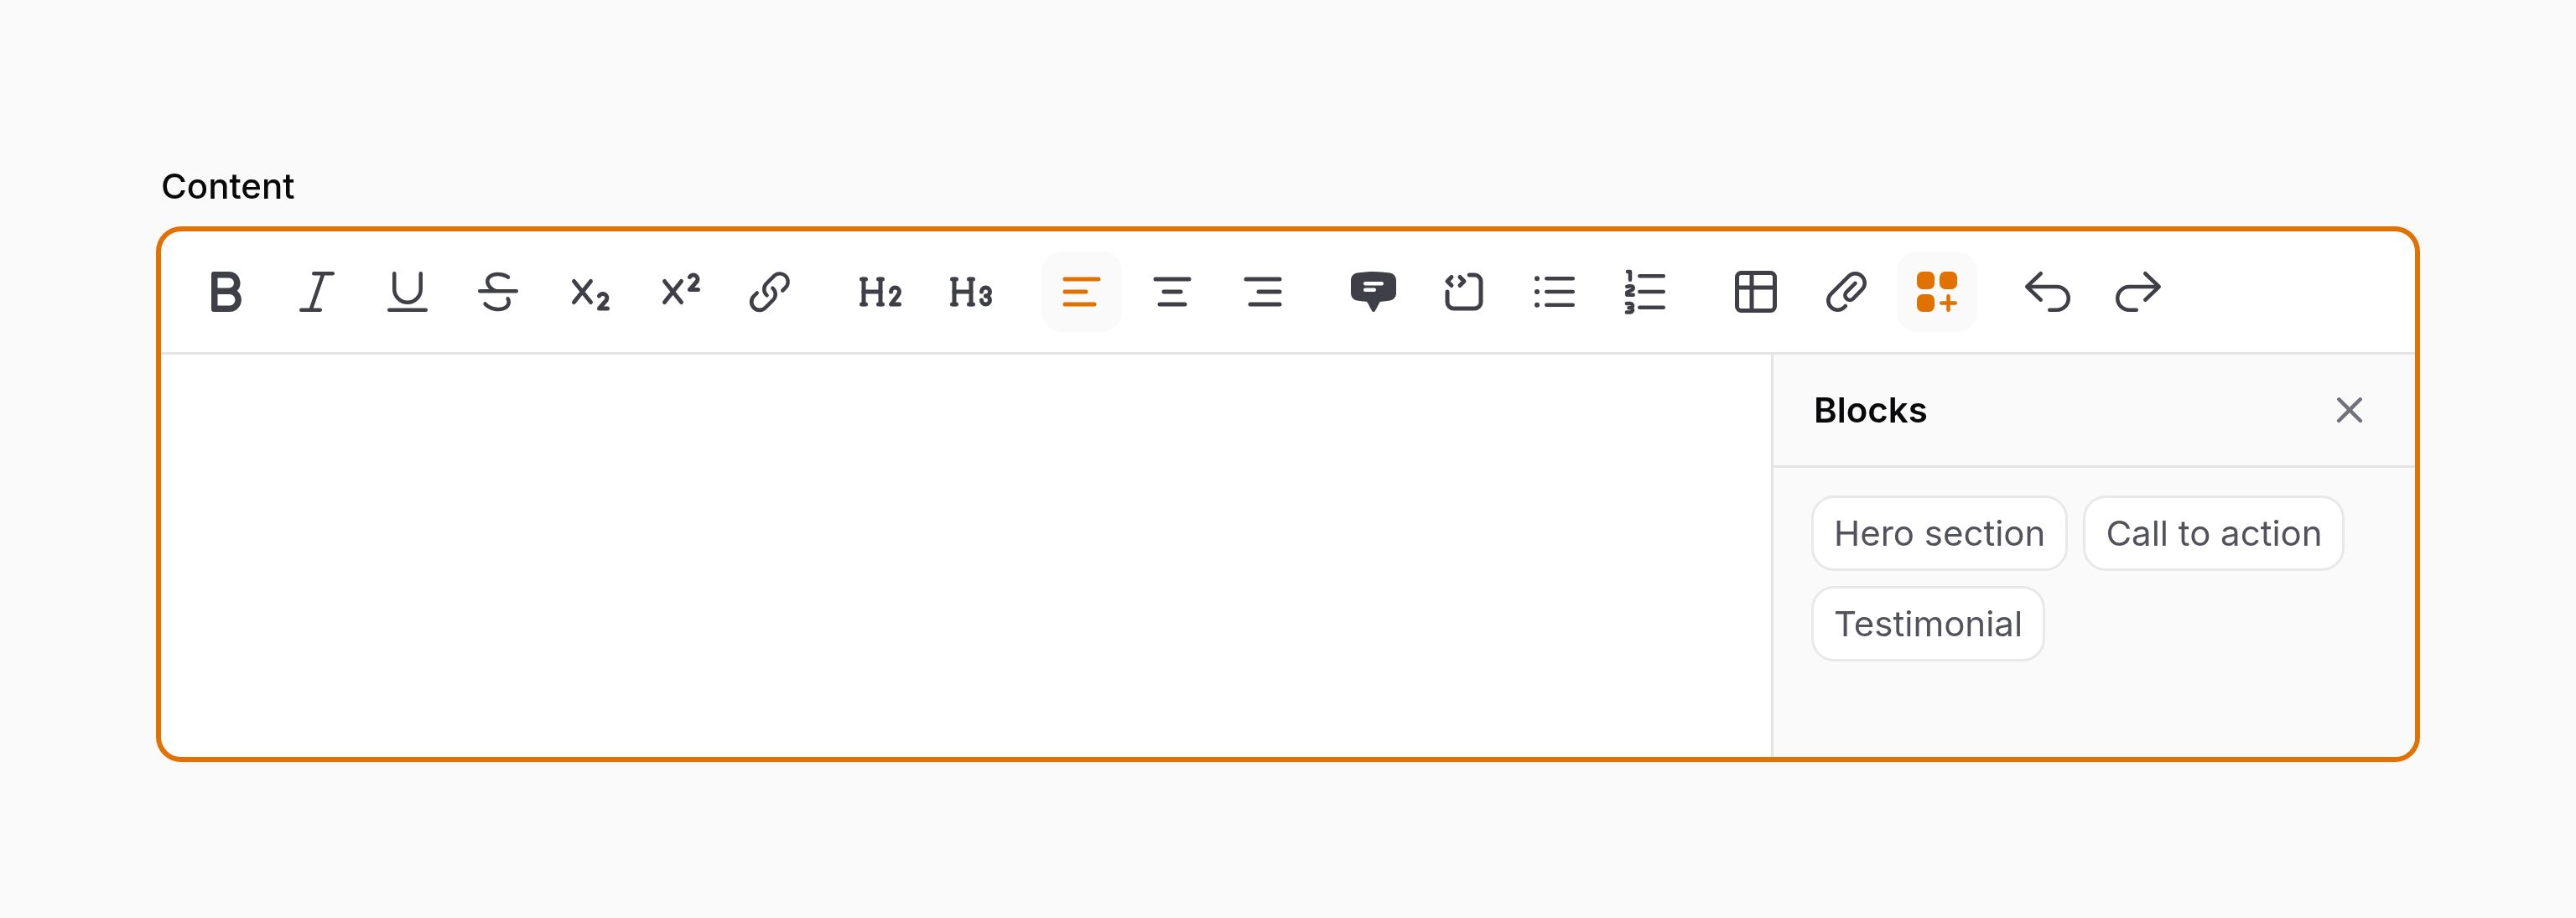
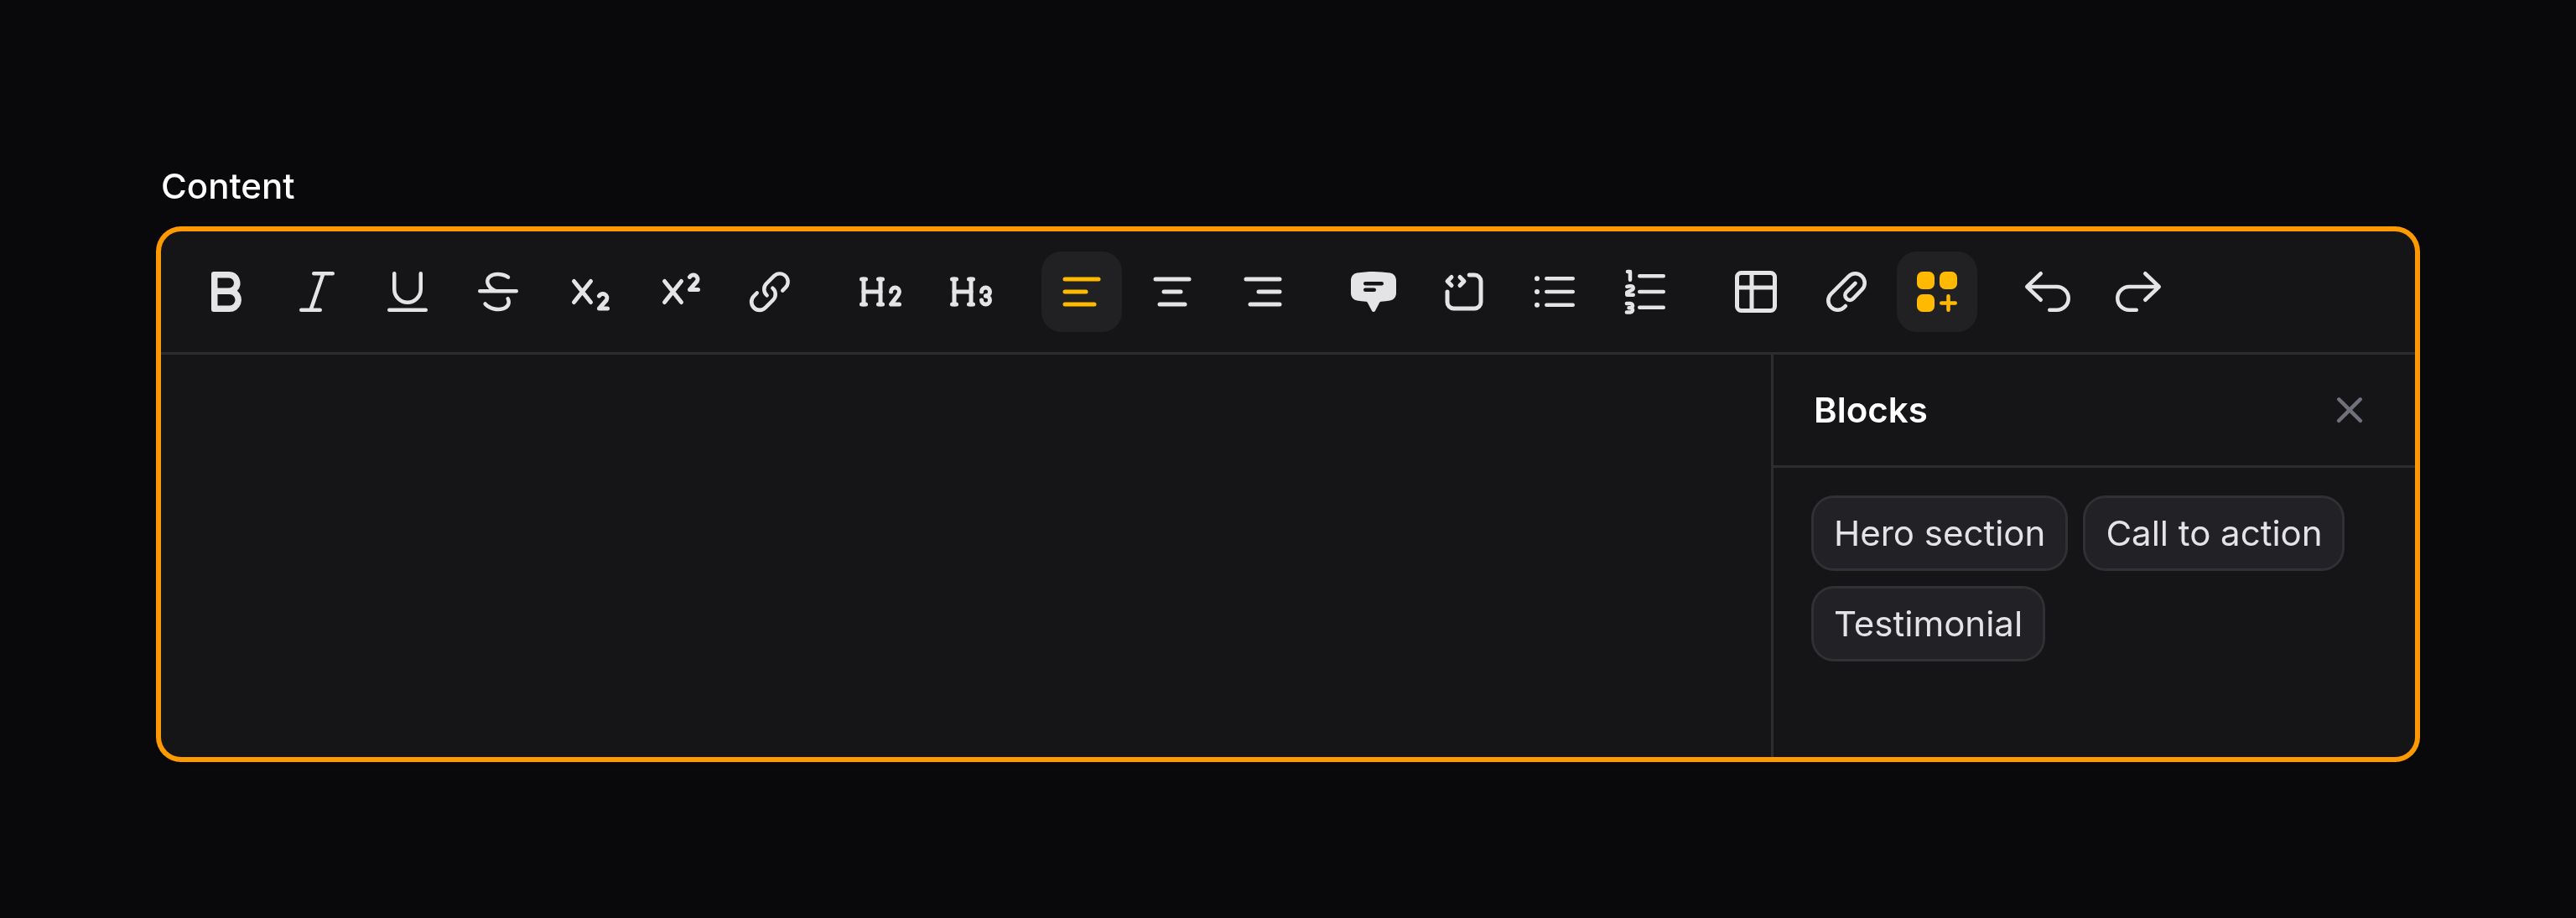
自定义 Block 是用户可以拖拽到富文本编辑器的元素。使用 customBlocks() 方法,你可以定义用户可以插入到富文本编辑器的自定义的 Block:
use Filament\Forms\Components\RichEditor;

RichEditor::make('content')
    ->customBlocks([
        HeroBlock::class,
        CallToActionBlock::class,
    ])
To create a custom block, you can use the following command:
php artisan make:filament-rich-content-custom-block HeroBlock
每个 Block 需要对应的类,继承自 Filament\Forms\Components\RichEditor\RichContentCustomBlock 类。getId() 方法应该为 Block 返回为一标识符,而 getLabel() 方法则返回编辑器的侧边面板中展示的标签:
use Filament\Forms\Components\RichEditor\RichContentCustomBlock;

class HeroBlock extends RichContentCustomBlock
{
    public static function getId(): string
    {
        return 'hero';
    }

    public static function getLabel(): string
    {
        return 'Hero section';
    }
}
当用户将自定义 Block 拖拽到编辑器中时,你可以选择打开模态框以在插入该 Block 前收集用户的额外信息。为此,你可以使用 configureEditorAction() 方法配置插入 Block 时将会打开的模态框:
use Filament\Actions\Action;
use Filament\Forms\Components\RichEditor\RichContentCustomBlock;

class HeroBlock extends RichContentCustomBlock
{
    // ...

    public static function configureEditorAction(Action $action): Action
    {
        return $action
            ->modalDescription('Configure the hero section')
            ->schema([
                TextInput::make('heading')
                    ->required(),
                TextInput::make('subheading'),
            ]);
    }
}
Actiion 上的 schema() 方法可以定义将会在模态框中展示的表单字段。当用户提交表单时,表单数据将会被保存为该 Block 的“配置”。
为自定义 Block 渲染预览
一旦将 Block 插入到编辑器后,你可以使用 toPreviewHtml() 方法为其定义“预览”。该方法返回 Block 插入后展示在编辑器中的 HTML 字符串,它允许用户在保存之前查看该 Block 的外观。你可以在此方法中访问 Block 的 $config,该变量包含插入 Block 之后在模态框中提交的数据:
use Filament\Forms\Components\RichEditor\RichContentCustomBlock;

class HeroBlock extends RichContentCustomBlock
{
    // ...

    /**
     * @param  array<string, mixed>  $config
     */
    public static function toPreviewHtml(array $config): string
    {
        return view('filament.forms.components.rich-editor.rich-content-custom-blocks.hero.preview', [
            'heading' => $config['heading'],
            'subheading' => $config['subheading'] ?? 'Default subheading',
        ])->render();
    }
}
如果你想自定义编辑器中预览上方显示的标签,可以定义 getPreviewLabel()。默认情况下,它将使用 getLabel() 方法中定义的标签,但 getPreviewLabel() 可以访问 Block 的 $config,从而允许你在标签中显示动态信息:
use Filament\Forms\Components\RichEditor\RichContentCustomBlock;

class HeroBlock extends RichContentCustomBlock
{
    // ...

    /**
     * @param  array<string, mixed>  $config
     */
    public static function getPreviewLabel(array $config): string
    {
        return "Hero section: {$config['heading']}";
    }
}
使用自定义 Block 渲染内容
当渲染富文本内容时,你可以传递自定义 Block 数组到 RichContentRender,用以确保这些 Block 可以正确渲染:
use Filament\Forms\Components\RichEditor\RichContentRenderer;

RichContentRenderer::make($record->content)
    ->customBlocks([
        HeroBlock::class,
        CallToActionBlock::class,
    ])
    ->toHtml()
每个 Block 类有一个 toHtml() 方法,它返回该 Block 要渲染的 HTML:
use Filament\Forms\Components\RichEditor\RichContentCustomBlock;

class HeroBlock extends RichContentCustomBlock
{
    // ...

    /**
     * @param  array<string, mixed>  $config
     * @param  array<string, mixed>  $data
     */
    public static function toHtml(array $config, array $data): string
    {
        return view('filament.forms.components.rich-editor.rich-content-custom-blocks.hero.index', [
            'heading' => $config['heading'],
            'subheading' => $config['subheading'],
            'buttonLabel' => 'View category',
            'buttonUrl' => $data['categoryUrl'],
        ])->render();
    }
}
如上所示,toHtml() 方法接收两个参数:$cofig 包含 Block 插入时模态框中提交的配置数据,以及 $data 包含渲染 Block 所需的其他数据。它允许访问配置数据并相应地渲染 Block。数据可以在 customBlocks() 中传入:
use Filament\Forms\Components\RichEditor\RichContentRenderer;

RichContentRenderer::make($record->content)
    ->customBlocks([
        HeroBlock::class => [
            'categoryUrl' => $record->category->getUrl(),
        ],
        CallToActionBlock::class,
    ])
    ->toHtml()
Grouping custom blocks
You can organize custom blocks into groups using string keys in the customBlocks() array. Blocks passed directly (without a string key) are ungrouped and appear first in the panel:
use Filament\Forms\Components\RichEditor;

RichEditor::make('content')
    ->customBlocks([
        AlertBlock::class,
        DividerBlock::class,
        'Marketing' => [
            HeroBlock::class,
            CallToActionBlock::class,
            BannerBlock::class,
        ],
        'Media' => [
            ImageGalleryBlock::class,
            VideoEmbedBlock::class,
        ],
    ])
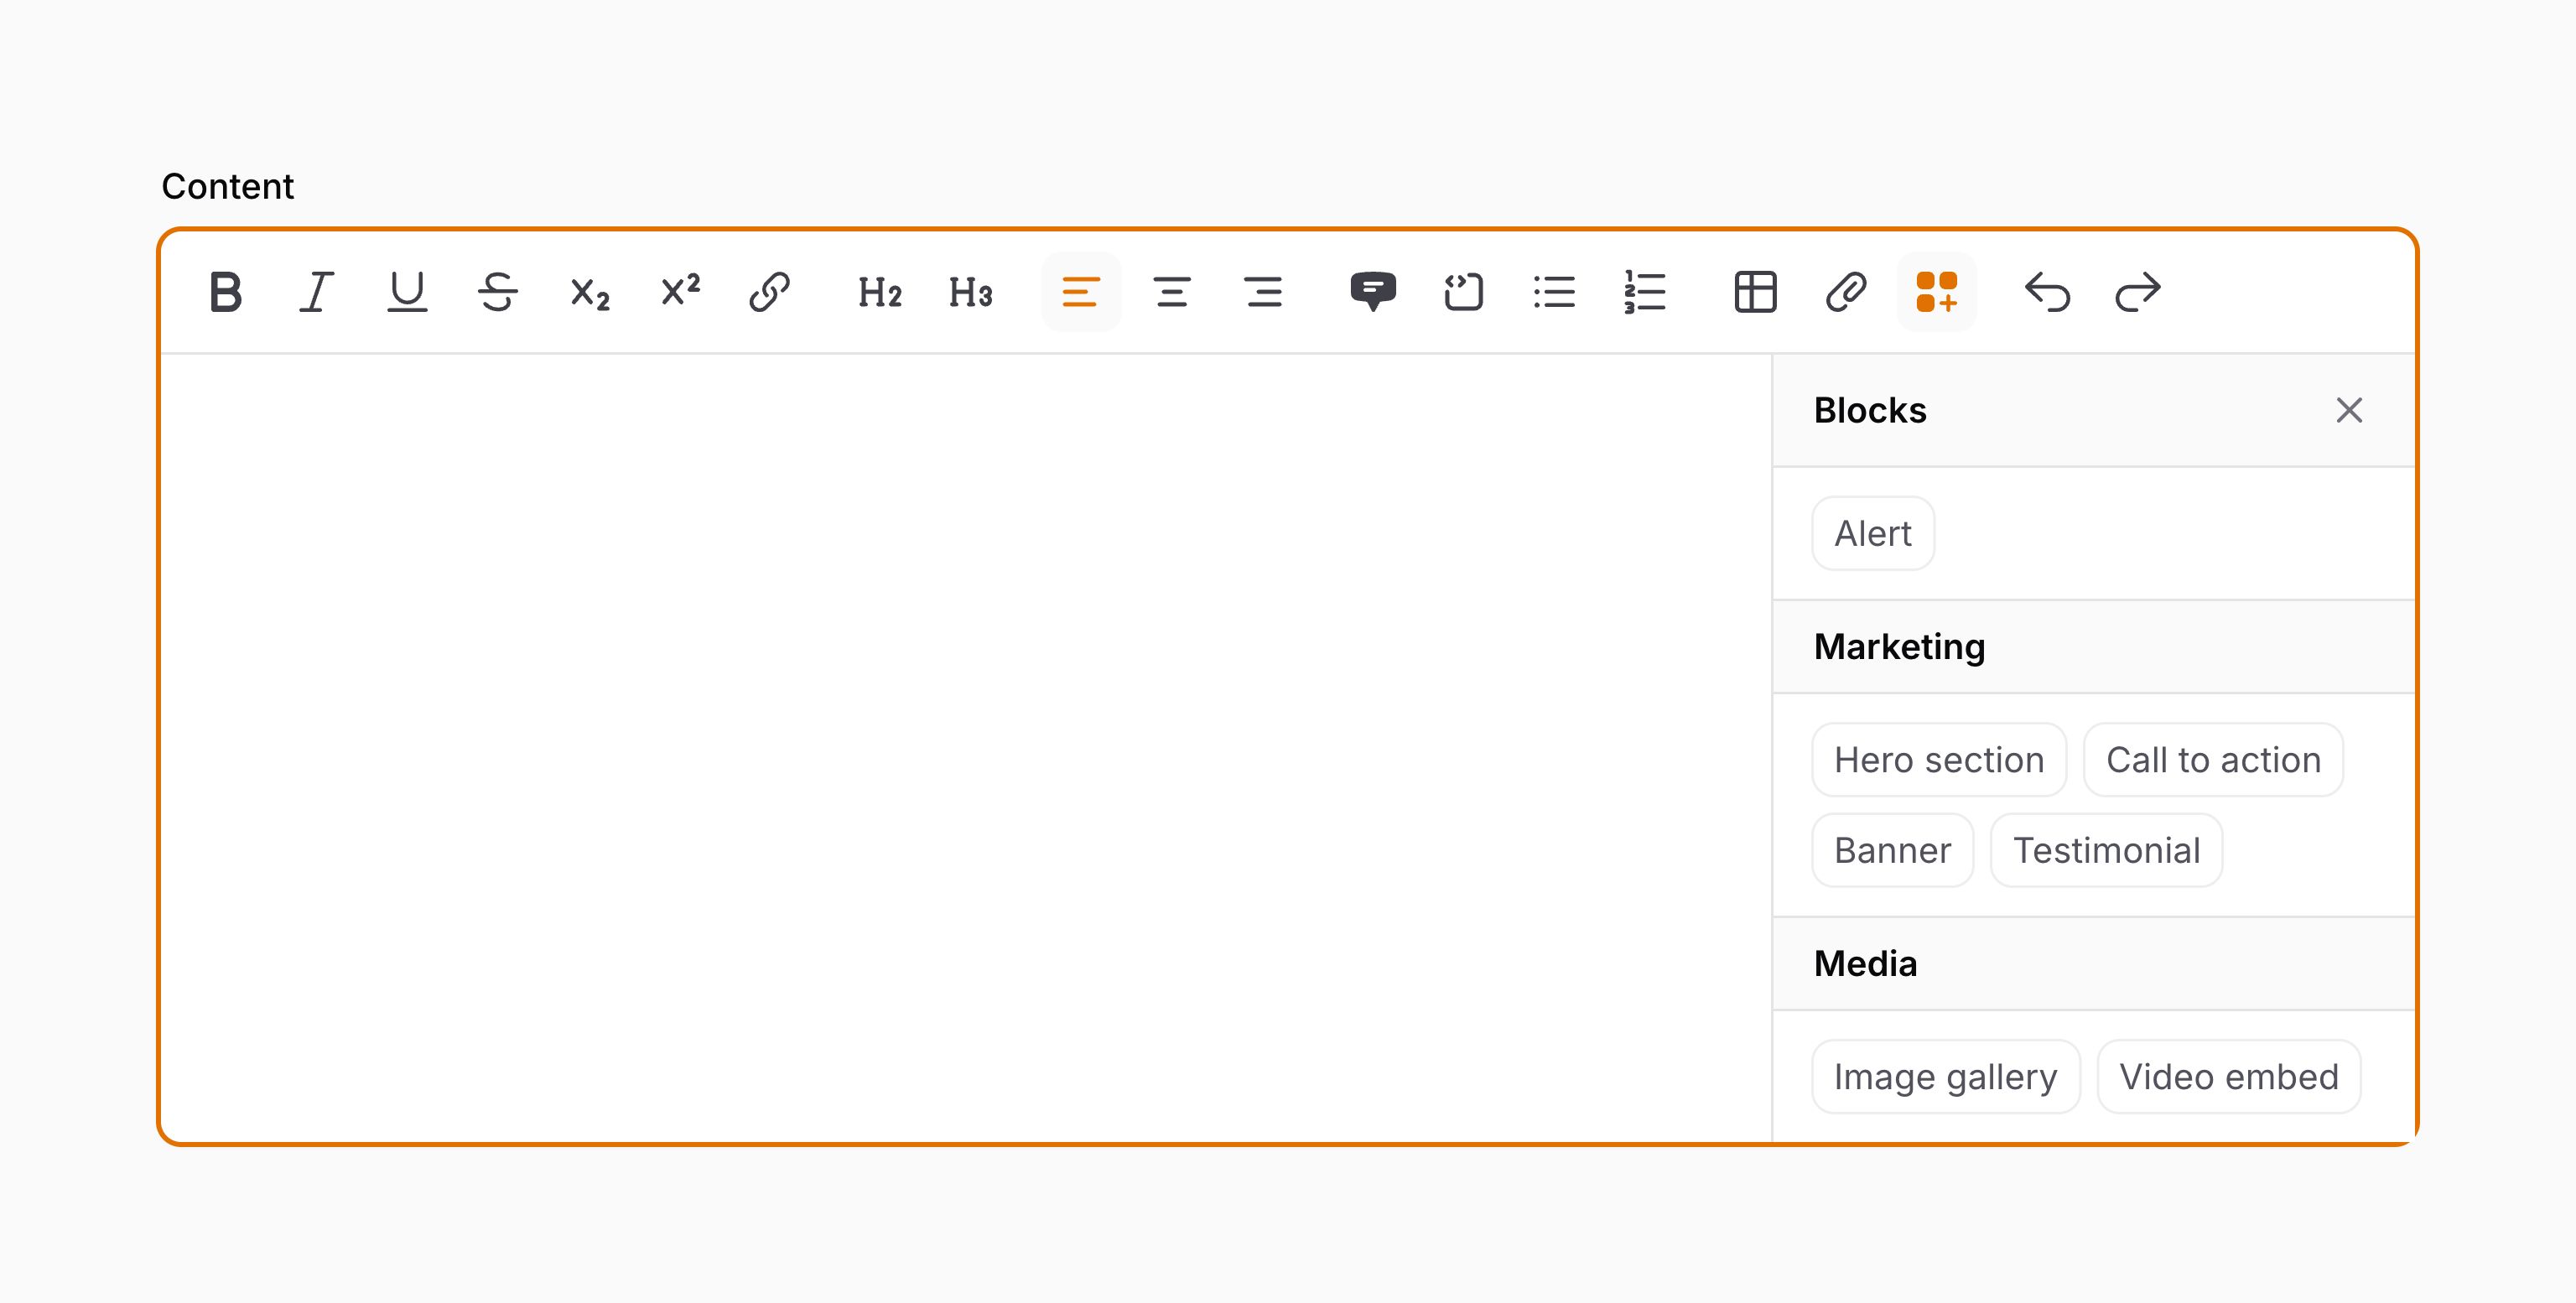
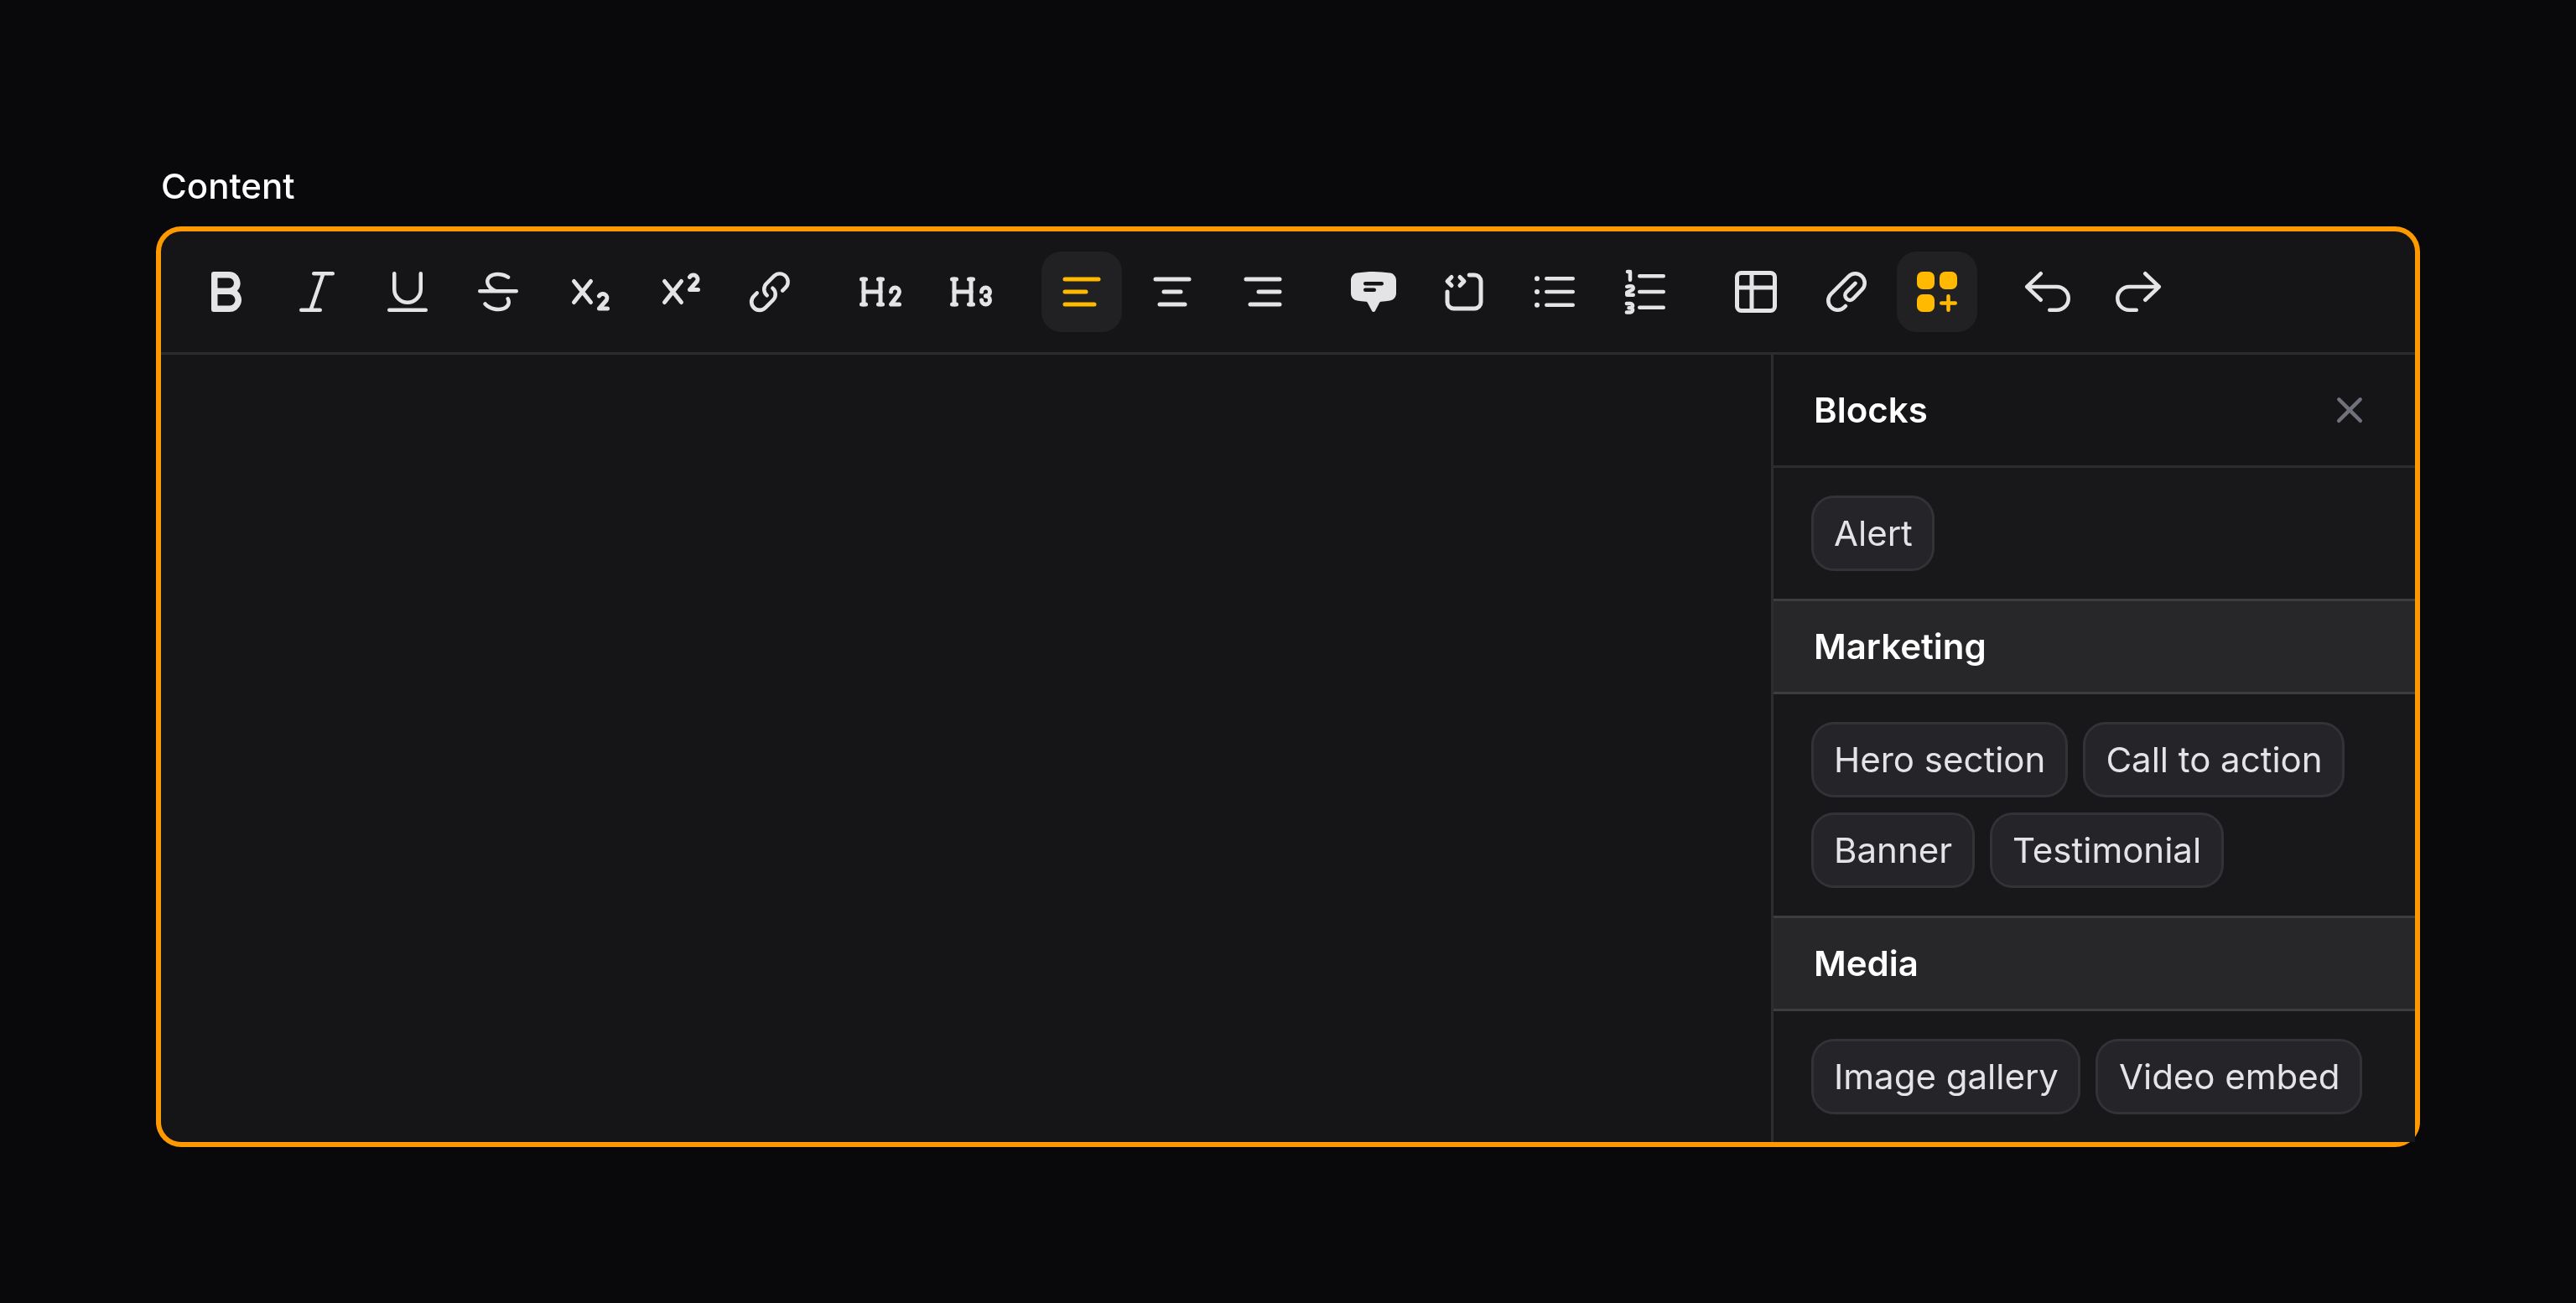
Groups are displayed in the order they are defined in the array, with sticky headings in the side panel.
When rendering content with grouped blocks, you can pass the same grouped array structure to the RichContentRenderer. Groups are ignored during rendering — only the block classes are used:
use Filament\Forms\Components\RichEditor\RichContentRenderer;

RichContentRenderer::make($record->content)
    ->customBlocks([
        'Marketing' => [
            HeroBlock::class => [
                'categoryUrl' => $record->category->getUrl(),
            ],
            CallToActionBlock::class,
        ],
    ])
    ->toHtml()
默认打开自定义 Block 面板
如果你想在加载富文本编辑器时,默认打开 Block 面板,你可以使用 activePanel('customBlocks') 方法:
use Filament\Forms\Components\RichEditor;

RichEditor::make('content')
    ->customBlocks([
        HeroBlock::class,
        CallToActionBlock::class,
    ])
    ->activePanel('customBlocks')
Styling custom block previews with prose
By default, custom block previews are displayed without prose styling to make styling easier. You can enable prose styling for a block’s preview using the shouldApplyProseStylingToPreview() method. This is useful when you want the preview to display with typography styles like headings, paragraphs, and other prose elements:
use Filament\Forms\Components\RichEditor\RichContentCustomBlock;

class HeadingBlock extends RichContentCustomBlock
{
    // ...

    /**
     * @param  array<string, mixed>  $config
     */
    public static function shouldApplyProseStylingToPreview(array $config): bool
    {
        return true;
    }
}
When shouldApplyProseStylingToPreview() returns true, the block’s preview will be styled with the prose typography styles defined in the rich editor, including proper margins, font sizes, and other text formatting. By default, this method returns false, so previews are displayed with minimal styling.
You can make this decision based on the block’s configuration, allowing different blocks to have different preview styling:
public static function shouldApplyProseStylingToPreview(array $config): bool
{
    return ($config['useProseStyle'] ?? false) === true;
}
使用合并标签
合并标签允许用户在其富文本内容中插入“占位符”,这些占位符可以在内容渲染时被动态值替换。这对于插入当前用户姓名或当前日期等内容非常有用。
要在编辑器上注册合并标签,请使用 mergeTags() 方法:
use Filament\Forms\Components\RichEditor;

RichEditor::make('content')
    ->mergeTags([
        'name',
        'today',
    ])
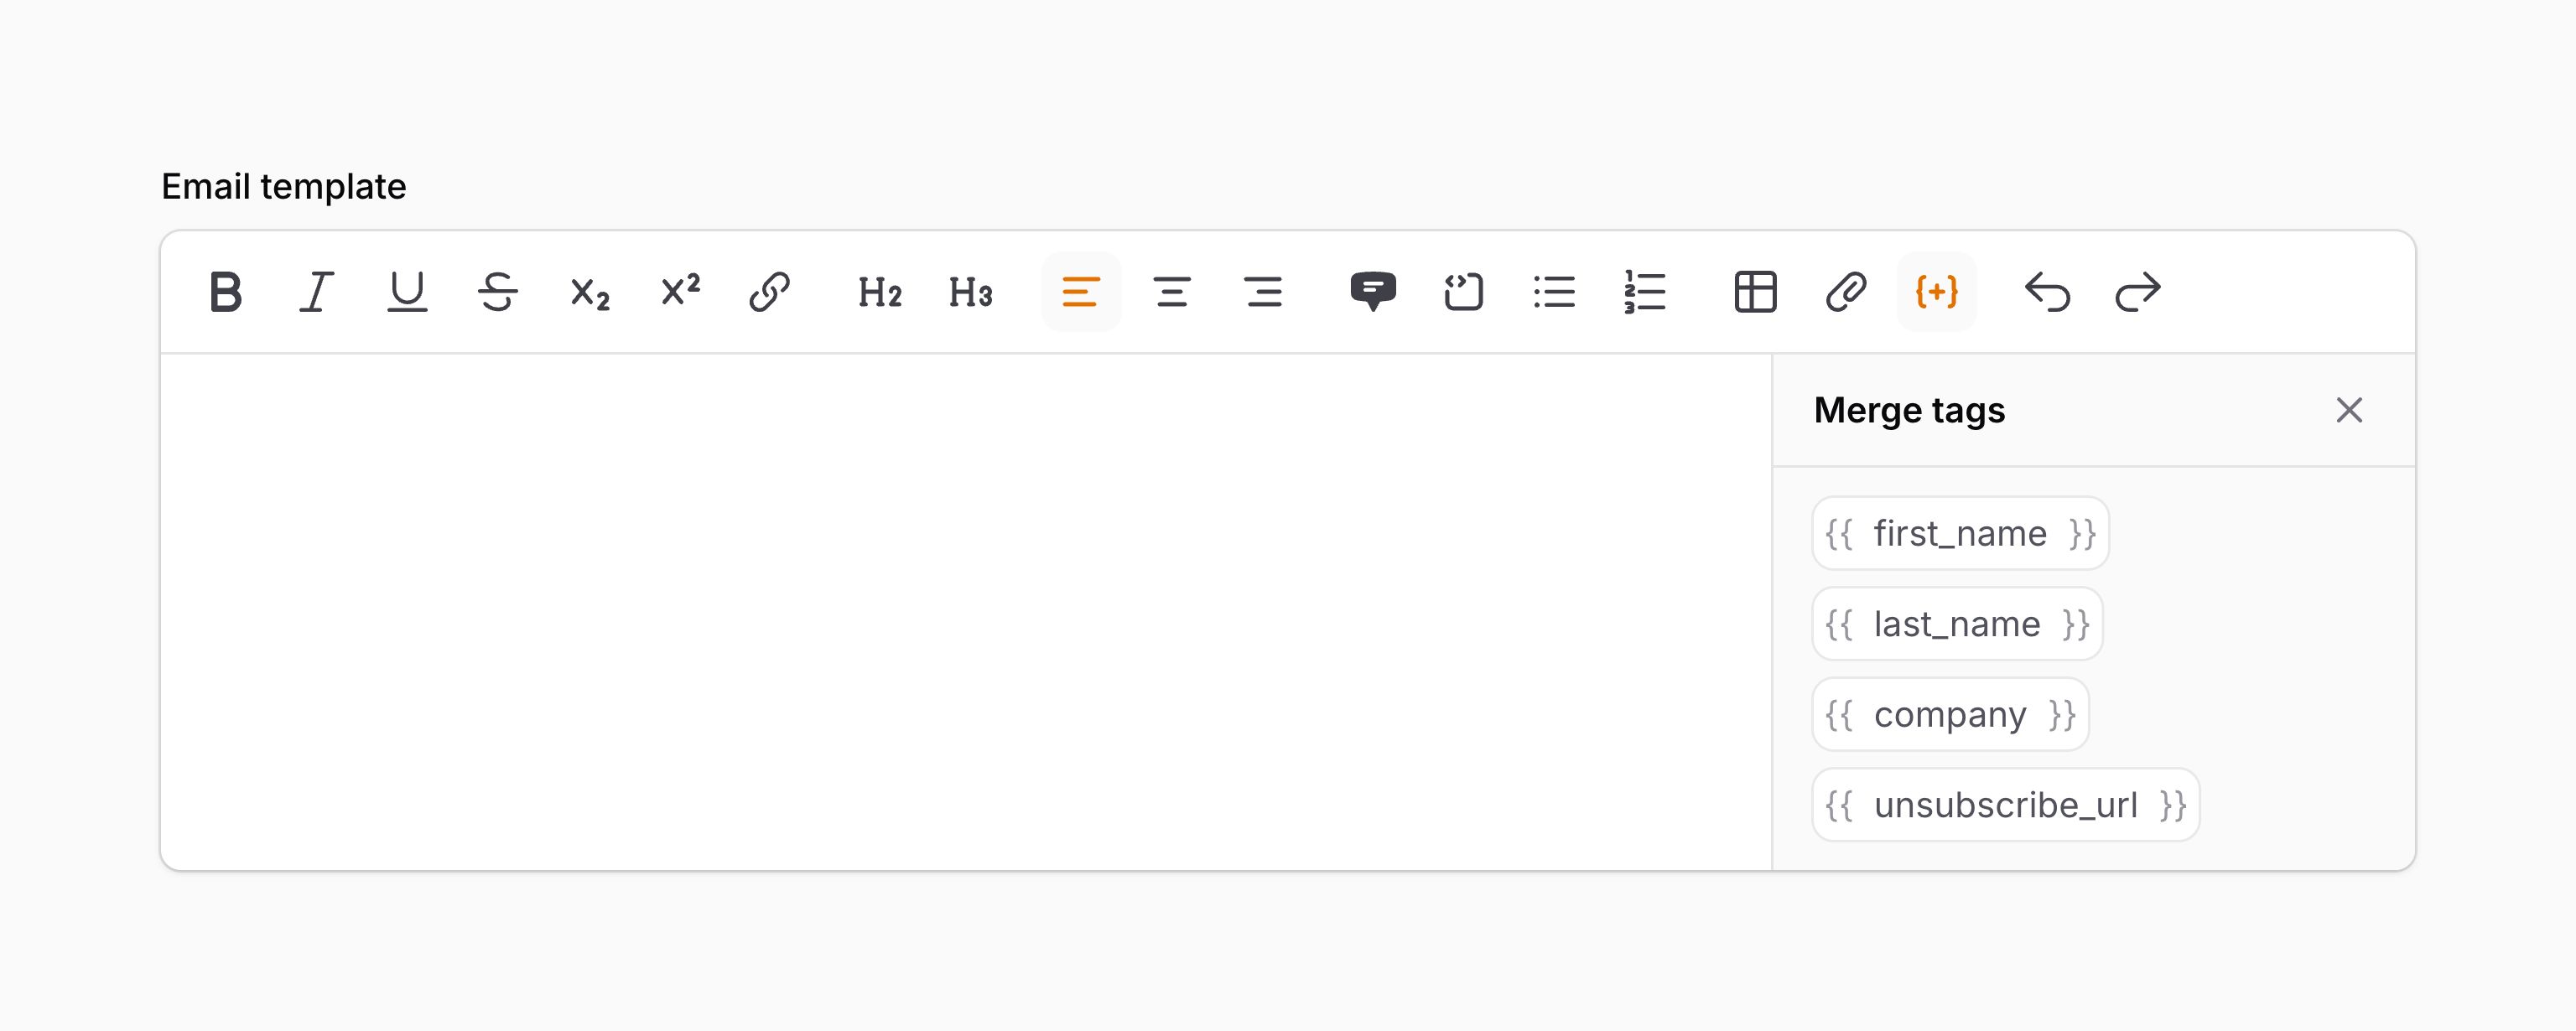
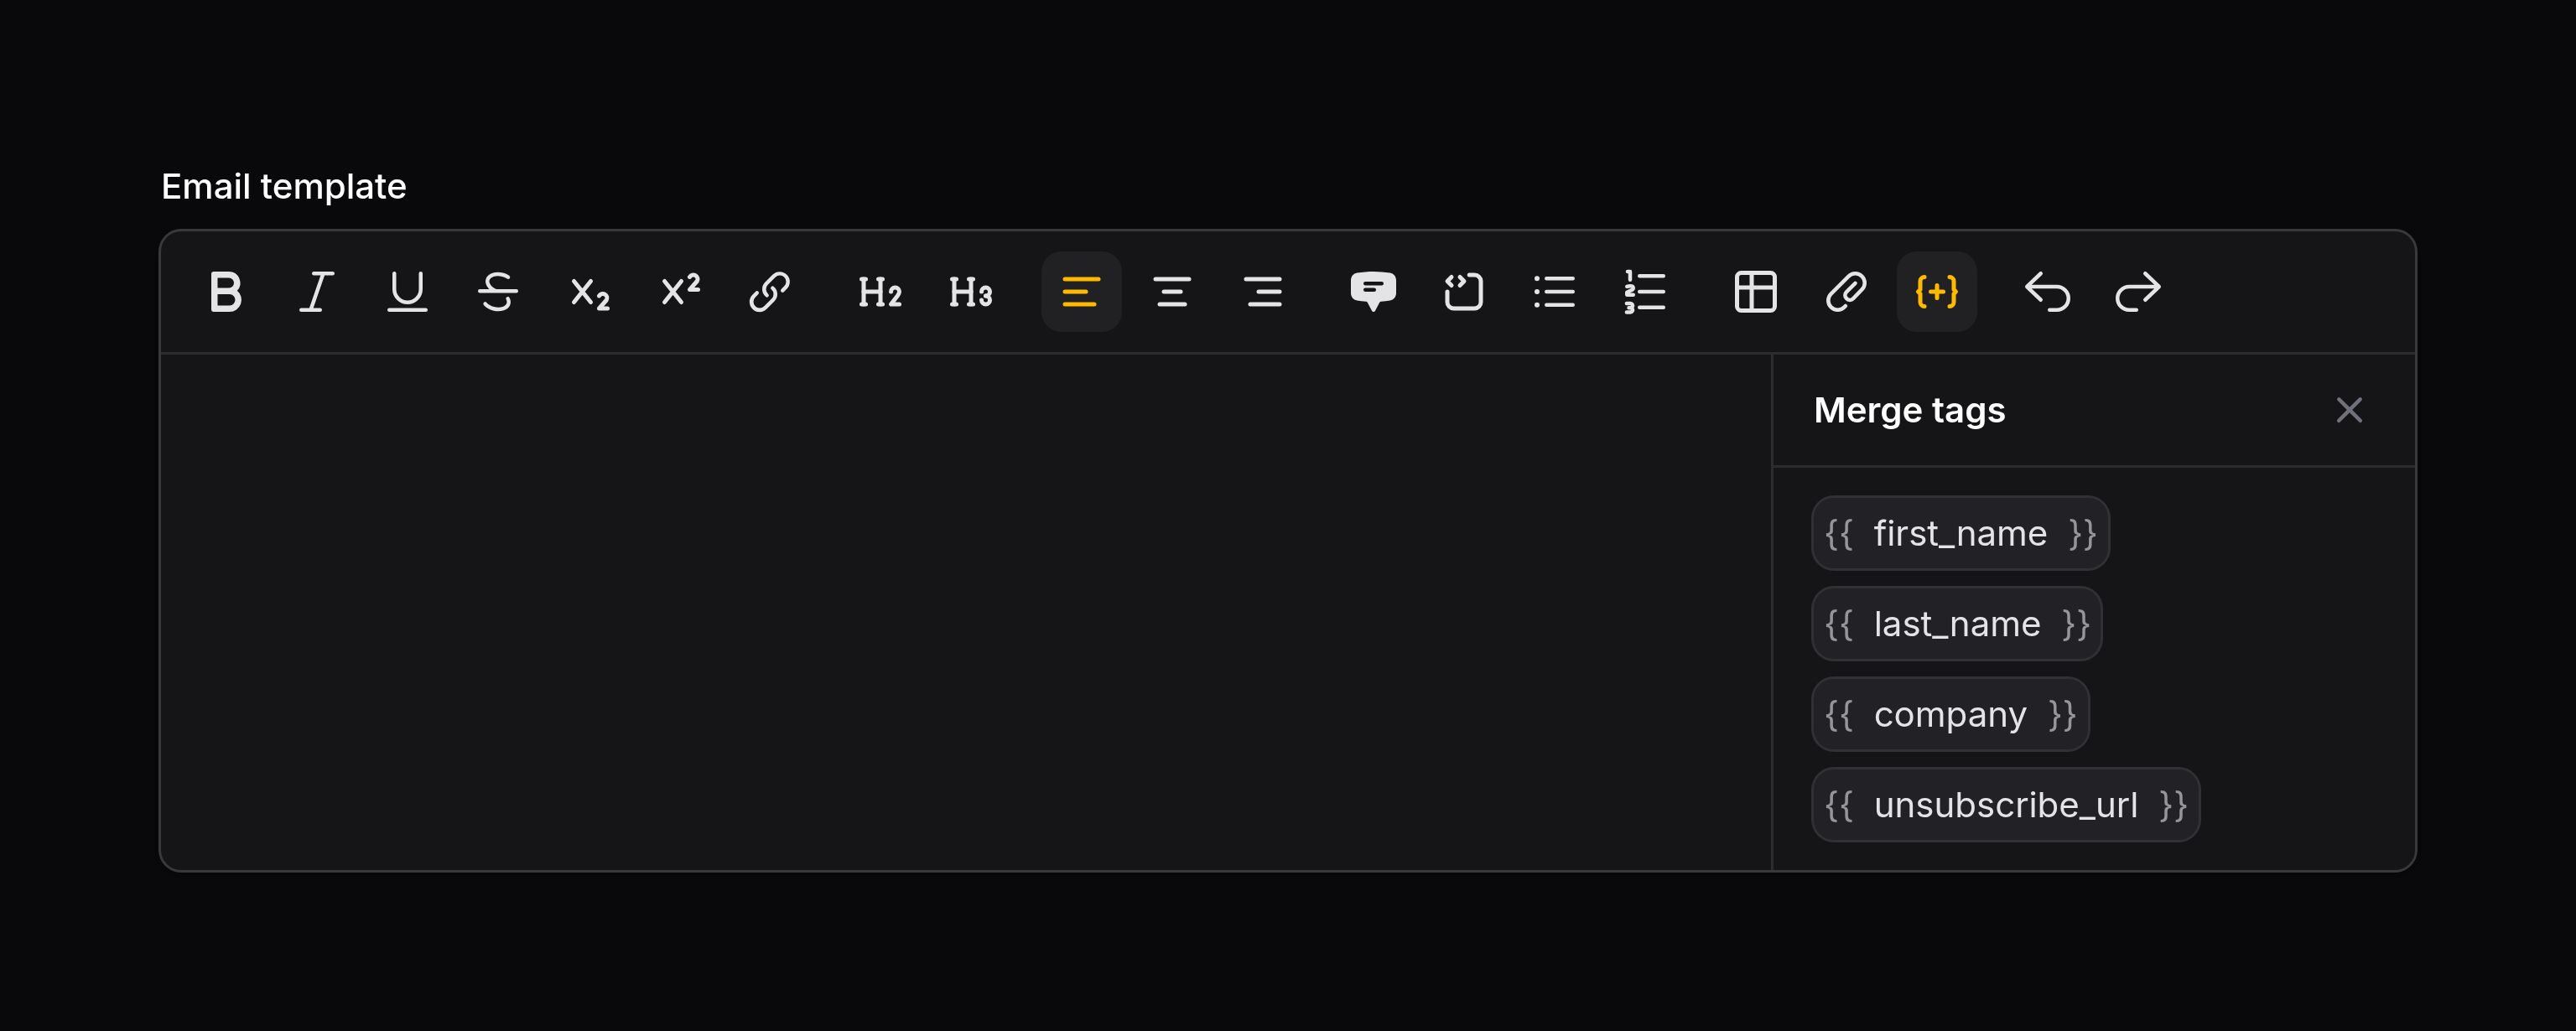
合并标签用双花括号括起来,例如 {{ name }}。内容渲染时,这些标签将被替换为相应的值。
要将合并标签插入内容,用户可以输入 {{ 来搜索要插入的标签。或者,他们可以点击编辑器工具栏中的“合并标签”工具,这将打开一个包含所有合并标签的面板。然后,他们可以将合并标签从编辑器的侧面板拖放到内容中,或者点击插入。
使用合并标签渲染内容
渲染富文本内容时,你可以传递一个值数组来替换合并标签:
use Filament\Forms\Components\RichEditor\RichContentRenderer;

RichContentRenderer::make($record->content)
    ->mergeTags([
        'name' => $record->user->name,
        'today' => now()->toFormattedDateString(),
    ])
    ->toHtml()
如果你有多个合并标签,或者需要运行一些逻辑来确定它们的值,可以使用一个函数作为每个合并标签的值。当内容中第一次遇到合并标签时,将调用此函数,并将其结果缓存起来,以供后续同名标签使用:
use Filament\Forms\Components\RichEditor\RichContentRenderer;

RichContentRenderer::make($record->content)
    ->mergeTags([
        'name' => fn (): string => $record->user->name,
        'today' => now()->toFormattedDateString(),
    ])
    ->toHtml()
Using HTML content in merge tags
By default, merge tags render their values as plain text. However, you can render HTML content in merge tags by providing values that implement Laravel’s Htmlable interface. This is useful for inserting formatted content, links, or other HTML elements:
use Filament\Forms\Components\RichEditor\RichContentRenderer;
use Illuminate\Support\HtmlString;

RichContentRenderer::make($record->content)
    ->mergeTags([
        'user_name' => $record->user->name, // Plain text
        'user_profile_link' => new HtmlString('<a href="' . route('profile', $record->user) . '">View Profile</a>'),
    ])
    ->toHtml()
When a merge tag value implements the Htmlable interface (such as HtmlString), the system automatically detects this and renders the HTML content without escaping it. Non-Htmlable values continue to be rendered as plain text for security.
Using custom merge tag labels
You may provide custom labels for merge tags that will be displayed in the editor’s side panel and content preview using an associative array where the keys are the merge tag names and the values are the labels:
use Filament\Forms\Components\RichEditor;

RichEditor::make('content')
    ->mergeTags([
        'name' => 'Full name',
        'today' => 'Today\'s date',
    ])
The labels aren’t saved in the content of the editor and are only used for display purposes.
默认打开合并标签面板
如果你希望在加载富文本编辑器时默认打开合并标签面板,可以使用 activePanel('mergeTags') 方法:
use Filament\Forms\Components\RichEditor;

RichEditor::make('content')
    ->mergeTags([
        'name',
        'today',
    ])
    ->activePanel('mergeTags')
Using mentions
Mentions allow users to insert references to other records (such as users, issues, or tags) by typing a trigger character. When the user types a trigger character like @, a dropdown appears allowing them to search and select from available options. The selected mention is inserted as a non-editable inline token.
To register mentions on an editor, use the mentions() method with one or more MentionProvider instances:
use Filament\Forms\Components\RichEditor;
use Filament\Forms\Components\RichEditor\MentionProvider;

RichEditor::make('content')
    ->mentions([
        MentionProvider::make('@')
            ->items([
                1 => 'Jane Doe',
                2 => 'John Smith',
            ]),
    ])
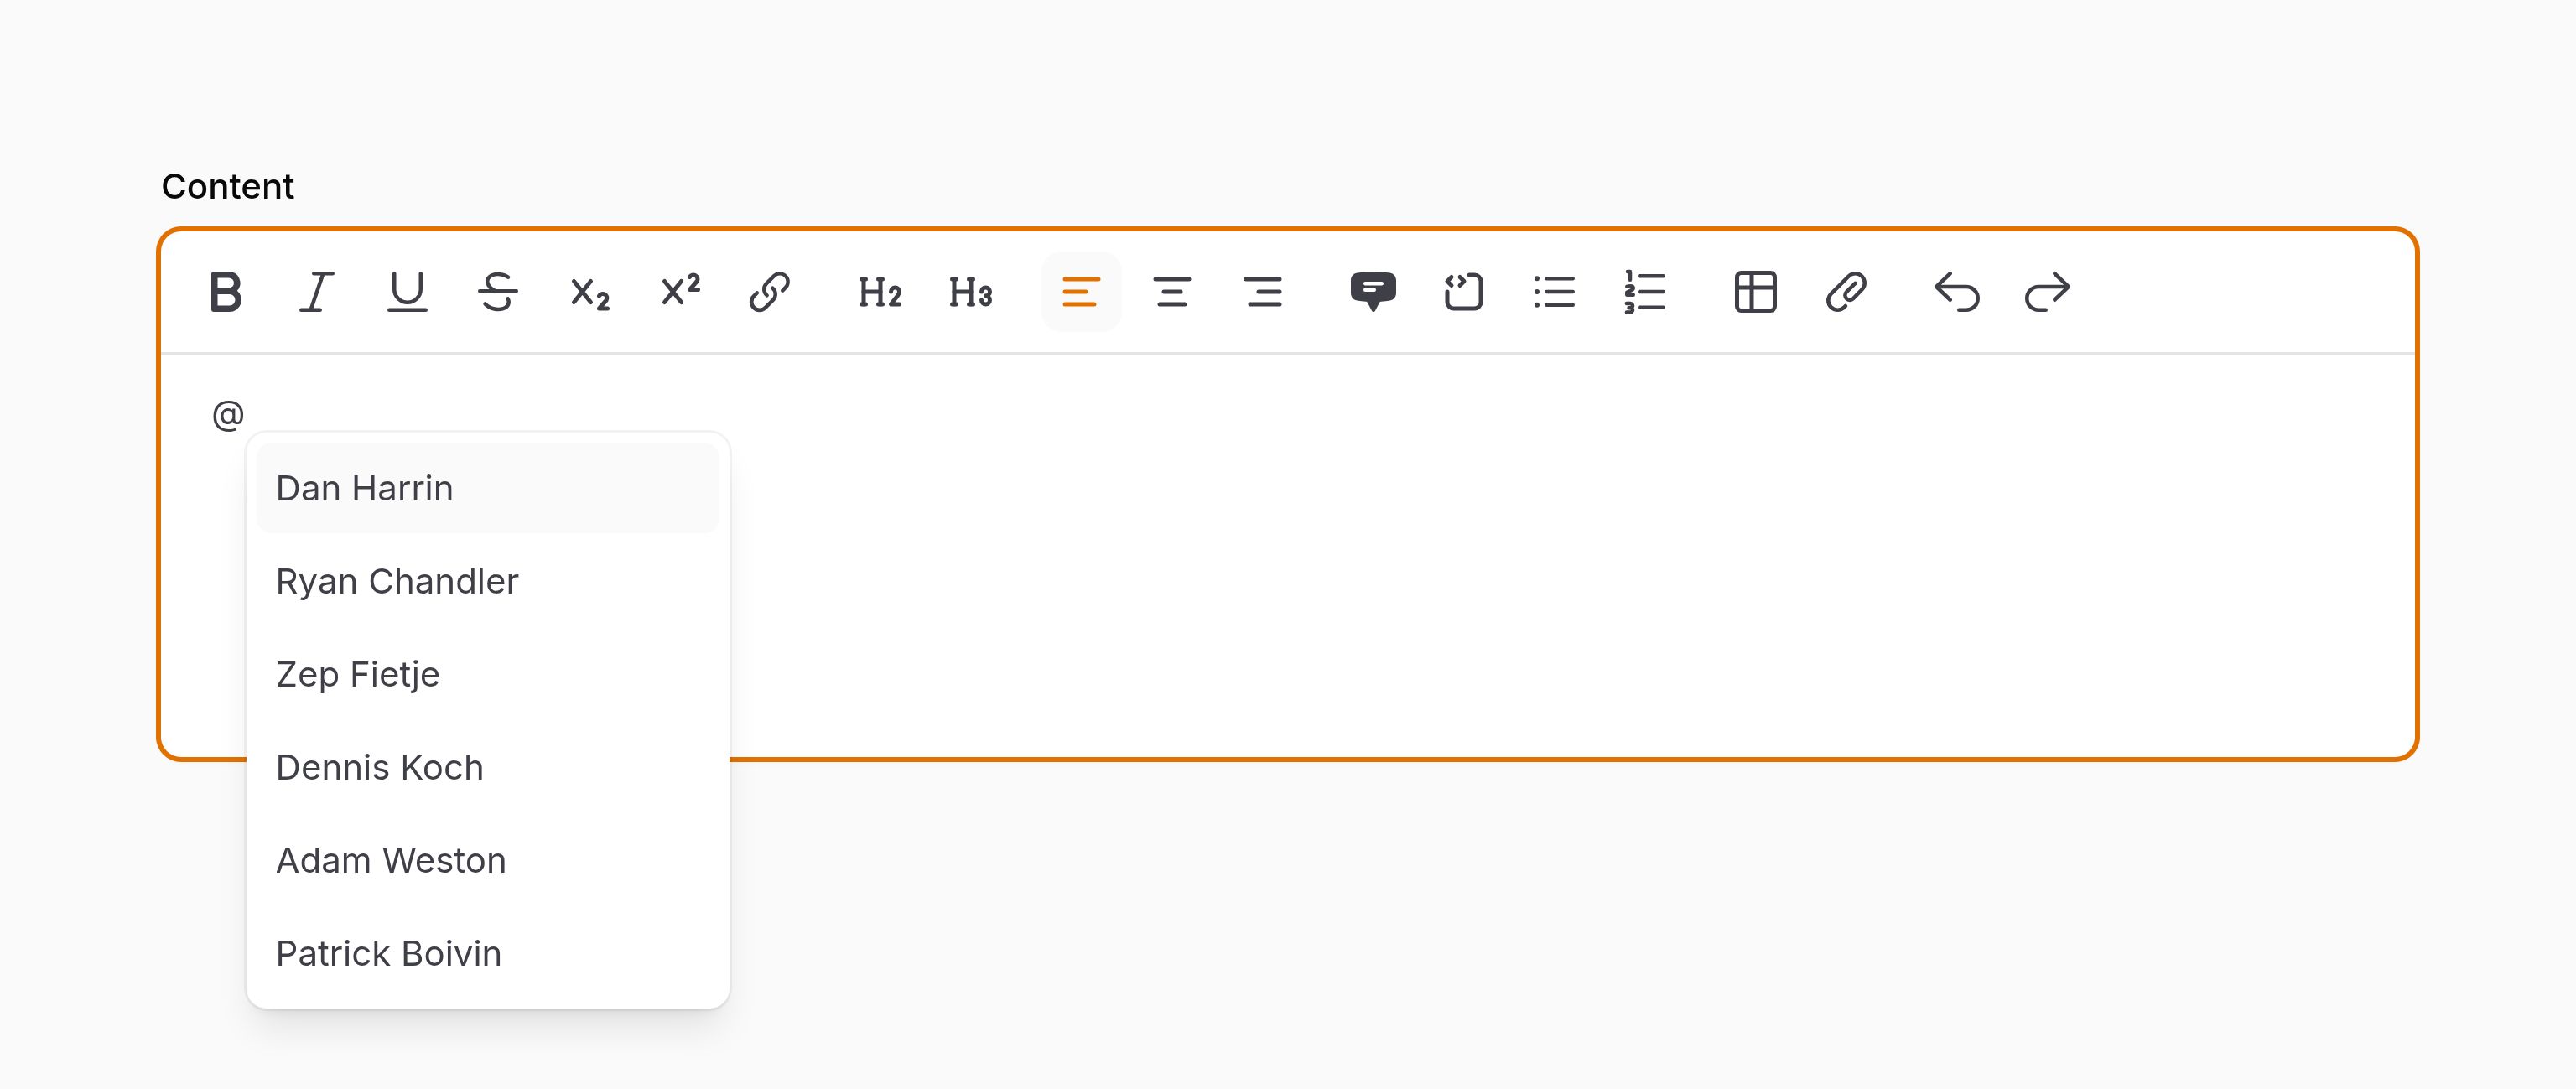
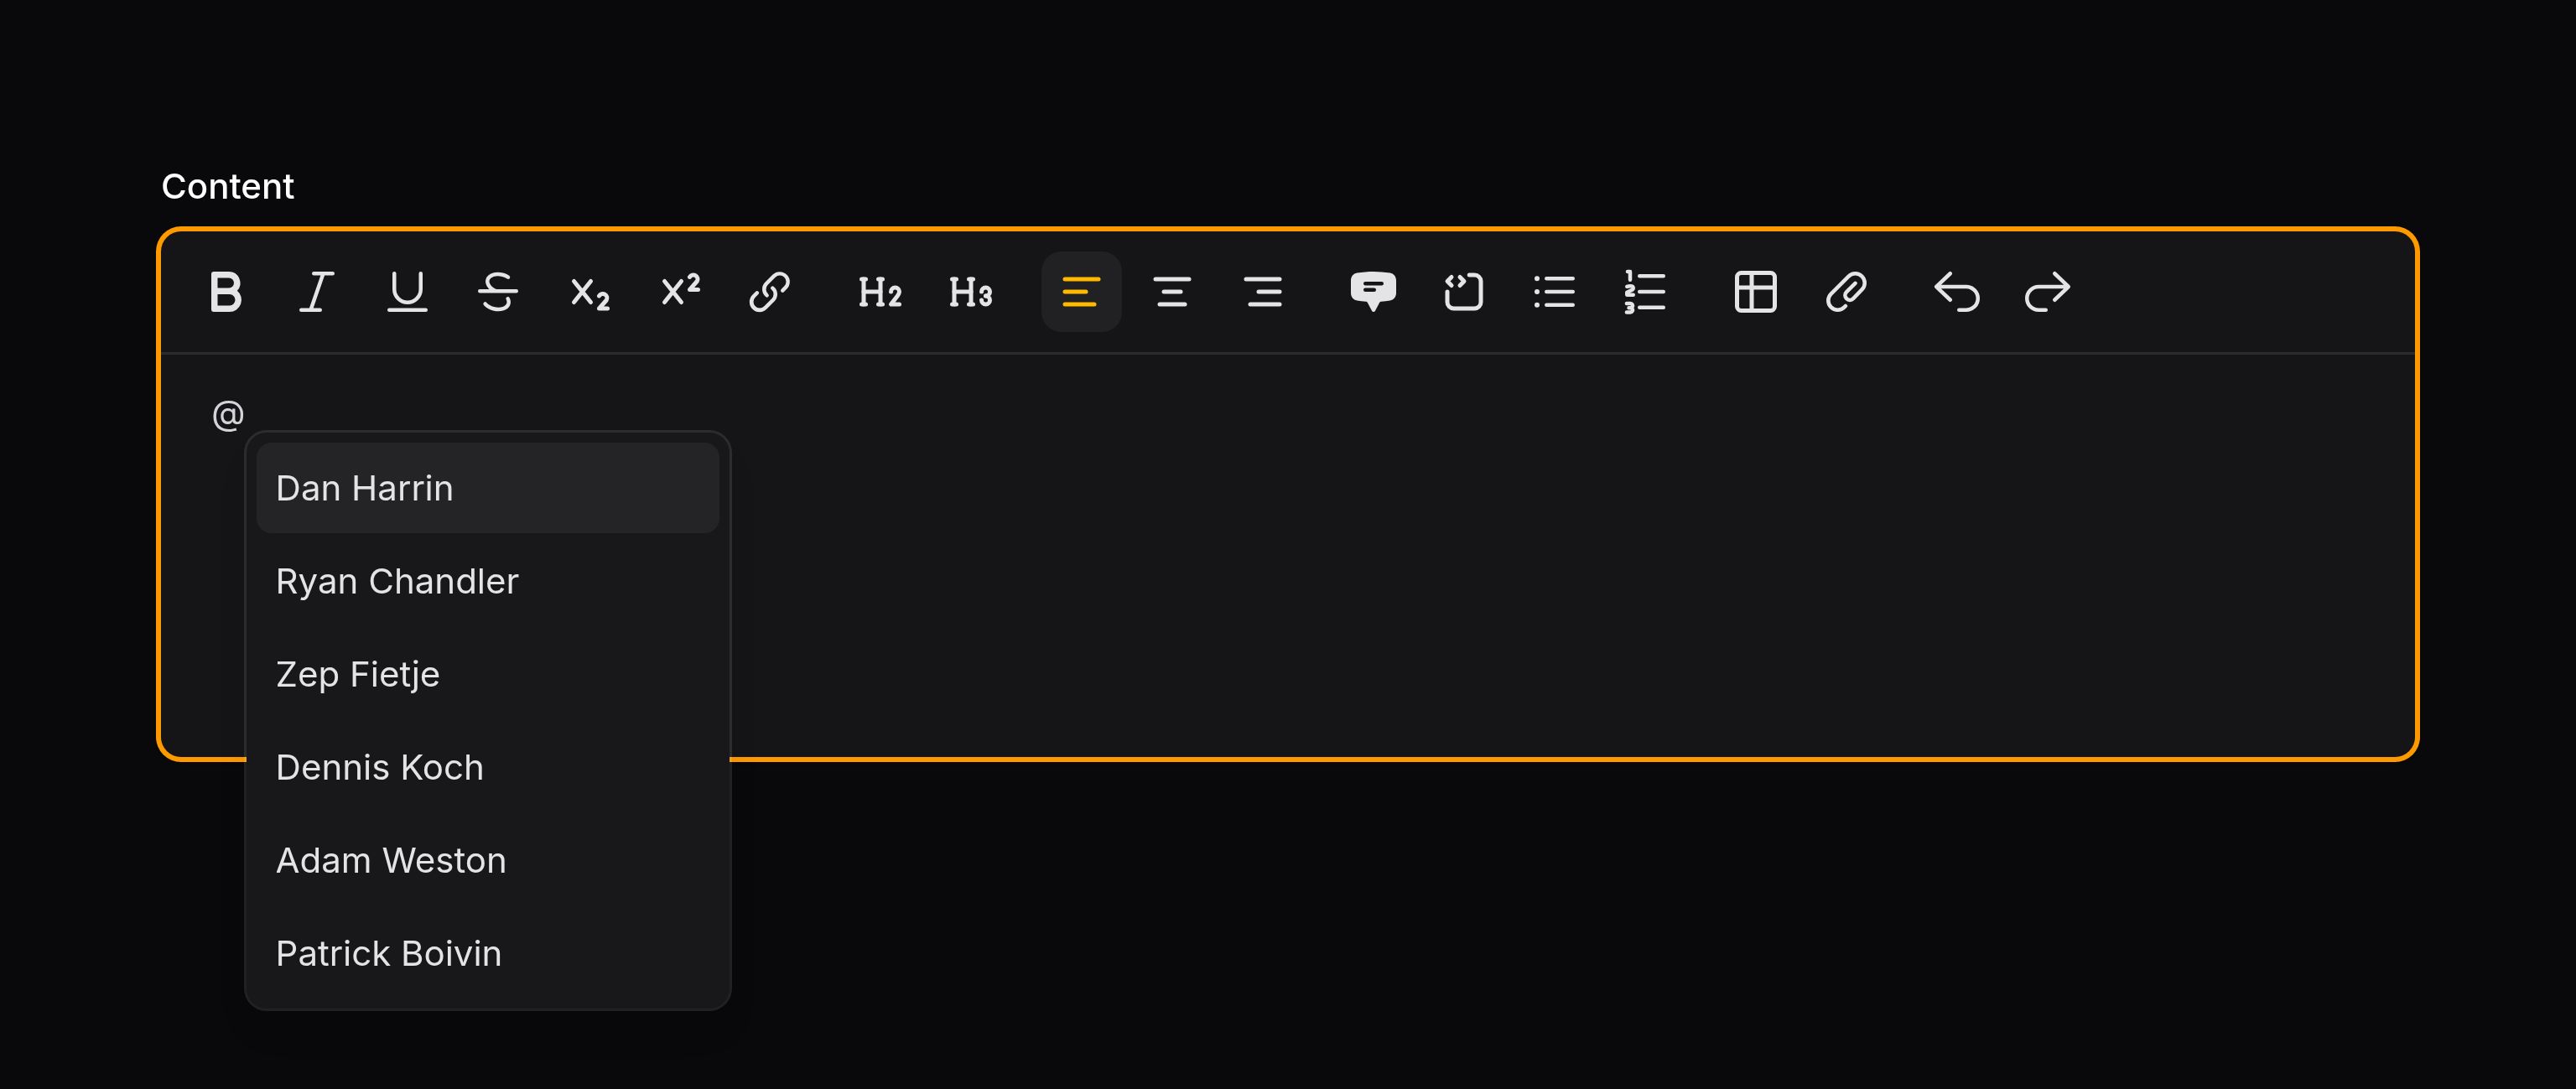
Each provider is configured with a trigger character (passed to make()) that activates the mention search. You can have multiple providers with different triggers:
use Filament\Forms\Components\RichEditor;
use Filament\Forms\Components\RichEditor\MentionProvider;

RichEditor::make('content')
    ->mentions([
        MentionProvider::make('@')
            ->items([
                1 => 'Jane Doe',
                2 => 'John Smith',
            ]),
        MentionProvider::make('#')
            ->items([
                'bug' => 'Bug',
                'feature' => 'Feature',
            ]),
    ])
Searching mentions from the database
For large datasets, you should fetch results dynamically using getSearchResultsUsing(). The callback receives the search term and should return an array of options with the format [id => label].
When using dynamic search results, only the mention’s id is stored in the content. To display the correct label when the content is loaded, you must also provide getLabelsUsing(). This callback receives an array of IDs and should return an array with the format [id => label]:
use Filament\Forms\Components\RichEditor;
use Filament\Forms\Components\RichEditor\MentionProvider;

RichEditor::make('content')
    ->mentions([
        MentionProvider::make('@')
            ->getSearchResultsUsing(fn (string $search): array => User::query()
                ->where('name', 'like', "%{$search}%")
                ->orderBy('name')
                ->limit(10)
                ->pluck('name', 'id')
                ->all())
            ->getLabelsUsing(fn (array $ids): array => User::query()
                ->whereIn('id', $ids)
                ->pluck('name', 'id')
                ->all()),
    ])
Rendering content with mentions
When rendering the rich content, you can pass the array of mention providers to the RichContentRenderer to ensure that the mentions are rendered correctly.
You can make mentions link to a URL when rendered using the url() method. The callback receives the mention’s id and label, and should return a URL string:
use Filament\Forms\Components\RichEditor\MentionProvider;
use Filament\Forms\Components\RichEditor\RichContentRenderer;

RichContentRenderer::make($record->content)
    ->mentions([
        MentionProvider::make('@')
            ->getLabelsUsing(fn (array $ids): array => User::query()
                ->whereIn('id', $ids)
                ->pluck('name', 'id')
                ->all())
            ->url(fn (string $id, string $label): string => route('users.show', $id)),
    ])
    ->toHtml()
TIP
The string returned from the url() closure is rendered directly into the href attribute of an <a> tag, so if any part of the URL is built from user input you should make sure it cannot resolve to a scheme like javascript: or data: that the browser would execute. The simplest way to guarantee this is to wrap the return value in Filament’s Str::sanitizeUrl() helper, which only allows http/https and relative URLs:
use Illuminate\Support\Str;

->url(fn (string $id, string $label): ?string => Str::sanitizeUrl(
    route('users.show', $id),
))
If you intentionally want to allow a javascript: URL (for example, to wire a mention to an Alpine.js handler), skip the helper and return the raw value — just make sure none of the components of that URL come from untrusted user input.
注册富文本内容属性
富文本编辑器配置中有一些元素同时适用于编辑器和渲染器。例如,如果你使用了私有图片、自定义 Block、合并标签、mentions或插件,则需要确保在两个地方使用相同的配置。为此,Filament 提供了一种注册富文本内容属性的方法,这些属性可以在编辑器和渲染器中使用。如果插件实现了 HasFileAttachmentProvider,系统会自动从该插件解析出文件附件提供者,因此你无需在属性或渲染器上调用 fileAttachmentProvider()。
要在 Eloquent 模型上注册富文本内容属性,你应该使用 InteractsWithRichContent trait 并实现 HasRichContent 接口。这样你就可以在 setUpRichContent() 方法中注册这些属性:
use Filament\Forms\Components\RichEditor\MentionProvider;
use Filament\Forms\Components\RichEditor\Models\Concerns\InteractsWithRichContent;
use Filament\Forms\Components\RichEditor\Models\Contracts\HasRichContent;
use Illuminate\Database\Eloquent\Model;

class Post extends Model implements HasRichContent
{
    use InteractsWithRichContent;

    public function setUpRichContent(): void
    {
        $this->registerRichContent('content')
            ->fileAttachmentsDisk('s3')
            ->fileAttachmentsVisibility('private')
            ->customBlocks([
                HeroBlock::class => [
                    'categoryUrl' => fn (): string => $this->category->getUrl(),
                ],
                CallToActionBlock::class,
            ])
            ->mergeTags([
                'name' => fn (): string => $this->user->name,
                'today' => now()->toFormattedDateString(),
            ])
            ->mergeTagLabels([
                'name' => 'Full name',
                'today' => 'Today\'s date',
            ])
            ->mentions([
                MentionProvider::make('@')
                    ->items([
                        1 => 'Jane Doe',
                        2 => 'John Smith',
                    ]),
            ])
            ->textColors([
                'brand' => TextColor::make('Brand', '#0ea5e9', darkColor: '#38bdf8'),
            ])
            ->customTextColors()
            ->plugins([
                HighlightRichContentPlugin::make(),
            ]);
    }
}
无论你何时使用 RichEditor 组件时,都会使用对应属性注册的配置:
use Filament\Forms\Components\RichEditor;

RichEditor::make('content')
为了轻松地从具有给定配置的模型中渲染丰富的内容 HTML,你可以调用模型上的 renderRichContent() 方法,并传递属性的名称:
{!! $record->renderRichContent('content') !!}
或者,你也可以获取 Htmlable 对象,以不转义 HTML 进行渲染。
{{ $record->getRichContentAttribute('content') }}
在表格中使用 文本列 或在信息列表中使用文本条目时,你无需手动渲染富文本内容。Filament 会自动为你完成此操作:
use Filament\Infolists\Components\TextEntry;
use Filament\Tables\Columns\TextColumn;

TextColumn::make('content')

TextEntry::make('content')
富文本编辑器扩展
你可以为富文本编辑器创建插件,它允许你将自定义 TipTap 扩展以及自定义工具栏按钮添加到编辑器和渲染器。创建一个实现 RichContentPlugin 接口的新类:
use Filament\Actions\Action;
use Filament\Forms\Components\ColorPicker;
use Filament\Forms\Components\RichEditor;
use Filament\Forms\Components\RichEditor\EditorCommand;
use Filament\Forms\Components\RichEditor\Plugins\Contracts\RichContentPlugin;
use Filament\Forms\Components\RichEditor\RichEditorTool;
use Filament\Support\Enums\Width;
use Filament\Support\Facades\FilamentAsset;
use Filament\Support\Icons\Heroicon;
use Tiptap\Core\Extension;
use Tiptap\Marks\Highlight;

class HighlightRichContentPlugin implements RichContentPlugin
{
    public static function make(): static
    {
        return app(static::class);
    }

    /**
     * @return array<Extension>
     */
    public function getTipTapPhpExtensions(): array
    {
        // This method should return an array of PHP TipTap extension objects.
        // See: https://github.com/ueberdosis/tiptap-php

        return [
            app(Highlight::class, [
                'options' => ['multicolor' => true],
            ]),
        ];
    }

    /**
     * @return array<string>
     */
    public function getTipTapJsExtensions(): array
    {
        // This method should return an array of URLs to JavaScript files containing
        // TipTap extensions that should be asynchronously loaded into the editor
        // when the plugin is used.

        return [
            FilamentAsset::getScriptSrc('rich-content-plugins/highlight'),
        ];
    }

    /**
     * @return array<RichEditorTool>
     */
    public function getEditorTools(): array
    {
        // This method should return an array of `RichEditorTool` objects, which can then be
        // used in the `toolbarButtons()` of the editor.

        // The `jsHandler()` method allows you to access the TipTap editor instance
        // through `$getEditor()`, and `chain()` any TipTap commands to it.
        // See: https://tiptap.dev/docs/editor/api/commands

        // The `action()` method allows you to run an action (registered in the `getEditorActions()`
        // method) when the toolbar button is clicked. This allows you to open a modal to
        // collect additional information from the user before running a command.

        return [
            RichEditorTool::make('highlight')
                ->jsHandler('$getEditor()?.chain().focus().toggleHighlight().run()')
                ->icon(Heroicon::CursorArrowRays),
            RichEditorTool::make('highlightWithCustomColor')
                ->action(arguments: '{ color: $getEditor().getAttributes(\'highlight\')?.[\'data-color\'] }')
                ->icon(Heroicon::CursorArrowRipple),
        ];
    }

    /**
     * @return array<Action>
     */
    public function getEditorActions(): array
    {
        // This method should return an array of `Action` objects, which can be used by the tools
        // registered in the `getEditorTools()` method. The name of the action should match
        // the name of the tool that uses it.

        // The `runCommands()` method allows you to run TipTap commands on the editor instance.
        // It accepts an array of `EditorCommand` objects that define the command to run,
        // as well as any arguments to pass to the command. You should also pass in the
        // `editorSelection` argument, which is the current selection in the editor
        // to apply the commands to.

        return [
            Action::make('highlightWithCustomColor')
                ->modalWidth(Width::Large)
                ->fillForm(fn (array $arguments): array => [
                    'color' => $arguments['color'] ?? null,
                ])
                ->schema([
                    ColorPicker::make('color'),
                ])
                ->action(function (array $arguments, array $data, RichEditor $component): void {
                    $component->runCommands(
                        [
                            EditorCommand::make(
                                'toggleHighlight',
                                arguments: [[
                                    'color' => $data['color'],
                                ]],
                            ),
                        ],
                        editorSelection: $arguments['editorSelection'],
                    );
                }),
        ];
    }
}
你可以使用 plugins() 方法为富文本编辑器和富文本内容渲染器注册插件:
use Filament\Forms\Components\RichEditor;
use Filament\Forms\Components\RichEditor\RichContentRenderer;

RichEditor::make('content')
    ->toolbarButtons([
        ['bold', 'highlight', 'highlightWithCustomColor'],
        ['h2', 'h3'],
        ['bulletList', 'orderedList'],
    ])
    ->plugins([
        HighlightRichContentPlugin::make(),
    ])

RichContentRenderer::make($record->content)
    ->plugins([
        HighlightRichContentPlugin::make(),
    ])
Enabling or disabling toolbar buttons from a plugin
By default, when a plugin provides tools via getEditorTools(), those tools are registered but not automatically shown in the toolbar. The user needs to manually add them using toolbarButtons() or enableToolbarButtons().
If you want your plugin to automatically enable or disable toolbar buttons, you can implement the HasToolbarButtons interface alongside RichContentPlugin. This is an optional, separate interface:
use Filament\Forms\Components\RichEditor\Plugins\Contracts\HasToolbarButtons;
use Filament\Forms\Components\RichEditor\Plugins\Contracts\RichContentPlugin;

class HighlightRichContentPlugin implements RichContentPlugin, HasToolbarButtons
{
    // ... other methods ...

    /**
     * @return array<string | array<string | array<string>>>
     */
    public function getEnabledToolbarButtons(): array
    {
        return ['highlight', 'highlightWithCustomColor'];
    }

    /**
     * @return array<string>
     */
    public function getDisabledToolbarButtons(): array
    {
        return [];
    }
}
The getEnabledToolbarButtons() method returns button names to add to the toolbar. The getDisabledToolbarButtons() method returns button names to remove from the toolbar.
Plugin toolbar modifications are applied before user-level modifications. This means the user can always override the plugin’s behavior using enableToolbarButtons() or disableToolbarButtons():
RichEditor::make('content')
    ->plugins([
        HighlightRichContentPlugin::make(),
    ])
    ->disableToolbarButtons(['highlightWithCustomColor'])
设置 TipTap JavaScript 扩展
Filament 能够异步加载 TipTap 的 JavaScript 扩展。为此,你需要创建一个包含扩展的 JavaScript 文件,并将其注册到插件的 getTipTapJsExtensions() 方法中。
例如,如果你想使用 TipTap 高亮显示扩展,请确保先安装:
npm install @tiptap/extension-highlight --save-dev
然后,新建一个 JavaScript 文件导入扩展。本例中,在 resources/js/filament/rich-content-plugin 目录中新建了一个名为 highlight.js 的文件,并添加了如下代码:
import Highlight from '@tiptap/extension-highlight'

export default Highlight.configure({
    multicolor: true,
})
你可以使用 esbuild 编译该文件。可以使用 npm 按照 Esbuild:
npm install esbuild --save-dev
你必须创建一个 esbuild 脚本来编译该文件。你可以将其放在任何位置,比如 bin/build.js:
import * as esbuild from 'esbuild'

async function compile(options) {
    const context = await esbuild.context(options)

    await context.rebuild()
    await context.dispose()
}

compile({
    define: {
        'process.env.NODE_ENV': `'production'`,
    },
    bundle: true,
    mainFields: ['module', 'main'],
    platform: 'neutral',
    sourcemap: false,
    sourcesContent: false,
    treeShaking: true,
    target: ['es2020'],
    minify: true,
    entryPoints: ['./resources/js/filament/rich-content-plugins/highlight.js'],
    outfile: './resources/js/dist/filament/rich-content-plugins/highlight.js',
})
如你所见,在脚本的底部,我们将一个一个名为 resources/js/filament/rich-content-plugins/highlight.js 的文件编译到 resources/js/dist/filament/rich-content-plugins/highlight.js。你可以根据需要修改这些路径。并且可以根据需要编译多个文件。
要运行脚本并将该文件编译到 resources/js/dist/filament/rich-content-plugins/highlight.js,请运行如下命令:
node bin/build.js
你应该在服务提供者(如 AppServiceProvider)的 boot() 方法中对其进行注册,并使用 loadedOnRequest(),这样在页面上加载富文本编辑器之前就不会下载它:
use Filament\Support\Assets\Js;
use Filament\Support\Facades\FilamentAsset;

FilamentAsset::register([
    Js::make('rich-content-plugins/highlight', __DIR__ . '/../../resources/js/dist/filament/rich-content-plugins/highlight.js')->loadedOnRequest(),
]);
要将这个新的 JavaScript 文件发布到应用的 /public 目录中,使之可以提供服务,你可以使用 filament:assets 命令:
php artisan filament:assets
在插件对象中,其 getTipTapJsExtensions() 方法应该返回刚刚创建的 JavaScript 文件的路径。既然,它以及在 FilamentAsset 中注册了,你可以使用 getScriptSrc() 方法获取该文件的 URL:
use Filament\Support\Facades\FilamentAsset;

/**
 * @return array<string>
 */
public function getTipTapJsExtensions(): array
{
    return [
        FilamentAsset::getScriptSrc('rich-content-plugins/highlight'),
    ];
}
Sharing the bundled TipTap/ProseMirror instance
When custom JavaScript extensions import from @tiptap/core or @tiptap/pm/*, each compiled extension includes its own copy of these packages. This wastes around 150-200 KB per extension and — more importantly — creates multiple ProseMirror instances on the page. Because ProseMirror relies heavily on instanceof checks (for Node, Mark, Plugin, DecorationSet, etc.), extensions that bundle their own copy of these modules can fail to interoperate with the editor’s core.
To avoid this, Filament exposes the bundled TipTap and ProseMirror modules on window.FilamentRichEditor.tiptap:
window.FilamentRichEditor.tiptap = {
    core,     // @tiptap/core
    pmState,  // @tiptap/pm/state
    pmView,   // @tiptap/pm/view
    pmModel,  // @tiptap/pm/model
}
You can reference these modules directly in your extension:
const { Node, mergeAttributes } = window.FilamentRichEditor.tiptap.core
const { Plugin, PluginKey } = window.FilamentRichEditor.tiptap.pmState

export default Node.create({
    name: 'myExtension',
    // ...
})
Alternatively, you can configure your build to intercept imports of @tiptap/core and @tiptap/pm/{state,view,model} and resolve them from the global at runtime. This lets you keep writing normal import statements in your extension source — other @tiptap/* packages (like @tiptap/extension-highlight) continue to be bundled as usual. The following esbuild plugin inspects each intercepted package’s real named exports at build time and rewrites the imports to read from window.FilamentRichEditor.tiptap:
npm install --save-dev @tiptap/core @tiptap/pm
// bin/build.js
import * as esbuild from 'esbuild'

const tiptapSharedPlugin = {
    name: 'tiptap-shared',
    setup(build) {
        const keys = {
            '@tiptap/core': 'core',
            '@tiptap/pm/state': 'pmState',
            '@tiptap/pm/view': 'pmView',
            '@tiptap/pm/model': 'pmModel',
        }

        build.onResolve({ filter: /^@tiptap\/(core|pm\/(state|view|model))$/ }, (args) => ({
            path: args.path,
            namespace: 'tiptap-shared',
        }))

        build.onLoad({ filter: /.*/, namespace: 'tiptap-shared' }, async (args) => {
            const realModule = await import(args.path)
            const namedExports = Object.keys(realModule).filter(
                (key) => key !== '__esModule' && key !== 'default',
            )

            const key = keys[args.path]
            let code = `const __module = window.FilamentRichEditor.tiptap.${key};\n`

            if (namedExports.length) {
                code += `export const { ${namedExports.join(', ')} } = __module;\n`
            }

            code += `export default __module?.default ?? __module;\n`

            return { contents: code, loader: 'js' }
        })
    },
}

esbuild.build({
    // ...
    plugins: [tiptapSharedPlugin],
    entryPoints: ['./resources/js/filament/rich-content-plugins/my-extension.js'],
    outfile: './resources/js/dist/filament/rich-content-plugins/my-extension.js',
})
NOTE
window.FilamentRichEditor.tiptap is assigned when the rich editor bundle loads, which happens before getTipTapJsExtensions() URLs are fetched. If you need to use the modules in a context where the rich editor has not yet loaded, bundle your own copies instead.
The esbuild plugin above reads the named exports from your locally-installed @tiptap/core and @tiptap/pm at build time, so keep those versions roughly in sync with the version bundled by Filament — otherwise a newer named export referenced in your extension may be undefined at runtime.
Still need help? Join our Discord community or open a GitHub discussion